123ignition distributor install

Stevehose

Well-Known Member
Site Donor $$
Messages
13,434
Reaction score
6,272
Location
Sarasota, FL
Received my 123ignition distributor today. I bought the tuneable version which allows you to program any mechanical and vacuum curve you want and adjust it on the fly (think dyno) from a laptop. I think it is worth the extra $26 for the tuneable version so you don't have to limit yourself to the preprogrammed curves, especially if you have made engine changes (webers etc.) and dealing with today's crappy fuel.

I bought it from 123ignitionusa.com on Saturday and took 2 days to get here-quick-which is good because I am impatient lol. The build quality appears very good and in my research online I'd say it gets 99% positive reviews. So on to the e9 install.

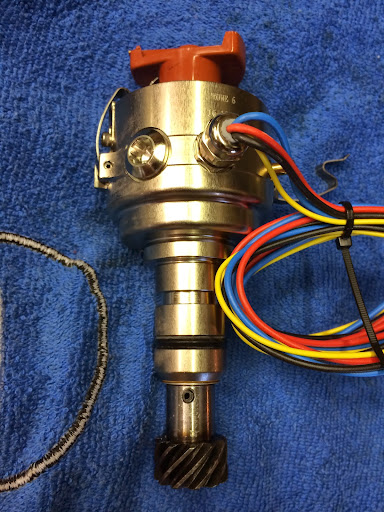
I put my engine at TDC and had the old dist. out already, here is what it the 123 looks like (comes with new rotor and cap):
IMG_0904.JPG


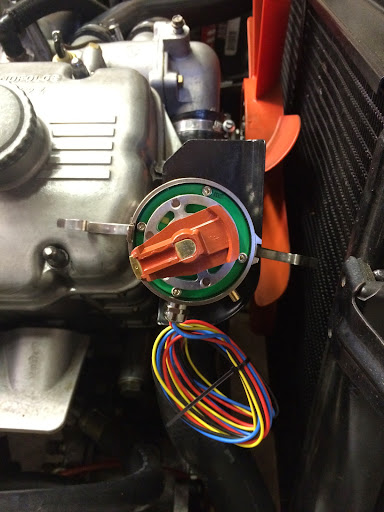
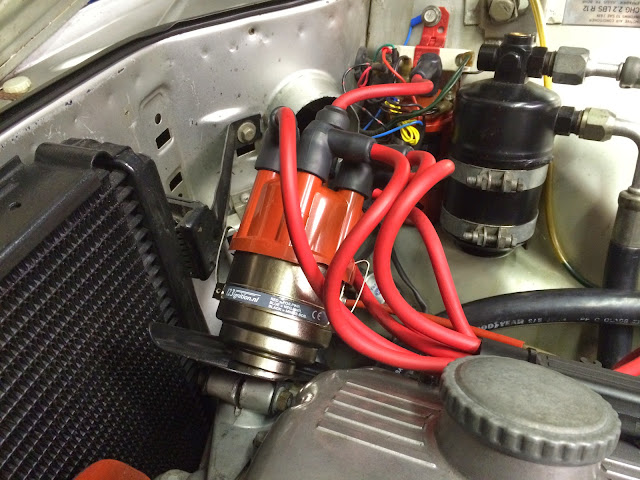
The round area to the left of the wires is the USB port. Here it is mounted with the rotor pointing in the area of #1 cylinder. I also replaced the shaft o-ring (which didn't look like it fit very well) with an oem one I had in the parts bin. Installed:
IMG_0906.JPG


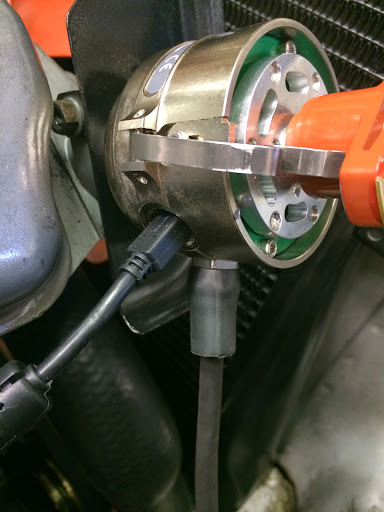
USB cable and I shrink-tubed the wires:
IMG_0907.JPG


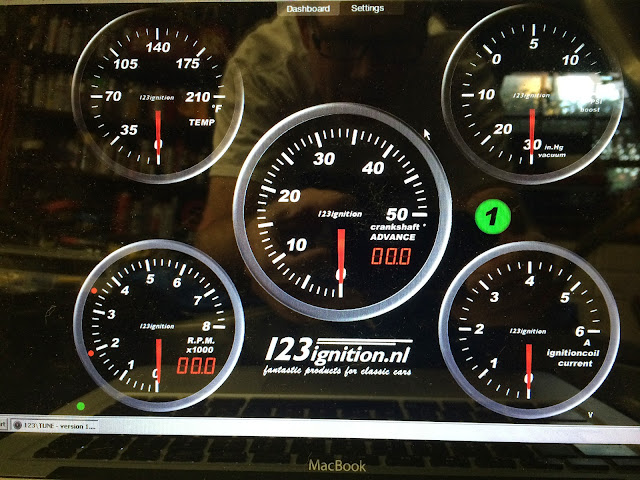
Computer interface dashboard. Temp, RPM, Advance, Vacuum/Boost, coil current (what does this tell me?):
IMG_0908.JPG


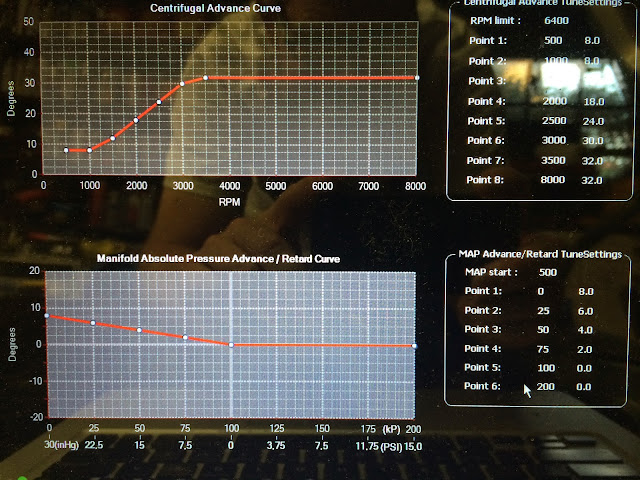
Curve graphs, these can be designed, saved, exported and tweaked. The rev limit can also be set here, I did 6400rpm:
IMG_0909.JPG


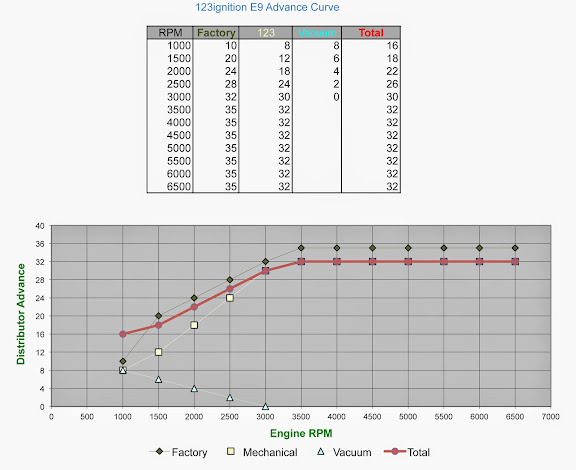
As a starter I based mine on having manifold vacuum increase advance at idle, drop off as throttle opens under acceleration, then mechanical is there to do its job, I have it all in at 3500 rpm at 32 degrees but I will likely lower this to 3000 rpm but need something to start with.

I made a spreadsheet to help set up curves, it has the Blue Book one, mechanical, vacuum, then plotted for total advance and comparison, then imported into the tune software:
Advance%2520Curve%2520Sheet1.jpg


Here's how it looks on the car. Me likey:
IMG_0915.JPG


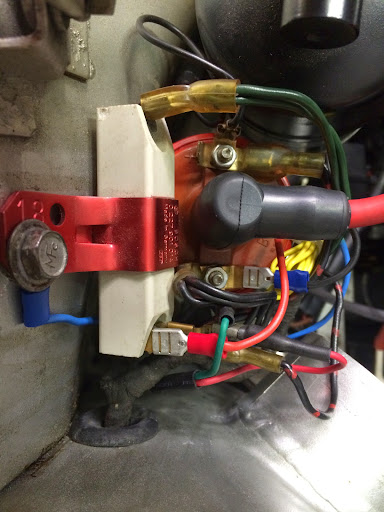
There are 4 wires to hook up, red to 12v at the coil (I did it before the ballast resistor, black to neg coil, blue to ground (ballast bolt), and yellow which can be connected to a switch to toggle between 2 stored curves (haven't fooled with this yet).
IMG_0913.JPG


There are some things to do to set it's starting point (all in the cryptic instructions) before hooking it all up and firing it up which I then did. Did not start. Checked and rechecked over everything and decided to give it a bunch of manual advance and then it started right up.

Right away I could tell it idled smoother. No doubt. I let it warm up, used a strobe to set the all in timing amount to match the software (I guess this correlates the two). Here is what it looks like running:
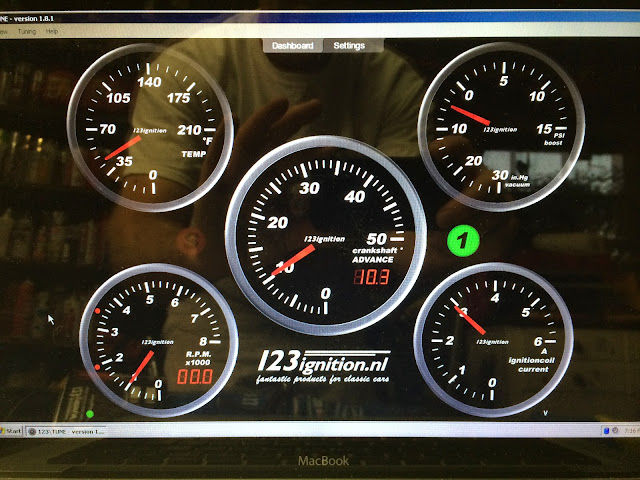
IMG_0911.JPG


I then checked mixtures on each barrel since the timing has changed and then played with the software a little, I need to redo some of the curves based on the amount of vacuum my Webers pull etc. but you can adjust advance and retard with the keyboard as well as change the curves. Very cool stuff. They claim that it has the ability to detect each cylinder's firing strength based on rotational variances and adjust accordingly for max power.

I have yet to take it on the road but already I can tell the engine is happier - I have never seen my engine idle as smoothly as this, with hardly any hood shake at the top (my benchmark). I still have a small random miss now and again but that is likely fuel or vacuum leak related.

Am looking forward to test driving it. More to follow as I tweak and settle on the right curves. And give the final opinion on if it's worth the $$$.
 
Last edited:
They claim that it has the ability to detect each cylinder's firing strength based on rotational variances and adjust accordingly for max power.

This is quite common on modern EFI systems, although it usually runs off a timing wheel attached to the crank with at least 60 teeth, so there is enough data per cylinder firing event.

Conti/Siemens/Bosch calls this adjustment "Engine Roughness Adaptation", as it is supposed to compensate for "fixed" power differences between cylinders. (combustion chamber variation, slightly off leakdown, poor intake manifold design, etc) Usually it is controlled with a combination of fuel and ignition changes, but in your case fuel control would be tricky, to say the least. I'm glad it is working so well for you. The program looks pretty slick.
 
That looks great, good job and thanks for posting :razz:
 
Is there a particular reason why you use a vacuum advance curve based on rpm? I would think vacuum advance would be based on vacuum.
 
Thrilled that you are being a "forerunner" on this product as I have been reading and thinking about it also. I'll be curious to hear you comments and opinions once its fully tuned and you've driven it a bit.
 
I second Tod. I have a 123 dizzy on my E9 but did not take the step of buying the "tune" version. I sure appreciate your doing this!

I'm going to put Webers on Sahara and have been thinking about getting a "tune" version for her.

One thing I don't understand is why you leave the ballast resistor hooked up. Is your ignition system 6V or 12V Steve? Most of the benefit IMO of running an EI Dizzy is that you move up to a 12V system and can throw a bigger spark/gap - thus better fuel burn.

Cheers
James
 
Only as a starting point to come up with a curve. I didn't know how much or if enough vacuum a single barrel will pull so I estimated based on how I thought it would go vs. rpm (High with throttle closed and dropping as throttle opened) to get started.


Is there a particular reason why you use a vacuum advance curve based on rpm? I would think vacuum advance would be based on vacuum.
 
Last edited:
Curiosity finally got the better of me (plus I wanted the right curves for the triple webers) so hopefully this can benefit others on the fence.

I kept the ballast resistor for now because I don't want to risk overheating the Bosch red coil. I believe this caused my previous backfire/muffler blow out so I am concerned about that until I can research further. So the distributor gets full 12v but the coil still is protected (at least that's how I see it-I could be wrong here). I had the Pertronix hooked to the output side of the ballast because that's what they recommended.

I am new to this so I appreciate any and all questions or advice.


I second Tod. I have a 123 dizzy on my E9 but did not take the step of buying the "tune" version. I sure appreciate your doing this!

I'm going to put Webers on Sahara and have been thinking about getting a "tune" version for her.

One thing I don't understand is why you leave the ballast resistor hooked up. Is your ignition system 6V or 12V Steve? Most of the benefit IMO of running an EI Dizzy is that you move up to a 12V system and can throw a bigger spark/gap - thus better fuel burn.

Cheers
James
 
Last edited:
This is great Steve.
You have done a bunch of leg work for me so when I install mine in a couple weeks I can be assured of success. Yea!

This will make my PB cam and 10.5:1 pistons really scream.

Gary
 
Only as a starting point to come up with a curve. I didn't know how much or if enough vacuum a single barrel will pull so I estimated based on how I thought it would go vs. rpm (High with throttle closed and dropping as throttle opened) to get started. Turned out I was wrong, my manifold vacuum curve looks like this:

Vacuum@RPM
-8@1000
-8.5@1500
-10@2000
-10@2500
-10@3000
-8@4000
-5@5000

Hardly linear like I expected. I am going to try tapping into the power brake vacuum which comes off the intake manifold and not so close to the butterflies and see if that makes a difference. Another option is to tee all the vac ports together to smooth out the pulse (which may be throwing the distributor off) but that may cause mixture issues with single intake per barrel.

If not I may just go straight mech advance but I was hoping to utilize vacuum for highway economy.

Is there a smoothing function in the software?

What was the load on the engine when you took your vacuum readings? My B35 with twin Webers has about 19" at idle and 14" running down the road at 70 mph.
 
If the Bosch coil is 6V I recommend switching to the 12V MSD Blaster 2 coil (buy at any parts store). It throws multiple sparks as it discharges - hence the name. You can run it with a much larger spark plug gap.

cheers
James
 
The MSD part comes from the MSD controller, not the coil. The coil only fires when the box puts current through it.
 
It's a 12v german made bosch red coil.

Here is a post from a benz forum on ballast:

"The Blue coils have about 4 ohms of internal resistance and they do not need an external resistor. The red coil has about 2 ohms of internal resistance and it utilizes a 1.8 ohm external ballast resistor (total of about 4 ohms).

Ballast resistors reduce the current flow through the coil and thus reduce the heat generated within the coil. So running the coil without the correct resistance, with or without a transistorizes ignition, will affect the longevity of the coil."

So at 12v this would explain the 3 amps i am seeing from the coil.

Am not yet considering any msd stuff


If the Bosch coil is 6V I recommend switching to the 12V MSD Blaster 2 coil (buy at any parts store). It throws multiple sparks as it discharges - hence the name. You can run it with a much larger spark plug gap.

cheers
James
 
I haven't driven it yet so hope to this weekend. Readings were taken from the software in neutral.

There is some smoothing in the software but they say you may need to reduce pulses if it acts unusual. I bought an anti-pulse valve used on old Alfas from the uk but it isn't here yet. I may make a homemade version while i wait.

In the meantime i will hook all 6 barrels up to see if that makes a difference.


Is there a smoothing function in the software?


What was the load on the engine when you took your vacuum readings? My B35 with twin Webers has about 19" at idle and 14" running down the road at 70 mph.
 
Last edited:
Initial impressions

I love it. Before fiddling with advance curves at all I uploaded the basic one noted previously and took it for a drive. It ran great right away and after a while I realized I was now subconsciously shifting at a higher rpm, the engine is notably smoother and the howl from the Webers has a wonderful note.

I took some vacuum readings with my mechanical gauges to see how that behaves at speed and load from the three Webers. Vacuum from a single barrel seemed to be less accurate than hooking all 6 to a tube (smoother signal too) so I used that. Under this scenario though I think my engine runs a little richer because joining the barrels together effectively causes a leak (each barrel wants to suck mixture in from it's neighbors) so when my Alfa pulse eliminator arrives I will experiment again with a single barrel.

Since DCOE's typically don't have vacuum ports you'll just be running with the mechanical graph and leaving the vacuum graph at zero. This will work fine because you can set idle advance higher and then set the advance rate anyway you want up to the max very easilly. Essentially you can do in a minute what would take a distributor re-curve shop a couple hours to do with limited accuracy. This is the best feature of this distributor - dialing in an exact curve with no mechanical errors to worry about. You can watch how it behaves in real time with the dash display. One note about that-the optional USB cable from 123 is not long enough to reach from the distributor to the front seat so you'll need an extension cable. I have to give a shout out to Ed Madak from 123ignitiionUSA who has patiently answered several of my noob emails to help get me to this point.

The only advantage to me messing with the vacuum features of my model carbs is to try and get a little fuel economy at cruise on the highway. Here is the curves chart I settled on for now after today:

4-27-14-Curve.jpg


For the mechanical curve I set it to 15 at idle and max all in 34 at 3k rpm. The vacuum advance curve adds 6 degrees advance at idle and drops off as the load on the engine increases. The manifold vacuum drops to 0-2 Hg's under WOT/heavy acceleration so I want all vacuum advance gone during this. So since it adds another 6 degrees my total idle advance is 21. The engine loves this much idle advance and the acceleration from it is lively. Is this too much idle advance?

Here is my main question if the day, at light cruise load (65 mph), the timing is all in at 34 and the vacuum advance adds another 5 or so to max at 39. If I accelerate quickly I can see the manifold vacuum drop out and the advance goes back to 34. Pretty cool.

Is 39 too much advance for light load cruising? Other sources say engines can take much higher than this for light loads (like mid 40's and up) and it really helps fuel economy but I can't find anything specific to the M30. What is the max advance allowed under this scenario?

Under load the advance does not go above 34 and I have no pinging at all. It feels like the engine could go with more but I don't want to risk anything.

Any ideas on max advance at cruise loads?

Once I feel comfortable with this it's off to the dyno to dial it in for real.
 
Last edited:
Since ignition advance is compression dependent....
The m30 model big six varies from the 7:1 early 745i all the way to the 10:1 euro spec dirty engine.
One map doesn't fit all...
If you would like a safe starter ignition timing map for a 9:1 engine let me know.
Keep in mind 91+ octane!
 
This reminds me, you sent me this a while ago, how do I interpret the left column "ignionad %" ?

igition-map-mega-b35.jpg


Since ignition advance is compression dependent....
The m30 model big six varies from the 7:1 early 745i all the way to the 10:1 euro spec dirty engine.
One map doesn't fit all...
If you would like a safe starter ignition timing map for a 9:1 engine let me know.
Keep in mind 91+ octane!
 
Back
Top