NiekN
Member
Welcome all!
After being nudged by a few members to post my restoration on here as well, I have decided to start this thread. I already run the whole project on my website and various social media channels but figured I missed out a large group of E9 enthusiasts by not including this Forum. So hopefully this thread will change that. Any and all feedback, questions and general comments are more than welcome and appreciated.
Slight warning: This first post will be a rather lengthy one as I will be introducing the car and covering the work/episodes published so far.
A small note for the purists; This car will be leaning towards a restomod project as she is being converted into a rally car with a few modern upgrades/modifications (such as new electrics, roll cage, bucket seats, & gearbox) although the bulk of the car will remain original in order to qualify for the events I’ll be taking part in (bodywork, subframes, suspension, engine, rear seats, etc).

For those interested in my website and social media channels where more information, update details, photos and previous work can be found:
Website – www.nieknijsen.com | Instagram – E9Brunhilda | YouTube – BrunhildaE9 | FaceBook– E9Brunhilda
Car history & Name
I am sure everyone here is familiar with BMW’s E9 history and I have therefor omitted from rewriting it here. However, there is far more information on my website, both about the E9s in general and my car in specific for those interested. Below is a brief introduction on how I acquired the car and part of her history.
Brünhilda was born on 24 July 1974 in Munich, Germany as a 3.0CSa (automatic) bearing the colour “Atlantik” blue with VIN number 4320293. She was exported the following week to the Belgian BMW importer Moorkens in Antwerp. Unfortunately, the years that followed, including who her first owner was, remain a mystery for now. I am trying hard to find out more information and any help is more than appreciated. What I do know is that she remained in Belgium and ended up in a Chateau somewhere in the Ardennes, where her owner kept her amidst his collection of Italian super cars. This particular owner gave her a bodywork restoration in what seems to have been the early 2000’s, before giving the car to his kids for them to learn how to drive in. From here the story goes that the aforementioned owner also had an Austin Healey in which he participated in the Tulip Rally, the same rally my dad participated in with a friend of his. And since my dad's friend happened to drive the same car, they were invited to the man’s home residence. As part of the tour, they ended up in the basement where they were shown the car collection. It was quickly pointed out that the BMW did not “fit in” amongst the classic Italian Ferrari’s, Maserati’s and Lamborghini’s. At this point a reasonable share of alcohol may have been involved, but the owner agreed and made my dad an offer to buy the car from him. Perhaps not the typical “barn-find” story, but that is how we ended up with a Coupé in our family.
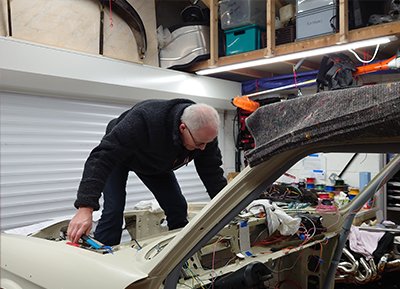
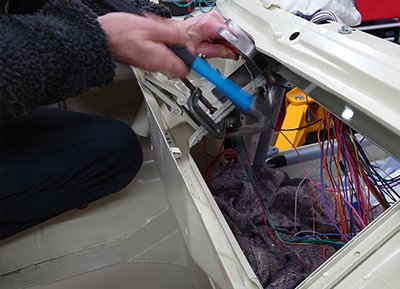
At first the car was stored next to the Austin Healey, where my brother and I learned to drive it as we went up and down the 400-meter driveway. In 2007 the decision was made to get the car road certified, and we drove it to the local testing station, but she never made it there. Somewhere along the way the oil lubrication system inside the engine had clogged up and as a result one of the pistons seized, resulting in a catastrophic engine failure. Without much choice, work began on restoring the engine, while also taking care of the front end of the car now that we had easy access. Practically every part was restored or replaced, including the support frame, shock absorbers and suspension, radiator, brakes, a new coat of rust protection and finally fresh paint for the engine bay. Sadly, the progress came to a halt when I moved to the USA in 2011 and the car ended up in long-term storage.
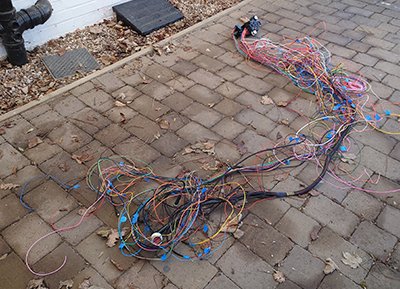
Skip ahead a few years to 2018 when she was pulled from under her layer of dust and shipped to the UK where I now lived, with a new attempt at getting her road worthy again. While being kept in a family member’s garage, the electrical work was completed and after 12 years of silence, she was roaring loudly again as we got the engine running over Christmas that same year. However, progress once again was put on halt as I moved to a new house and began preparing my own garage for her arrival.
It is now early 2020 and after many years, Brünhilda is finally home.
I am sure some of you might be wondering why the name Brünhilda? In my eyes a (classic) car should always be addressed as a ‘she’ and with that comes a female name. Choosing a name comes with a few rules in my regard; It has to match the car’s country of origin (Germany), start with the same letter as the colour (Blau/blue), and match the character of the car. With that in mind, is there any better name than that of the German Valkyrie “Brünhilda”?
With the car finally at my new home, I was ready to start the momentous job of performing a full restoration of a car in my residential garage. I think part of what makes the project special and different to others is that the bulk of the work will be done by myself (with the occasional help of an extra pair of hands) and with a limited amount of time, space, knowledge and tools. Granted, some work will be outsourced simply because I do not have the space, tools or skill for it.
I knew that from the start I wanted to record and share the entire project, at first just for me and later generations within the family, but soon enough also for all the fellow E9 owners, enthusiasts and general car lovers. With that, the name “Project C.A.R.” was born and I started recording episodes which are being published every 2 weeks on my YouTube channel. Since we are a bit behind here, I have posted the very first and last two episodes below with a brief introduction on what to expect. The last episode is a "special", which covers 2020 in this case and explains all I have done so far (basically the full process of stripping the car). All other episodes can be found on my YouTube channel and website.
Future updates will be posted in this thread as they become available.
The first episode in the series, listed as episode 0, is a brief introduction to the project and what to expect (I know, it's a bit cheesy and "scripted", but it was my first time recording after all - I promise I got better as time went on).
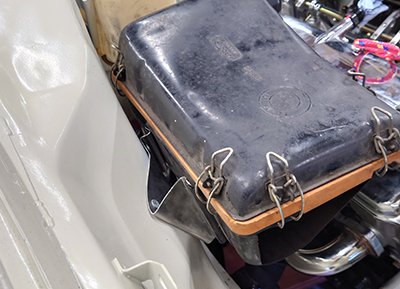
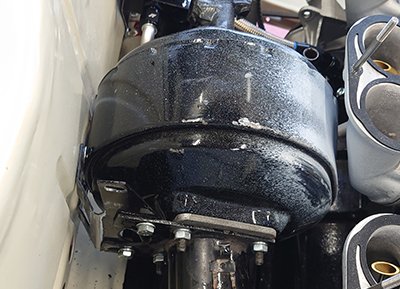
Episode 20 is one of my the bi-weekly updates as the car was gone at the time of recording, so we cover the cleaning of some very dirty parts.
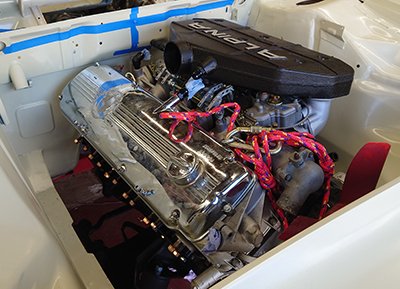
Episode 21 is a regular episode again, covering the conversion to triple Weber carburettors.
The episode below is one of my specials, either because they cover something that did not fit in the regular series, or simply because I ran out of time to get enough material for an episode and needed something to fill the bi-weekly update.
Special 02 is a Christmas special where we look back at the year 2020 and everything I have done so far.
After being nudged by a few members to post my restoration on here as well, I have decided to start this thread. I already run the whole project on my website and various social media channels but figured I missed out a large group of E9 enthusiasts by not including this Forum. So hopefully this thread will change that. Any and all feedback, questions and general comments are more than welcome and appreciated.
Slight warning: This first post will be a rather lengthy one as I will be introducing the car and covering the work/episodes published so far.
A small note for the purists; This car will be leaning towards a restomod project as she is being converted into a rally car with a few modern upgrades/modifications (such as new electrics, roll cage, bucket seats, & gearbox) although the bulk of the car will remain original in order to qualify for the events I’ll be taking part in (bodywork, subframes, suspension, engine, rear seats, etc).
For those interested in my website and social media channels where more information, update details, photos and previous work can be found:
Website – www.nieknijsen.com | Instagram – E9Brunhilda | YouTube – BrunhildaE9 | FaceBook– E9Brunhilda
Car history & Name
I am sure everyone here is familiar with BMW’s E9 history and I have therefor omitted from rewriting it here. However, there is far more information on my website, both about the E9s in general and my car in specific for those interested. Below is a brief introduction on how I acquired the car and part of her history.
Brünhilda was born on 24 July 1974 in Munich, Germany as a 3.0CSa (automatic) bearing the colour “Atlantik” blue with VIN number 4320293. She was exported the following week to the Belgian BMW importer Moorkens in Antwerp. Unfortunately, the years that followed, including who her first owner was, remain a mystery for now. I am trying hard to find out more information and any help is more than appreciated. What I do know is that she remained in Belgium and ended up in a Chateau somewhere in the Ardennes, where her owner kept her amidst his collection of Italian super cars. This particular owner gave her a bodywork restoration in what seems to have been the early 2000’s, before giving the car to his kids for them to learn how to drive in. From here the story goes that the aforementioned owner also had an Austin Healey in which he participated in the Tulip Rally, the same rally my dad participated in with a friend of his. And since my dad's friend happened to drive the same car, they were invited to the man’s home residence. As part of the tour, they ended up in the basement where they were shown the car collection. It was quickly pointed out that the BMW did not “fit in” amongst the classic Italian Ferrari’s, Maserati’s and Lamborghini’s. At this point a reasonable share of alcohol may have been involved, but the owner agreed and made my dad an offer to buy the car from him. Perhaps not the typical “barn-find” story, but that is how we ended up with a Coupé in our family.
At first the car was stored next to the Austin Healey, where my brother and I learned to drive it as we went up and down the 400-meter driveway. In 2007 the decision was made to get the car road certified, and we drove it to the local testing station, but she never made it there. Somewhere along the way the oil lubrication system inside the engine had clogged up and as a result one of the pistons seized, resulting in a catastrophic engine failure. Without much choice, work began on restoring the engine, while also taking care of the front end of the car now that we had easy access. Practically every part was restored or replaced, including the support frame, shock absorbers and suspension, radiator, brakes, a new coat of rust protection and finally fresh paint for the engine bay. Sadly, the progress came to a halt when I moved to the USA in 2011 and the car ended up in long-term storage.
Skip ahead a few years to 2018 when she was pulled from under her layer of dust and shipped to the UK where I now lived, with a new attempt at getting her road worthy again. While being kept in a family member’s garage, the electrical work was completed and after 12 years of silence, she was roaring loudly again as we got the engine running over Christmas that same year. However, progress once again was put on halt as I moved to a new house and began preparing my own garage for her arrival.
It is now early 2020 and after many years, Brünhilda is finally home.
I am sure some of you might be wondering why the name Brünhilda? In my eyes a (classic) car should always be addressed as a ‘she’ and with that comes a female name. Choosing a name comes with a few rules in my regard; It has to match the car’s country of origin (Germany), start with the same letter as the colour (Blau/blue), and match the character of the car. With that in mind, is there any better name than that of the German Valkyrie “Brünhilda”?
With the car finally at my new home, I was ready to start the momentous job of performing a full restoration of a car in my residential garage. I think part of what makes the project special and different to others is that the bulk of the work will be done by myself (with the occasional help of an extra pair of hands) and with a limited amount of time, space, knowledge and tools. Granted, some work will be outsourced simply because I do not have the space, tools or skill for it.
I knew that from the start I wanted to record and share the entire project, at first just for me and later generations within the family, but soon enough also for all the fellow E9 owners, enthusiasts and general car lovers. With that, the name “Project C.A.R.” was born and I started recording episodes which are being published every 2 weeks on my YouTube channel. Since we are a bit behind here, I have posted the very first and last two episodes below with a brief introduction on what to expect. The last episode is a "special", which covers 2020 in this case and explains all I have done so far (basically the full process of stripping the car). All other episodes can be found on my YouTube channel and website.
Future updates will be posted in this thread as they become available.
The first episode in the series, listed as episode 0, is a brief introduction to the project and what to expect (I know, it's a bit cheesy and "scripted", but it was my first time recording after all - I promise I got better as time went on).
Episode 20 is one of my the bi-weekly updates as the car was gone at the time of recording, so we cover the cleaning of some very dirty parts.
Episode 21 is a regular episode again, covering the conversion to triple Weber carburettors.
The episode below is one of my specials, either because they cover something that did not fit in the regular series, or simply because I ran out of time to get enough material for an episode and needed something to fill the bi-weekly update.
Special 02 is a Christmas special where we look back at the year 2020 and everything I have done so far.
")