Bmw e9 Fjord Blue Australia

Simon_D

Well-Known Member
Messages
81
Reaction score
76
Location
South Australia
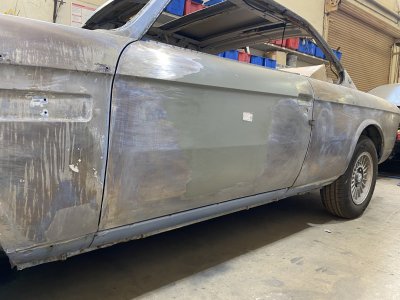
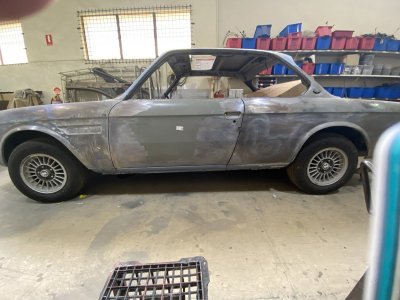
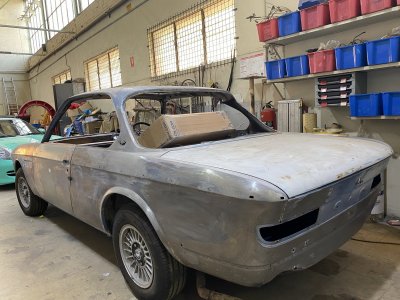
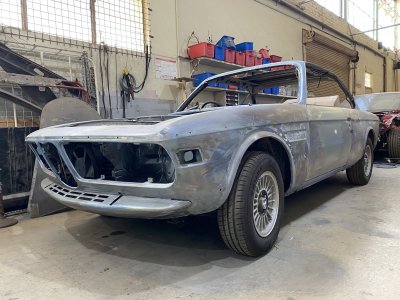
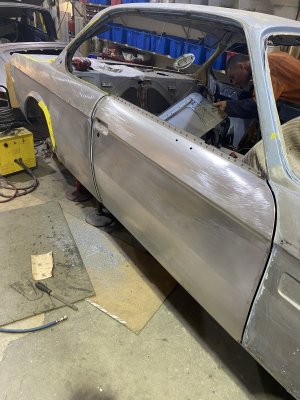
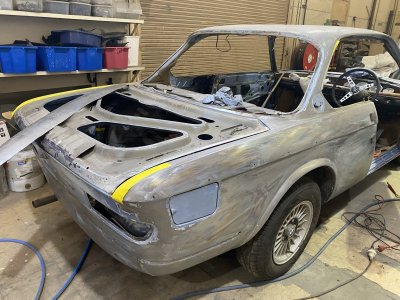
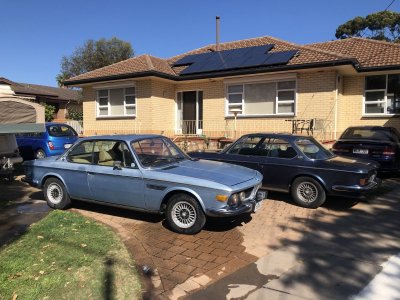
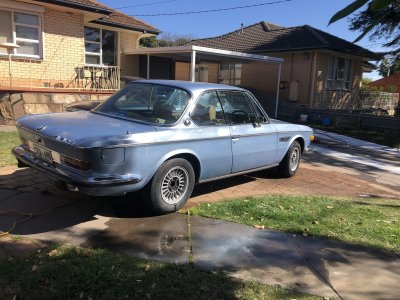
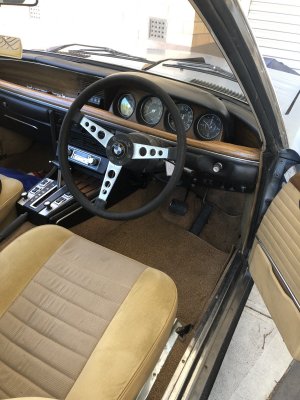
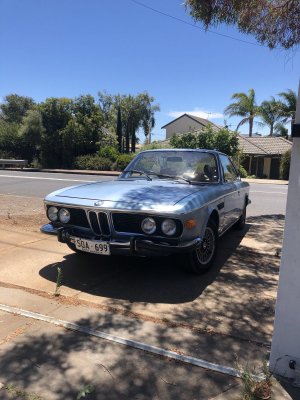
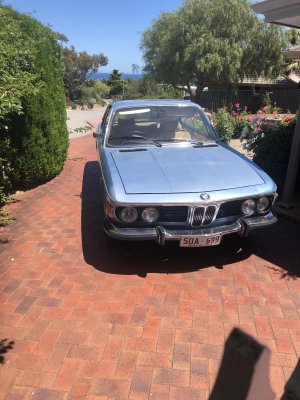
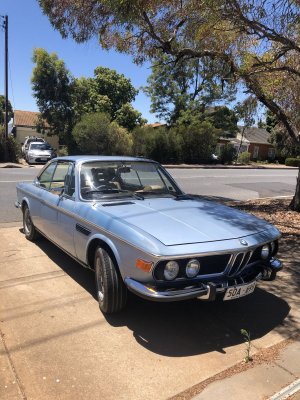
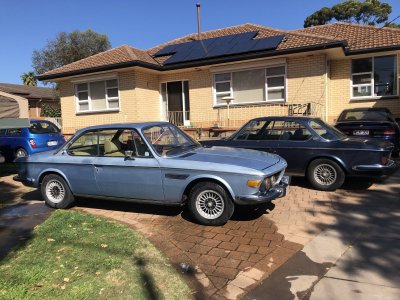
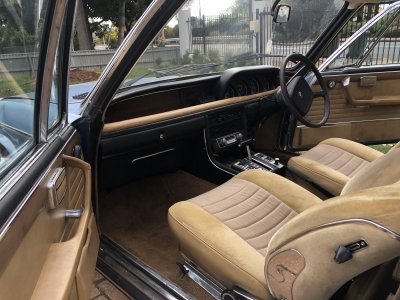
Thought I would start documenting the restoration here. I purchased my e9 in August 2020.

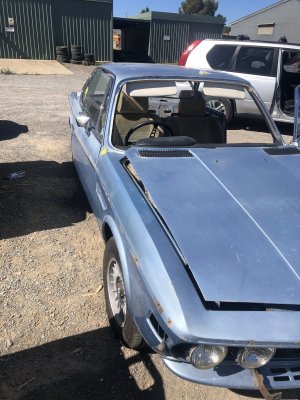
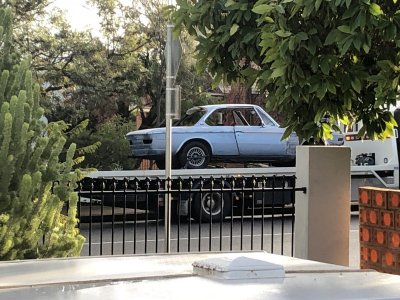
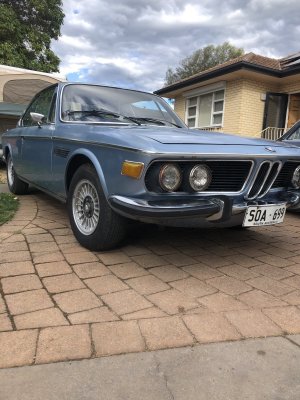
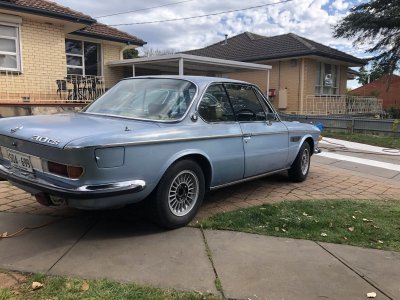
The BMW 3.0 CS Automatic rhd VIN 4330196 was manufactured on May 02nd, 1974 and delivered on June 10th, 1974 to Australia. The original colour was Fjord metallic, paint code 037.

The previous owner had owned the car for over 25 years and had kept the car registered the entire time as an occasional driver.

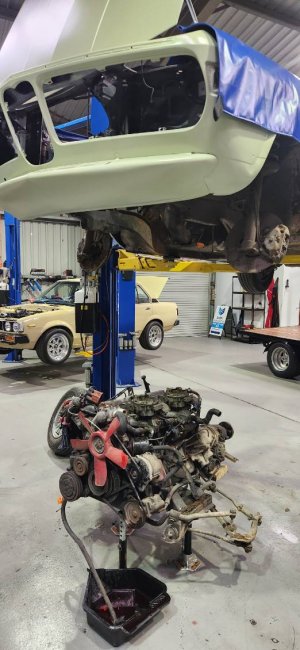
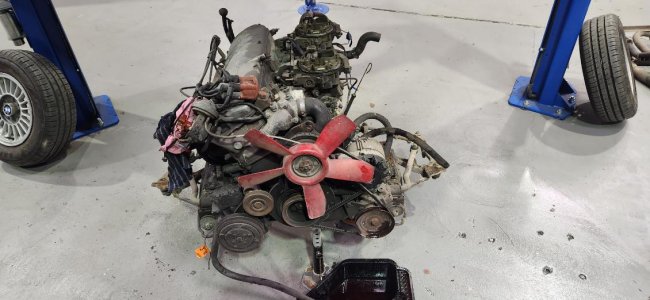
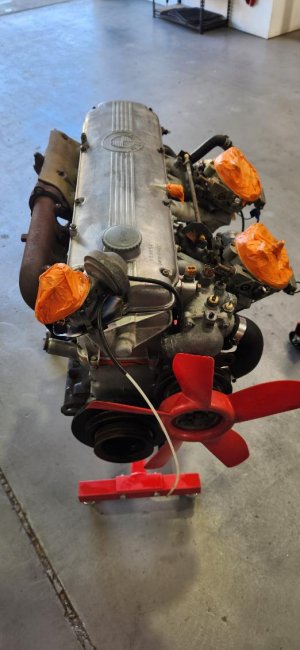
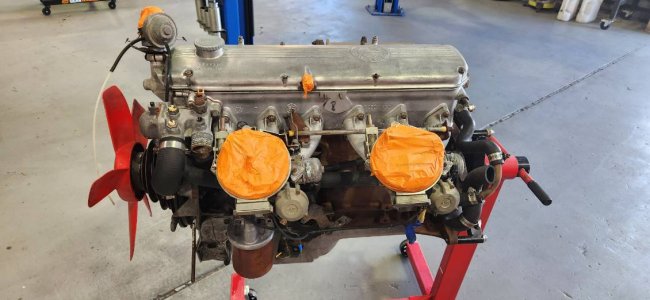
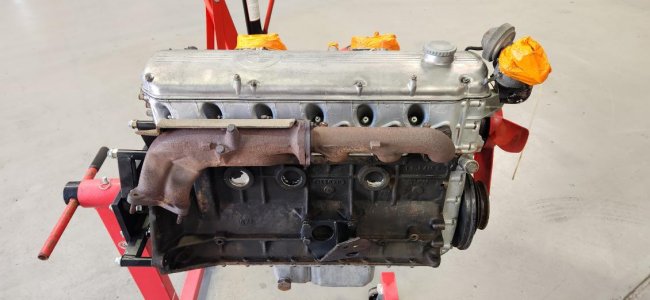
The car was in fantastic condition mechanically, however there was an engine swap a number of years ago. The owner kept the original engine and supplied that to me as well.

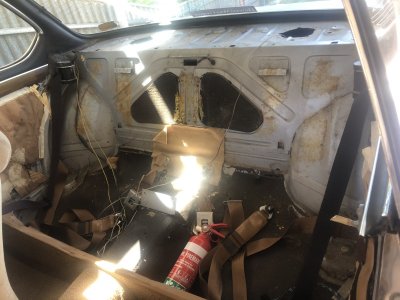
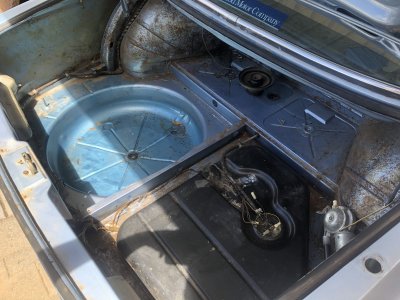
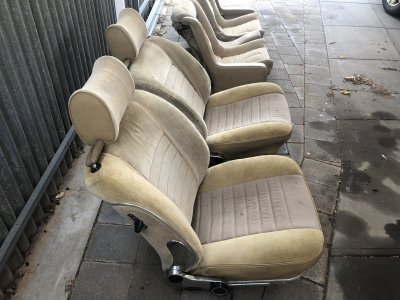
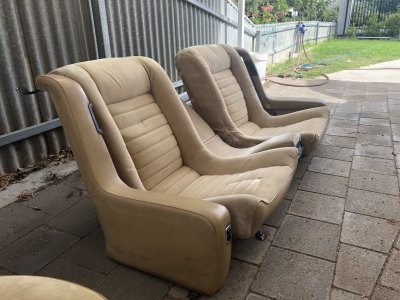
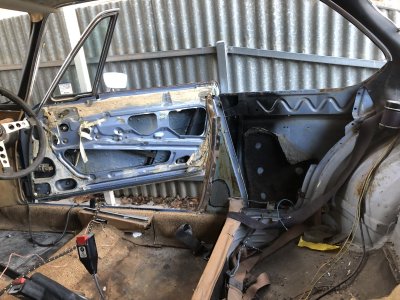
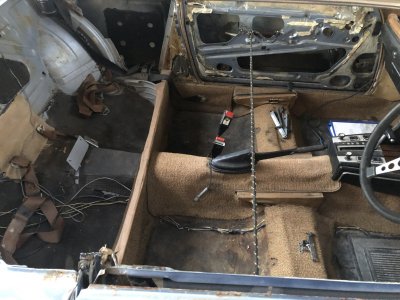
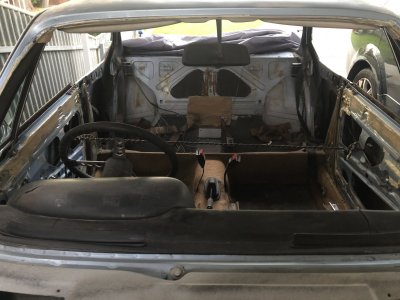
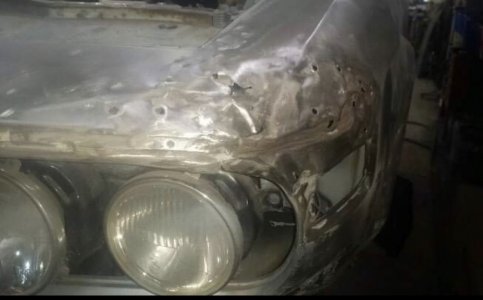
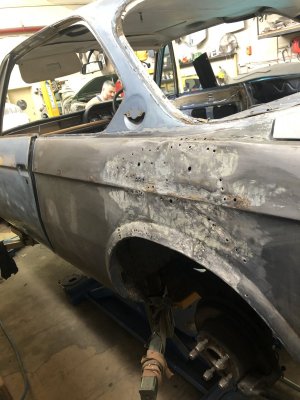
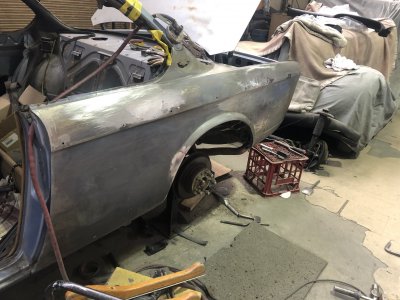
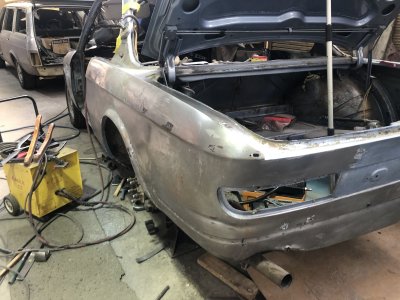
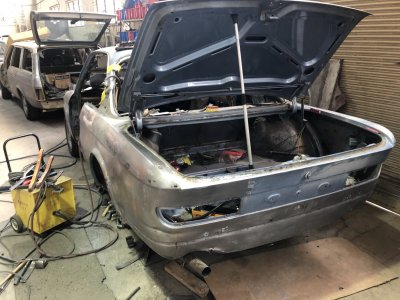
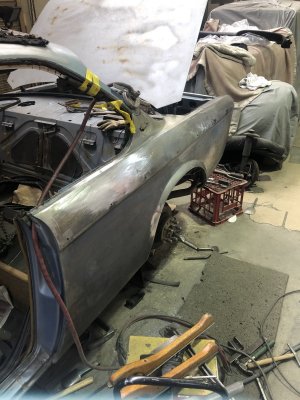
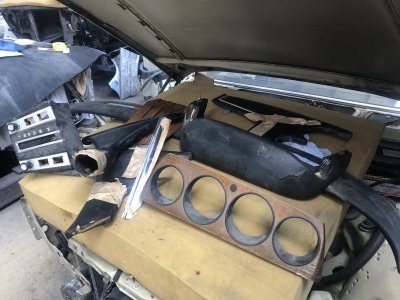
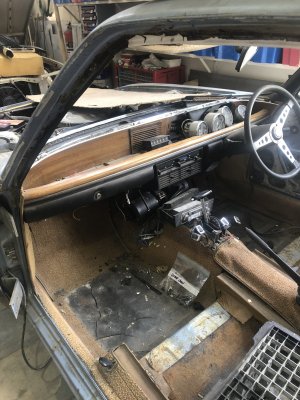
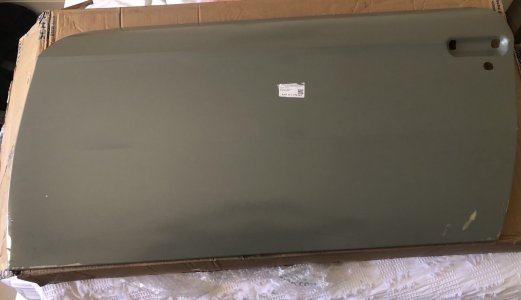
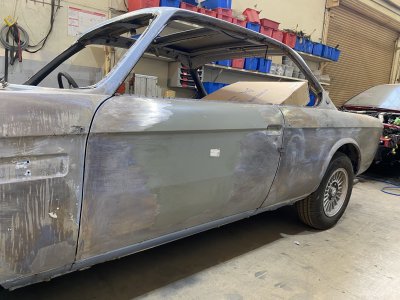
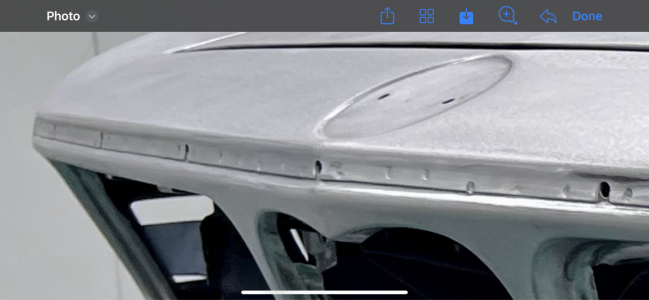
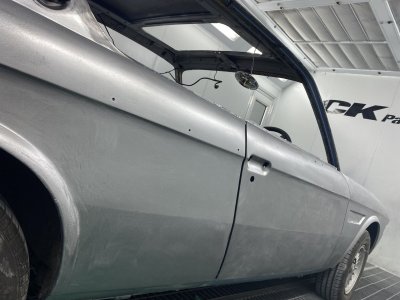
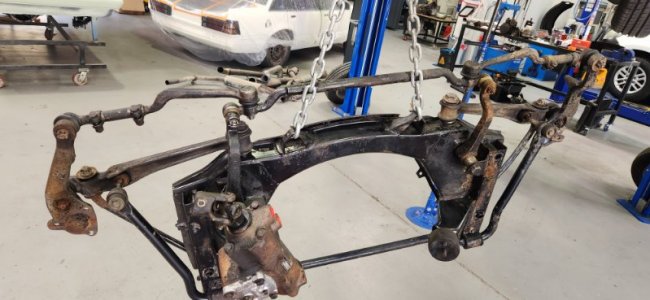
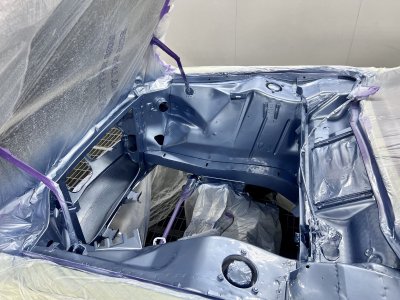
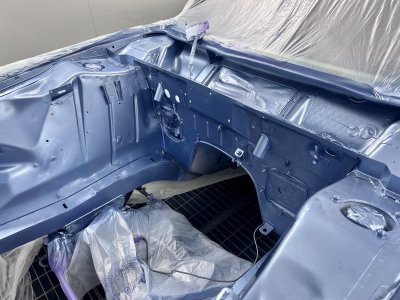
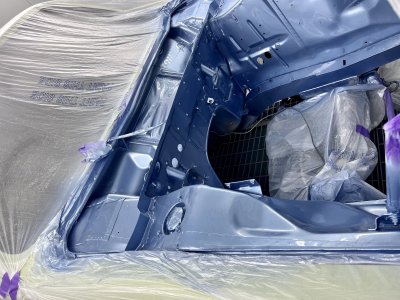
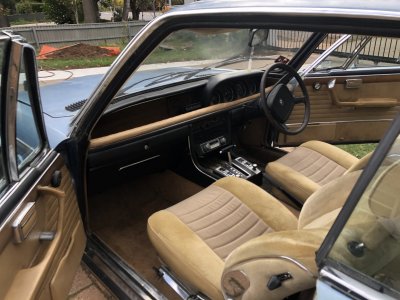
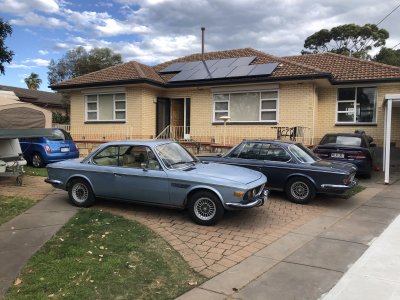
The car was a survivor. Unrestored and physically tired and she had also suffered accident damage to one side. Rust wise coming from dry Adelaide and being kept undercover was relatively not bad.

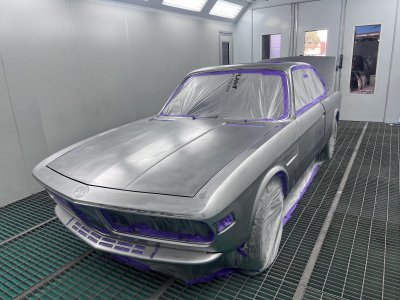
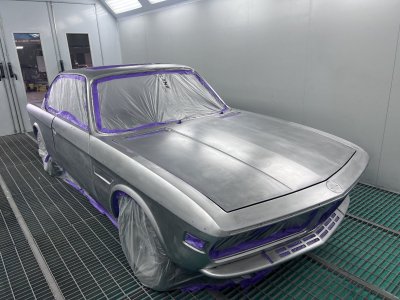
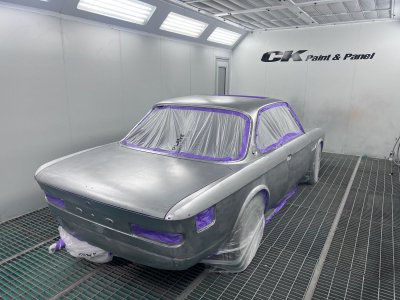
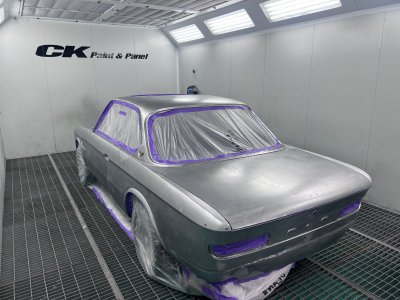
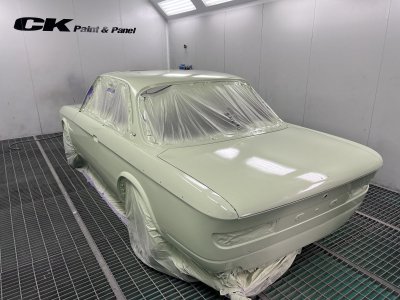
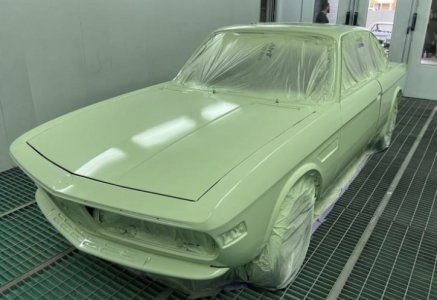
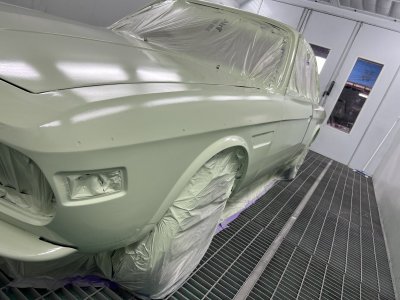
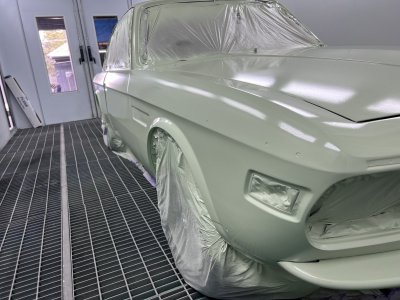
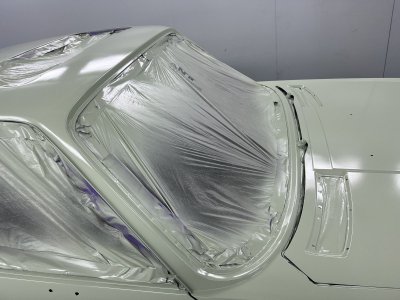
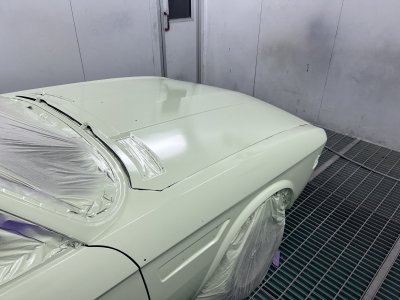
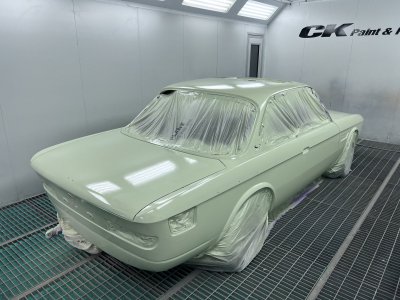
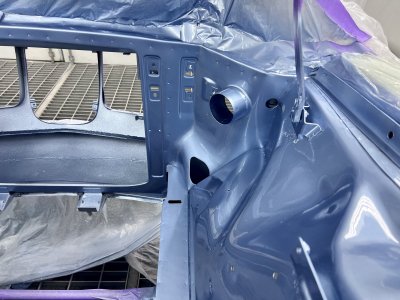
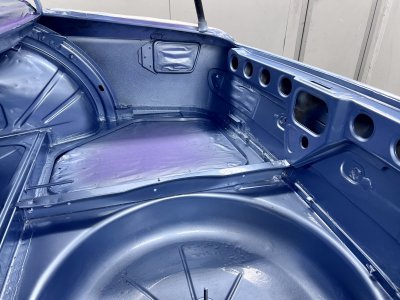
The great hope is to restore her to her former glory and give her another 50 years of life.

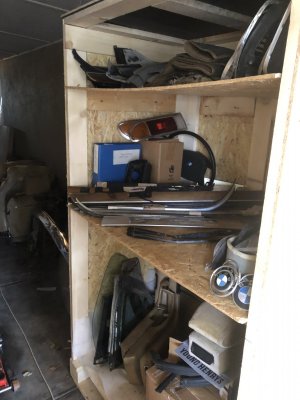
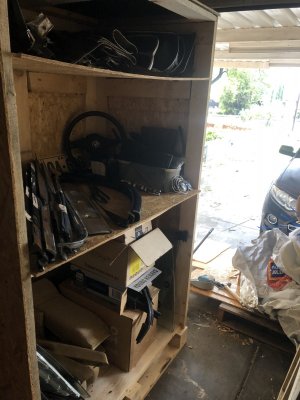
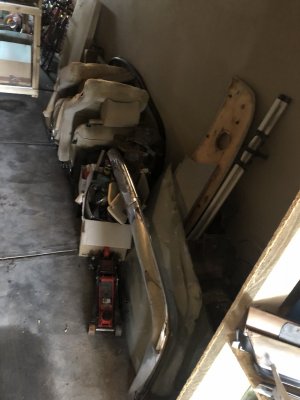
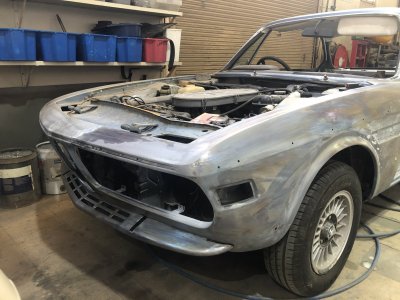
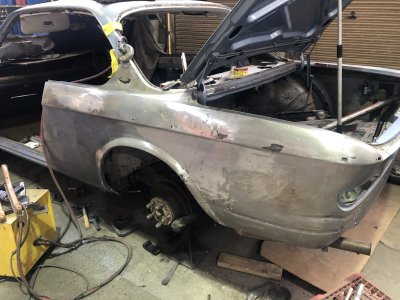
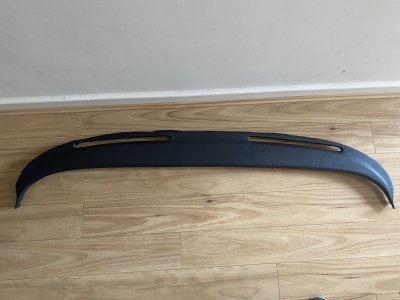
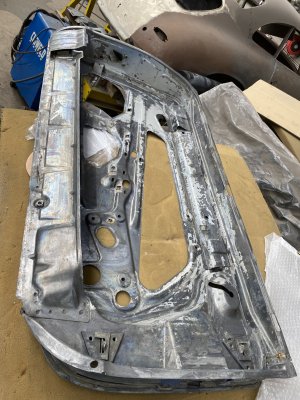
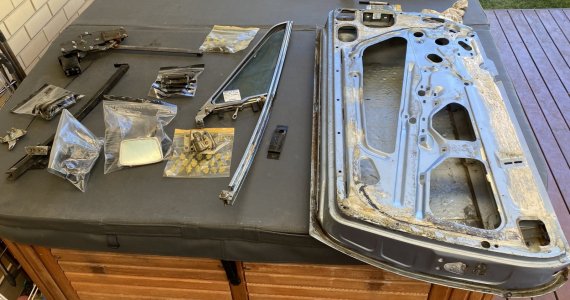
Here are some before photos. My next post will include stripping down and body prep.
 

Attachments

  • B292B422-3E8F-41CD-BD7A-9FDD9EEB9F11.jpeg
    B292B422-3E8F-41CD-BD7A-9FDD9EEB9F11.jpeg
    436 KB · Views: 370
  • FD75D95D-0334-4FD1-B4A0-D5E7C9ADA0BC.jpeg
    FD75D95D-0334-4FD1-B4A0-D5E7C9ADA0BC.jpeg
    449.9 KB · Views: 385
  • AB609506-9A8F-4D4F-8587-2B34D52A6526.jpeg
    AB609506-9A8F-4D4F-8587-2B34D52A6526.jpeg
    338 KB · Views: 325
  • C6E51BD1-17BE-41A8-A6F3-C5C58CCBBF5C.jpeg
    C6E51BD1-17BE-41A8-A6F3-C5C58CCBBF5C.jpeg
    415.6 KB · Views: 322
  • 86978A7C-270C-42A8-A7BB-CFF3436FB790.jpeg
    86978A7C-270C-42A8-A7BB-CFF3436FB790.jpeg
    447.9 KB · Views: 306
  • 14DA1E60-4C7E-4A12-A728-7F8A069EBAF4.jpeg
    14DA1E60-4C7E-4A12-A728-7F8A069EBAF4.jpeg
    563.4 KB · Views: 309
  • C951BD92-A440-486D-BF0F-C4EF8F478BBB.jpeg
    C951BD92-A440-486D-BF0F-C4EF8F478BBB.jpeg
    271.1 KB · Views: 289
  • C424D3E9-514B-404B-A52A-9DEFC99483BC.jpeg
    C424D3E9-514B-404B-A52A-9DEFC99483BC.jpeg
    415.9 KB · Views: 287
  • 73B81834-C556-4257-86E8-38CCF30BF84A.jpeg
    73B81834-C556-4257-86E8-38CCF30BF84A.jpeg
    407.8 KB · Views: 269
  • F1AD3D20-C51B-4A0C-8A87-5C56B4A844BB.jpeg
    F1AD3D20-C51B-4A0C-8A87-5C56B4A844BB.jpeg
    424.1 KB · Views: 283
  • DF108DB6-E4DD-48E8-A587-2C8D44C0FC40.jpeg
    DF108DB6-E4DD-48E8-A587-2C8D44C0FC40.jpeg
    470.6 KB · Views: 282
  • 927E8D09-6020-452A-8D0D-D9AE6F822750.jpeg
    927E8D09-6020-452A-8D0D-D9AE6F822750.jpeg
    331.7 KB · Views: 279

Bmachine

Well-Known Member
Site Donor $
Site Donor $$
Messages
3,531
Reaction score
1,789
Location
Northern California coast
I have to say, and I am usually in the minority on this, but I really like the cloth seats far better than leather. So much more comfortable both in hot and cold temps, plus you don't slide around so much. And these appear to be in remarkable condition!

Lovely car overall.
 

Simon_D

Well-Known Member
Messages
81
Reaction score
76
Location
South Australia
Thanks Bmachine,

The cloth seats were protected by thick lambswool seatcovers, but even still are worn from age and will need to be reupholstered.
 

Simon_D

Well-Known Member
Messages
81
Reaction score
76
Location
South Australia
Stripping down- this took a decent amount of time and yes still more to take out. Now I have a garage full of parts that will test my labeling and stocktake skills whenever this car needs to be re-assembled!

Last photo being towed away to let the experts at it. Next stop the panel shop.
 

Attachments

  • E7DB15F2-806F-4B7B-856E-878E0FB2E868.jpeg
    E7DB15F2-806F-4B7B-856E-878E0FB2E868.jpeg
    265.3 KB · Views: 263
  • E2211ABF-F011-472F-B169-59DFD03D63A6.jpeg
    E2211ABF-F011-472F-B169-59DFD03D63A6.jpeg
    334.1 KB · Views: 252
  • D04D7718-3678-4226-B2FB-28F5DEDA40EE.jpeg
    D04D7718-3678-4226-B2FB-28F5DEDA40EE.jpeg
    428.6 KB · Views: 250
  • 18961C9C-5B8E-4716-A1FB-1CB7CDB5F17F.jpeg
    18961C9C-5B8E-4716-A1FB-1CB7CDB5F17F.jpeg
    403.4 KB · Views: 241
  • 5AEA2EE5-A73C-488B-A72B-EC81A6522E65.jpeg
    5AEA2EE5-A73C-488B-A72B-EC81A6522E65.jpeg
    393.1 KB · Views: 246
  • 09E19A0B-E663-444B-9D63-86D0256BA4B9.jpeg
    09E19A0B-E663-444B-9D63-86D0256BA4B9.jpeg
    387.1 KB · Views: 252
  • 4BCEC3B8-A3D9-46E8-AA5C-0FC2656E516C.jpeg
    4BCEC3B8-A3D9-46E8-AA5C-0FC2656E516C.jpeg
    336.7 KB · Views: 240
  • 8C2FACBB-72C9-46B7-B87C-5AB659E98FCE.jpeg
    8C2FACBB-72C9-46B7-B87C-5AB659E98FCE.jpeg
    275.4 KB · Views: 228
  • 1A09A4C4-CBB7-49CC-89BE-D8A87DB227F7.jpeg
    1A09A4C4-CBB7-49CC-89BE-D8A87DB227F7.jpeg
    232.9 KB · Views: 247
  • EA555FE9-CE9E-4EFA-94E1-CDFBEB2B0F82.jpeg
    EA555FE9-CE9E-4EFA-94E1-CDFBEB2B0F82.jpeg
    279.5 KB · Views: 234
  • F0CC3B24-CEDF-4218-9A29-9E4FE56C7294.jpeg
    F0CC3B24-CEDF-4218-9A29-9E4FE56C7294.jpeg
    214.9 KB · Views: 223
  • EAC8A530-B534-45ED-8ED3-90CBFE1BC1E5.jpeg
    EAC8A530-B534-45ED-8ED3-90CBFE1BC1E5.jpeg
    361.1 KB · Views: 255

Simon_D

Well-Known Member
Messages
81
Reaction score
76
Location
South Australia
Front fender repair

Fully aware of a poor repair on the front fender, however once stripped down it was a real mess. We decided that replacement was better than repair, but quality fenders don’t grow on trees.

Through scouring the internet I found myself from Australia on a Finland based website talking to a lovely lady Marianne selling one from Norway. A few conversations later using google translate we were able to get the fender to Australia.

Mark at Edwardstown Body Repairs was able to perform the necessary wizardry to replace the offending fender.

Onto the next section!
 

Attachments

  • 10F27531-A6D8-479F-A89E-D2A1920AE4CB.jpeg
    10F27531-A6D8-479F-A89E-D2A1920AE4CB.jpeg
    76.5 KB · Views: 254
  • 998E1B7A-08B2-49FB-818B-BB3419B79182.jpeg
    998E1B7A-08B2-49FB-818B-BB3419B79182.jpeg
    298.4 KB · Views: 278

Simon_D

Well-Known Member
Messages
81
Reaction score
76
Location
South Australia
Rear quarter repair

An amazingly terrible ‘repair’ was revealed on the rear quarter. The decision was made to replace the damage rather than trying to repair. As everyone knows that’s tried to find these panels is that they are few and far between.

Thankfully forum member sfdon came to my rescue and posted one to Australia.

Mark did his amazing surgical work again installing the replacement and completing another piece of the puzzle. Slowly but surely it’s taking shape. Before and after photos attached.
 

Attachments

  • 9703BE42-B65A-42A4-9526-21494B62AFCA.jpeg
    9703BE42-B65A-42A4-9526-21494B62AFCA.jpeg
    289.5 KB · Views: 244
  • 45FB0934-D494-4362-B377-DBF57BC208EC.jpeg
    45FB0934-D494-4362-B377-DBF57BC208EC.jpeg
    310.3 KB · Views: 230
  • 57EB22A5-ADFA-45E6-BE20-70BDEA37DF7C.jpeg
    57EB22A5-ADFA-45E6-BE20-70BDEA37DF7C.jpeg
    309.9 KB · Views: 222
  • C0355987-3307-4AC0-8469-7965087BA53B.jpeg
    C0355987-3307-4AC0-8469-7965087BA53B.jpeg
    310.1 KB · Views: 225
  • 4154FD15-FDAC-49AD-983D-276EF5C5A2EB.jpeg
    4154FD15-FDAC-49AD-983D-276EF5C5A2EB.jpeg
    311.3 KB · Views: 223
  • 9DA00C54-115A-4CF3-8586-579B7F64D30C.jpeg
    9DA00C54-115A-4CF3-8586-579B7F64D30C.jpeg
    342 KB · Views: 234

Simon_D

Well-Known Member
Messages
81
Reaction score
76
Location
South Australia
Quick progress report- onto the doors, rather than repairing I’m going the re-skin option- the skins from w/n look nice and not wanting any future surprises.

More interior coming out- the dash heading off for restoration. Dash removal for the most part was ok, however the air conditioning unit had to be removed to access to the inside cluster screws which wasn’t on the agenda at this point!
 

Attachments

  • 1D615339-69CA-4643-884C-72F9BB4411F5.jpeg
    1D615339-69CA-4643-884C-72F9BB4411F5.jpeg
    330.4 KB · Views: 188
  • 62DAB7DC-15BC-4DFE-915D-AC9A24C3625D.jpeg
    62DAB7DC-15BC-4DFE-915D-AC9A24C3625D.jpeg
    394.9 KB · Views: 187
  • 45C5CF29-6D72-4EE3-AE6E-31070994095F.jpeg
    45C5CF29-6D72-4EE3-AE6E-31070994095F.jpeg
    120.5 KB · Views: 205

Simon_D

Well-Known Member
Messages
81
Reaction score
76
Location
South Australia
Toolkit- as happens over time the tools seem to walk. Really close to having the full set again ( once I receive a package from @Bert Poliakoff it’s almost there, thanks Bert). @Ian C was kind enough to send a spark plug cover, thanks Ian- really appreciated. Anthony Bolic the superstar sending me some Allen keys and Daniel Groot for a number of items.
 

Attachments

  • 35AD58C6-E9FA-49AD-8865-D0CFF402B666.jpeg
    35AD58C6-E9FA-49AD-8865-D0CFF402B666.jpeg
    305.8 KB · Views: 177

Simon_D

Well-Known Member
Messages
81
Reaction score
76
Location
South Australia
One door carcass - almost ready for some minor repairs and a new skin.
 

Attachments

  • 14EBE838-71A9-4E50-B77F-989E95B1B6F2.jpeg
    14EBE838-71A9-4E50-B77F-989E95B1B6F2.jpeg
    441.7 KB · Views: 169

Simon_D

Well-Known Member
Messages
81
Reaction score
76
Location
South Australia
Newly repaired and re skinned door hanging and gaps sorted. Pretty much all the hard work done for this side of the car thanks to Mark for his hard work getting this far. Moving onto some repairs at the rear of the car where the under rider attaches but looks like the worst sections are overcome.
 

Attachments

  • 0A69AA43-C062-4A81-83BD-65483DEB128A.jpeg
    0A69AA43-C062-4A81-83BD-65483DEB128A.jpeg
    354.4 KB · Views: 130
  • 225C3C03-BE03-4D2E-BE89-A22A0A5A656E.jpeg
    225C3C03-BE03-4D2E-BE89-A22A0A5A656E.jpeg
    308.2 KB · Views: 134
  • 5364F051-0E00-4C95-AE40-F0F6BCB7F323.jpeg
    5364F051-0E00-4C95-AE40-F0F6BCB7F323.jpeg
    252.8 KB · Views: 134
  • 89915701-CE90-498E-943F-6BD6EA3CC88E.jpeg
    89915701-CE90-498E-943F-6BD6EA3CC88E.jpeg
    371.9 KB · Views: 131
  • 65BBCD7B-0995-4A49-B0E8-5113731304D5.jpeg
    65BBCD7B-0995-4A49-B0E8-5113731304D5.jpeg
    380.6 KB · Views: 140

Simon_D

Well-Known Member
Messages
81
Reaction score
76
Location
South Australia
Haven’t posted here in a while but plenty going on with the rebuild. The second door skin has been replaced and most repairs carried out on the right hand side of the car. Little more tidying up to go then it’s boot, bonnet and roof to finish. After that it’s off to ck paint and panel for a fresh respray.

IMG_6101.jpeg
 

Attachments

  • IMG_6099.jpeg
    IMG_6099.jpeg
    407.9 KB · Views: 123
  • IMG_6052.jpeg
    IMG_6052.jpeg
    369.9 KB · Views: 121

Simon_D

Well-Known Member
Messages
81
Reaction score
76
Location
South Australia
More work on the e9! Bonnet/ hood cleaned up and torsion bar re-sleeved and installed, nicely working again. Boot/trunk skin removed for repairs- didn’t look like much rust but wanted to be sure everything underneath was sound, which it was. That’s all the rust we can find, just about something on every panel to correct despite looking in really good shape when we started. only being touched once this car!
IMG_6293.jpeg
 

Attachments

  • IMG_6292.jpeg
    IMG_6292.jpeg
    422.5 KB · Views: 136

Simon_D

Well-Known Member
Messages
81
Reaction score
76
Location
South Australia
So after nearly two years it’s come to this. Appreciation post for all those that have assisted getting to this point but really the work of mark from edwardstown body repairs metal finishing this car and the hundreds of hours involved is nothing short of amazing. This car has been turned absolutely inside out.

Final prep from Chris and the team at C.k paint and panel. It’s tempting to just clear over this stunning bodywork and leave it as is! Photos don’t do it justice.
 

Attachments

  • IMG_5469.jpeg
    IMG_5469.jpeg
    344.6 KB · Views: 108
  • IMG_5470.jpeg
    IMG_5470.jpeg
    334.7 KB · Views: 105
  • IMG_5471.jpeg
    IMG_5471.jpeg
    334.3 KB · Views: 102
  • IMG_5472.jpeg
    IMG_5472.jpeg
    319.9 KB · Views: 105
  • IMG_6638.png
    IMG_6638.png
    976.4 KB · Views: 103
  • IMG_6635.jpeg
    IMG_6635.jpeg
    236 KB · Views: 99

Simon_D

Well-Known Member
Messages
81
Reaction score
76
Location
South Australia
The e9 is in epoxy, I feel like this is a pretty big milestone to get to. Heaps of work to go but really nice to seal off that fresh metalwork.

Great work Chris from ck!
 

Attachments

  • IMG_5479.jpeg
    IMG_5479.jpeg
    314.3 KB · Views: 91
  • IMG_6654.jpeg
    IMG_6654.jpeg
    288.2 KB · Views: 104
  • IMG_5484.jpeg
    IMG_5484.jpeg
    290.5 KB · Views: 82
  • IMG_5483.jpeg
    IMG_5483.jpeg
    282.6 KB · Views: 79
  • IMG_5482.jpeg
    IMG_5482.jpeg
    294.7 KB · Views: 75
  • IMG_5481.jpeg
    IMG_5481.jpeg
    258 KB · Views: 86
  • IMG_5480.jpeg
    IMG_5480.jpeg
    305.8 KB · Views: 87
Last edited:

Simon_D

Well-Known Member
Messages
81
Reaction score
76
Location
South Australia
Whilst the epoxy cures it’s off to the workshop to strip the mechanicals. Engine is out, parts sourced to rebuild subframes, steering, bushes, new springs and shocks, new brakes incl rotors, engine gasket set, and many more jobs. Then back to the panel shop to clean up strip and preps the engine bay.
 

Attachments

  • image000000.jpeg
    image000000.jpeg
    98.4 KB · Views: 81
  • image000001.jpeg
    image000001.jpeg
    96.2 KB · Views: 92
  • image000003.jpeg
    image000003.jpeg
    73.6 KB · Views: 76
  • image000001.jpeg
    image000001.jpeg
    72.8 KB · Views: 85
  • image000002.jpeg
    image000002.jpeg
    75.8 KB · Views: 78
  • image000000.jpeg
    image000000.jpeg
    71 KB · Views: 92

Simon_D

Well-Known Member
Messages
81
Reaction score
76
Location
South Australia
Little bit going on with the rebuild. The engine bay and boot have some color, hard to tell in the photos but really happy with the result
 

Attachments

  • IMG_6255.jpeg
    IMG_6255.jpeg
    383 KB · Views: 76
  • IMG_6256.jpeg
    IMG_6256.jpeg
    341.6 KB · Views: 74
  • IMG_6257.jpeg
    IMG_6257.jpeg
    390.8 KB · Views: 69
  • IMG_6259.jpeg
    IMG_6259.jpeg
    313.1 KB · Views: 74
  • IMG_6265.jpeg
    IMG_6265.jpeg
    351.3 KB · Views: 73
  • IMG_6264.jpeg
    IMG_6264.jpeg
    360 KB · Views: 88
Top