Patricia A. Mayer's 3.0 CS / Paul Cain's Fjord project / The 300 mile Test Drive / VIII / Final Punch List

paul cain

Well-Known Member
Site Donor $$
Messages
675
Reaction score
1,294
Location
Orange County
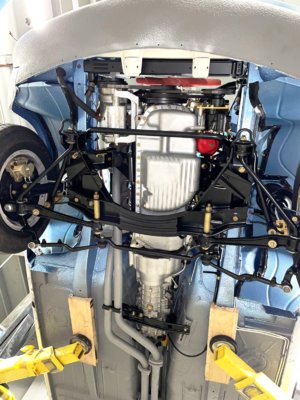
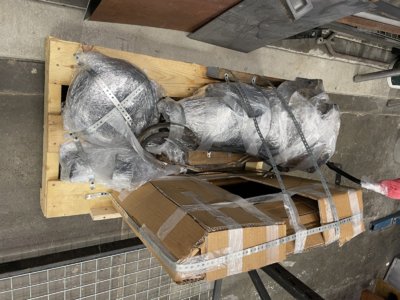
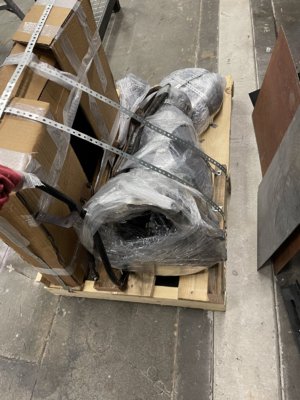
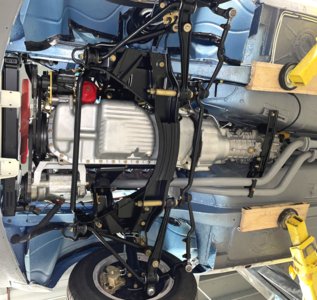
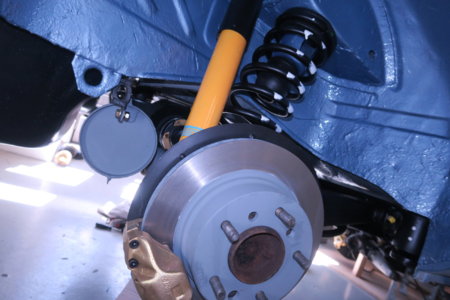
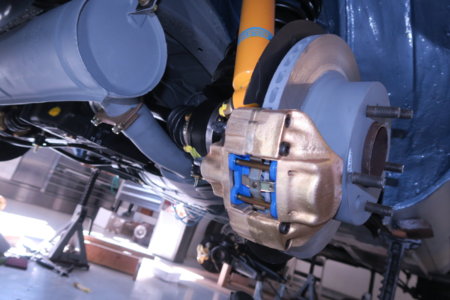
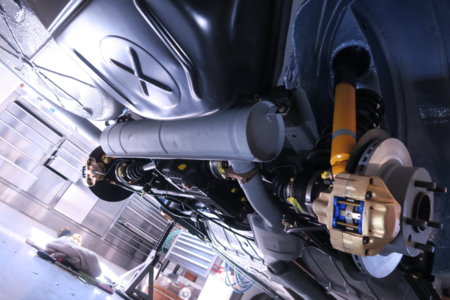
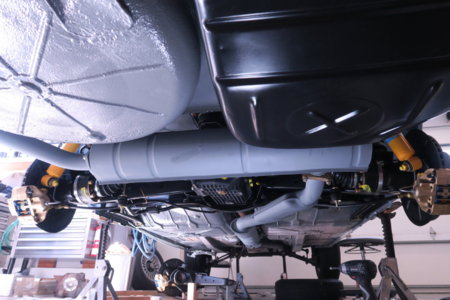
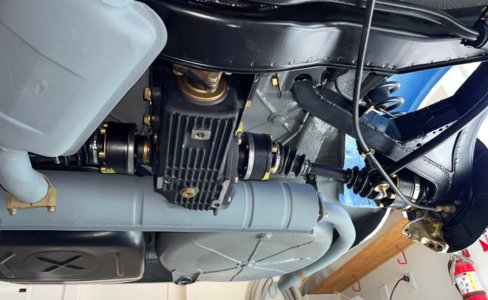
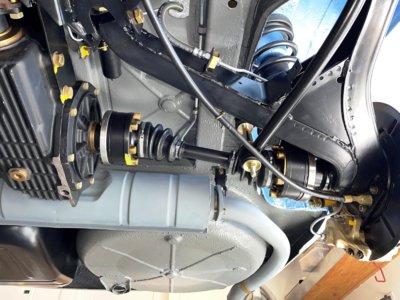
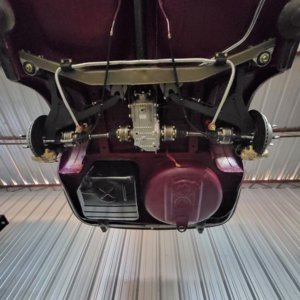
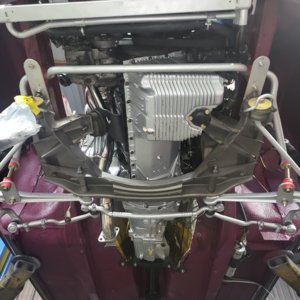
Only a few pics, as we only got a few hours in this afternoon. Here is the completed undercarriage.

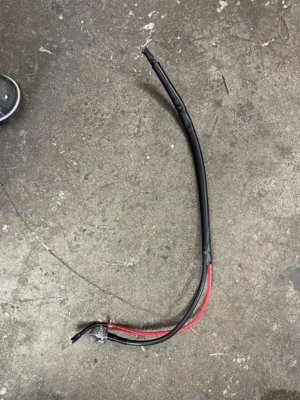
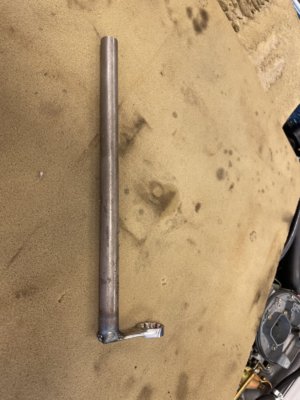
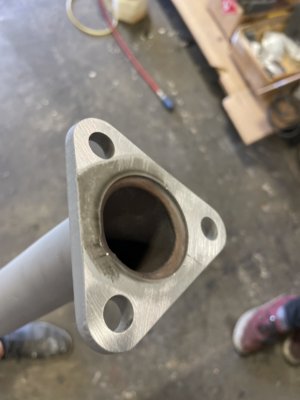
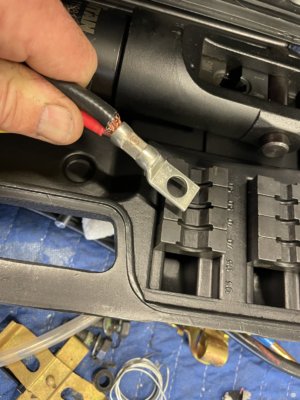
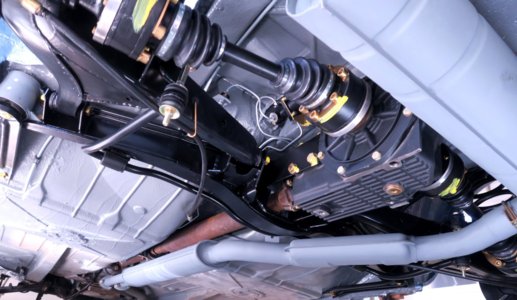
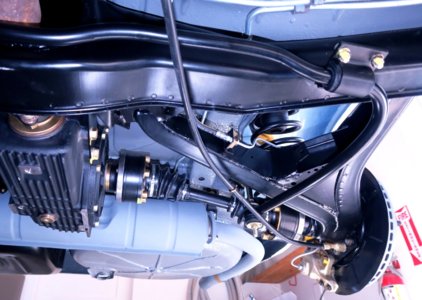
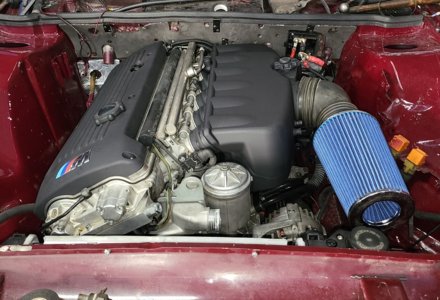
Everything is in in the engine compartment. Most everything is hooked up. We added distilled water, P/S fluid and Oil. We attacked the clutch bleeding again after multiple failures on Saturday. One of the more consistently irritating processes on an E9. After pressurizing the reservoir and pulling vacuum on the slave, we still had air in the line. Its almost impossible to get an 8mm line wrench on that slave bleed screw as there no room to rotate the wrench as it hits the drive tunnel. I fab'd up this solution so we could open and close the valve more easily. It helped, but we still had some air in the line. The final fix was to remove the entire clutch slave cylinder, keeping the line attached. Then rotate the part so the bleed nipple is at 12 O'clock, then gently bleed it again and all the air will finally exit. So irritating. We now have a working clutch pedal.

Tomorrow we will try and start it and drive it.

Stay tuned for day 21.
 

Attachments

  • 67070091475__07B7D2B4-0822-4A45-B596-EB34DED8D7ED.jpg
    67070091475__07B7D2B4-0822-4A45-B596-EB34DED8D7ED.jpg
    400.2 KB · Views: 296
  • undercarriage finished.jpg
    undercarriage finished.jpg
    403.5 KB · Views: 266

paul cain

Well-Known Member
Site Donor $$
Messages
675
Reaction score
1,294
Location
Orange County
Per the schedule, the plan was, Drive it in on March 14th


And drive it out on April 4th.


Program goals achieved today at 4:20pm with a solid 40 minutes to spare before Close of Business. We finished on time.

Not without some bumps:

Hurdles today included:

Fab'ing a new positive battery cable.

A massive exhaust leak at the rear manifold. Some serious warpage occurred during the ceramic coating process on the down pipe. Noted for future ref. Solved it with some belt sanding and rewelding at the upper flange. Drop the exhaust, etc. PITA.

The "factory remanufactured'' starter had a frozen solenoid and did not respond to the usual beating with pole and hammer. So another one was sourced. The famous upper 17mm bolt issue was solved with the fabrication of this 12 pt x 17mm box end wrench. Not pretty, but a massive time saver.

Mechanical fuel pump shaft was too sticky after the cleaning and was not sliding the bore in the cylinder head, so no fuel to the carbs. Solved with a few minutes with the shaft on the lathe. When thru three cans of starter fluid trying to figure this one out.

Misfiring with the original plug wires. A temporary set was sourced (Thank you Rey!). Now firing on 6 cylinders.

Needs more tuning and I've decided I really don't like Zenith carburetors. Forward carb secondary is back to dripping. Its fixable but I am so done with Zeniths.

But it runs, runs well and there are no fluid leaks.

Some buttoning will be required before final photos.

Phase III is finished.

I am really tired.

Thank you for watching. Thank you all for your encouragement. Sincerely.
 

Attachments

  • IMG_0746 (1).jpg
    IMG_0746 (1).jpg
    731.8 KB · Views: 225
  • IMG_0743 (1).jpg
    IMG_0743 (1).jpg
    428.3 KB · Views: 168
  • 67079637333__023F9F09-965A-424B-82E0-789EE9892364.jpg
    67079637333__023F9F09-965A-424B-82E0-789EE9892364.jpg
    146 KB · Views: 163
Last edited:

paul cain

Well-Known Member
Site Donor $$
Messages
675
Reaction score
1,294
Location
Orange County
E28 positive cable!
Actually, no. Its not from an E28. We should be clear here: It made from a mix of parts.

The black positive terminal is an NOS E12 part no. Its been cut shorter to match the length of the original E9 black cable that goes to the starter. The Black jacketing is the original part off of this car, just cleaned up. The new red cable is from my local electronics distributor and it's 6 gauge. All of this was measured to match the original E9 harness. End terminals were as close as I could get to the originals. Then crimped with this hydraulic crimper. Then 3M heat shrink tubing, much more expensive but totally worth it.
 

Attachments

  • IMG_0744.jpg
    IMG_0744.jpg
    349.3 KB · Views: 189

Gary Knox

E9 Member Emeritus
Site Donor $$
Messages
1,821
Reaction score
743
Location
West Chester, Pennsylvania
WHOOOPEEEEE! Incredibly well done and with unsurpassed speed.

PS: Any possibility Team Patricia could make a visit to help finalize Alan's project???
 

paul cain

Well-Known Member
Site Donor $$
Messages
675
Reaction score
1,294
Location
Orange County
The Coupe is back home and I've exited Reyn's speed shop. I palletized the 3 spd automatic that Hal Boyles purchased at the beginning of Phase III. These are all the pieces in an Automatic.

Thanks to Chris Macha who tailed me on the 20 mile drive home up the 73 toll road. The car ran great, 97F outside and we did a long 2.4 mile pull at 7% grade up to the top of Newport Coast in 5th Gear at about ~80 mph. Temp gauge did not move. Now that it is home I'll finish up the final torquing, eng. compartment stickers, wiper assembly, accessory placement and harness dressing. The Distributor is still out for rebuild and this borrowed unit will go back to Reyn's Speed Shop. It will need a new set of coil wires at the same time.
 

Attachments

  • IMG_0783.jpg
    IMG_0783.jpg
    466.2 KB · Views: 163
  • Phase III is done.JPG
    Phase III is done.JPG
    290.7 KB · Views: 149
  • E9 Auto  ALL the pieces.jpg
    E9 Auto ALL the pieces.jpg
    656.1 KB · Views: 151
  • IMG_0782.jpg
    IMG_0782.jpg
    445.6 KB · Views: 163
  • Phase III is done II.JPG
    Phase III is done II.JPG
    484.3 KB · Views: 180

paul cain

Well-Known Member
Site Donor $$
Messages
675
Reaction score
1,294
Location
Orange County
I especially love the photos of the undercarriage front. Do you have any of the underneath rear please?
Andy, with pleasure, this was all completed in Phase II, way back in February. Here you go:
 

Attachments

  • 2.2.JPG
    2.2.JPG
    238.7 KB · Views: 162
  • 4.JPG
    4.JPG
    276.9 KB · Views: 157
  • IMG_0015.JPG
    IMG_0015.JPG
    226 KB · Views: 148
  • IMG_0016.JPG
    IMG_0016.JPG
    220.9 KB · Views: 154
  • IMG_0019.JPG
    IMG_0019.JPG
    276.6 KB · Views: 144
  • IMG_0020.JPG
    IMG_0020.JPG
    271 KB · Views: 144
  • 2 two.jpg
    2 two.jpg
    259.4 KB · Views: 140
  • IMG_0350.jpg
    IMG_0350.jpg
    387.3 KB · Views: 146
  • PM rear susp Phase II finished II.jpg
    PM rear susp Phase II finished II.jpg
    351.2 KB · Views: 169

paul cain

Well-Known Member
Site Donor $$
Messages
675
Reaction score
1,294
Location
Orange County
This is a shameless plug (I need the room in my garage)

......And from the spoils of Phase III, I am selling off a lot of duplicate parts that I accumulated. See many items in the For Sale section.
 
Last edited:

AndyNZ

Active Member
Messages
45
Reaction score
4
Location
New Zealand
Just beautiful. Seeing work like this is certainly inspirational to complete my own restoration to such a high standard. Thank you.
 

paul cain

Well-Known Member
Site Donor $$
Messages
675
Reaction score
1,294
Location
Orange County
I've started working on the fine tuning. I've got the carbs to perform much better, the idle is smooth at 950rpm now. I was worried the secondaries, that are vacuum actuated on this late generation Zenith carb, were working properly. Difficult to view with the hood on and the air filter in place. Rob Edward's bore-a-scope to the rescue for some hard data:
We taped the tiny camera first on the front carb and then on the rear carb. The long cable allows us to view from the cabin during accelerations.

Action starts at about 39 seconds in

and the rear carb actuation:

Action starts at about 28 seconds

It seems that they are both performing well, but I leave it to serious Zenith experts on this forum for more comments on these short video clips.
 

Candia4441

Well-Known Member
Site Donor $
Site Donor $$
Messages
918
Reaction score
311
Location
California
Andy, with pleasure, this was all completed in Phase II, way back in February. Here you go:
Hello Paul, will you please check my work do you approve I am trying to do like you do it is not like yours but I am trying my best
 

Attachments

  • 20220314_162918.jpg
    20220314_162918.jpg
    433.3 KB · Views: 151
  • for Paul 2.jpg
    for Paul 2.jpg
    291.3 KB · Views: 151
  • Fore Paul.jpg
    Fore Paul.jpg
    275.7 KB · Views: 160
Top