Bumper Rubber Strip Installation at the Ends Question

Catbert

Active Member
Site Donor
Messages
65
Reaction score
49
Location
Signal Hill, CA
I've posted recently about the front bumper and my purchase and experience from ClassicEuroParts, the ebay company located in Vietnam. This question deserves a separate post.

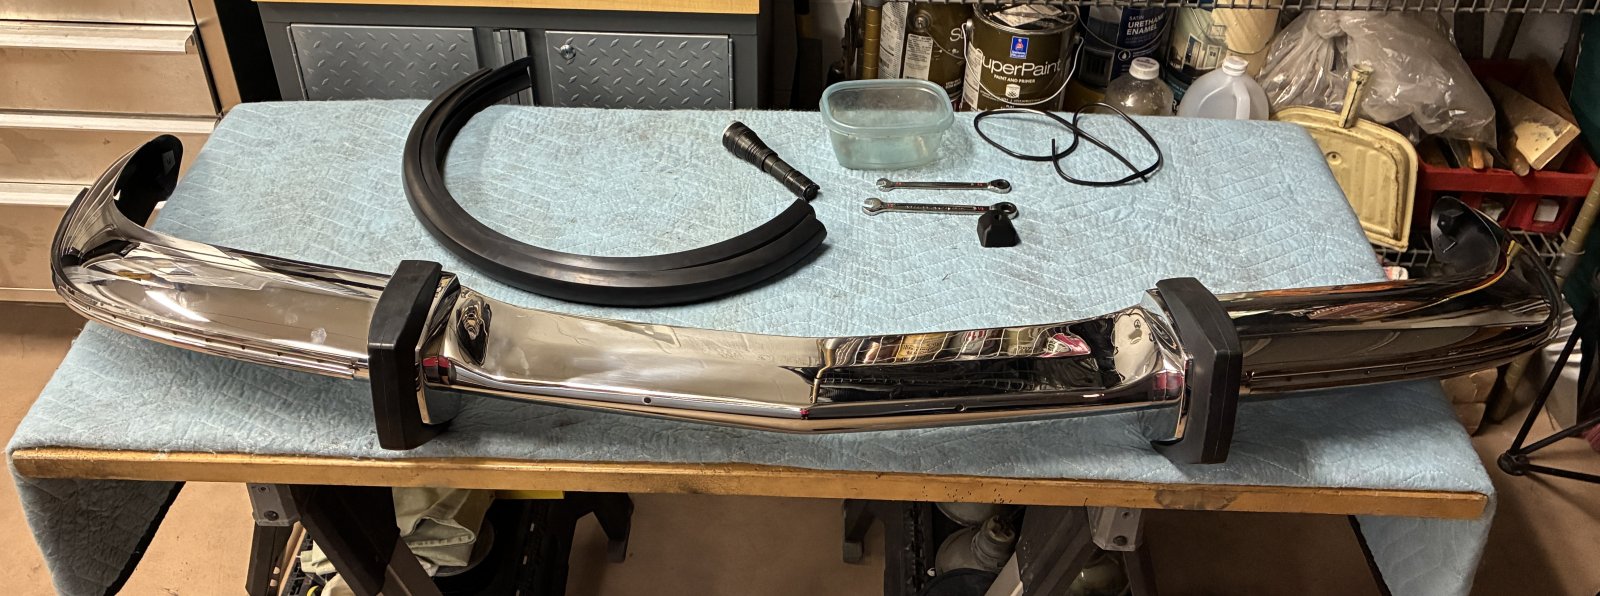
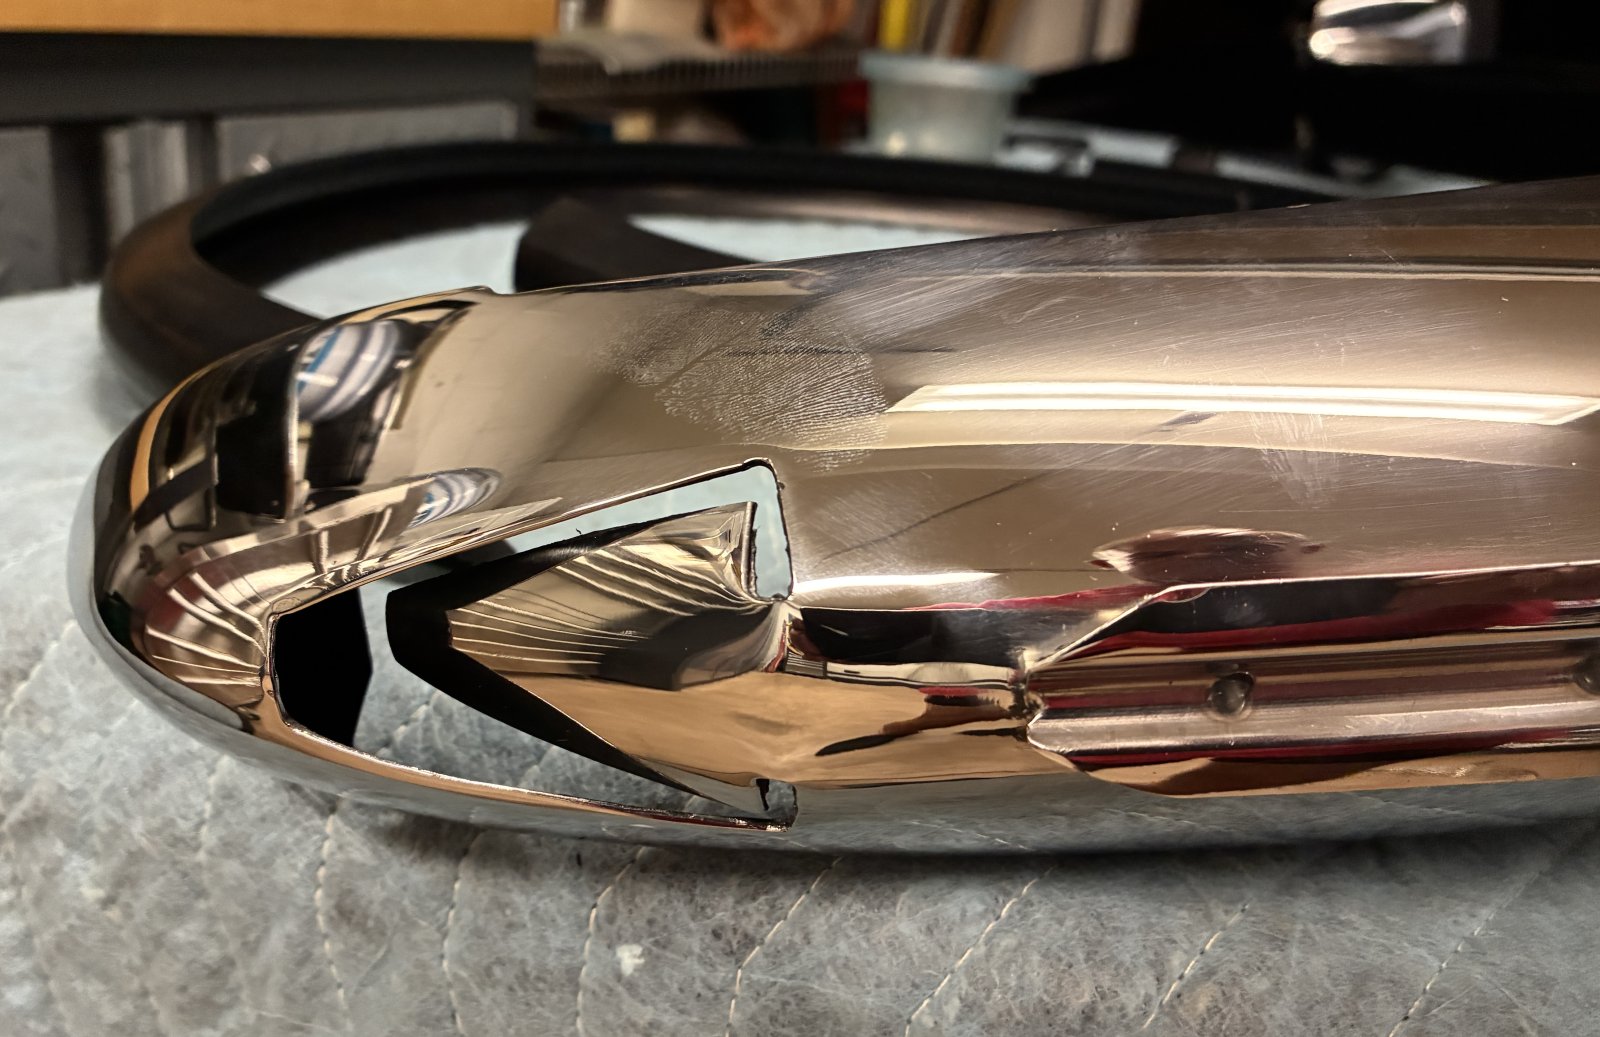
As I have already shared, I am very pleased with the quality of the front bumper including the hardware and rubber strip material. The rubber looks identical to OEM, something I did not expect. So, I was provided with two strips to cut and then install. My question is, what is the shape and technique to fit the rubber strip into the triangular indented slot at each end of the front bumper? My guess is, the rubber strip needs to be cut at an angle, like a slender triangle with the top cut off, to fit into the bumper opening. Can someone provide either a drawing or description on how this needs to be done? I'm also not clear on how the bumper strip end fits into the slot to stay secure.

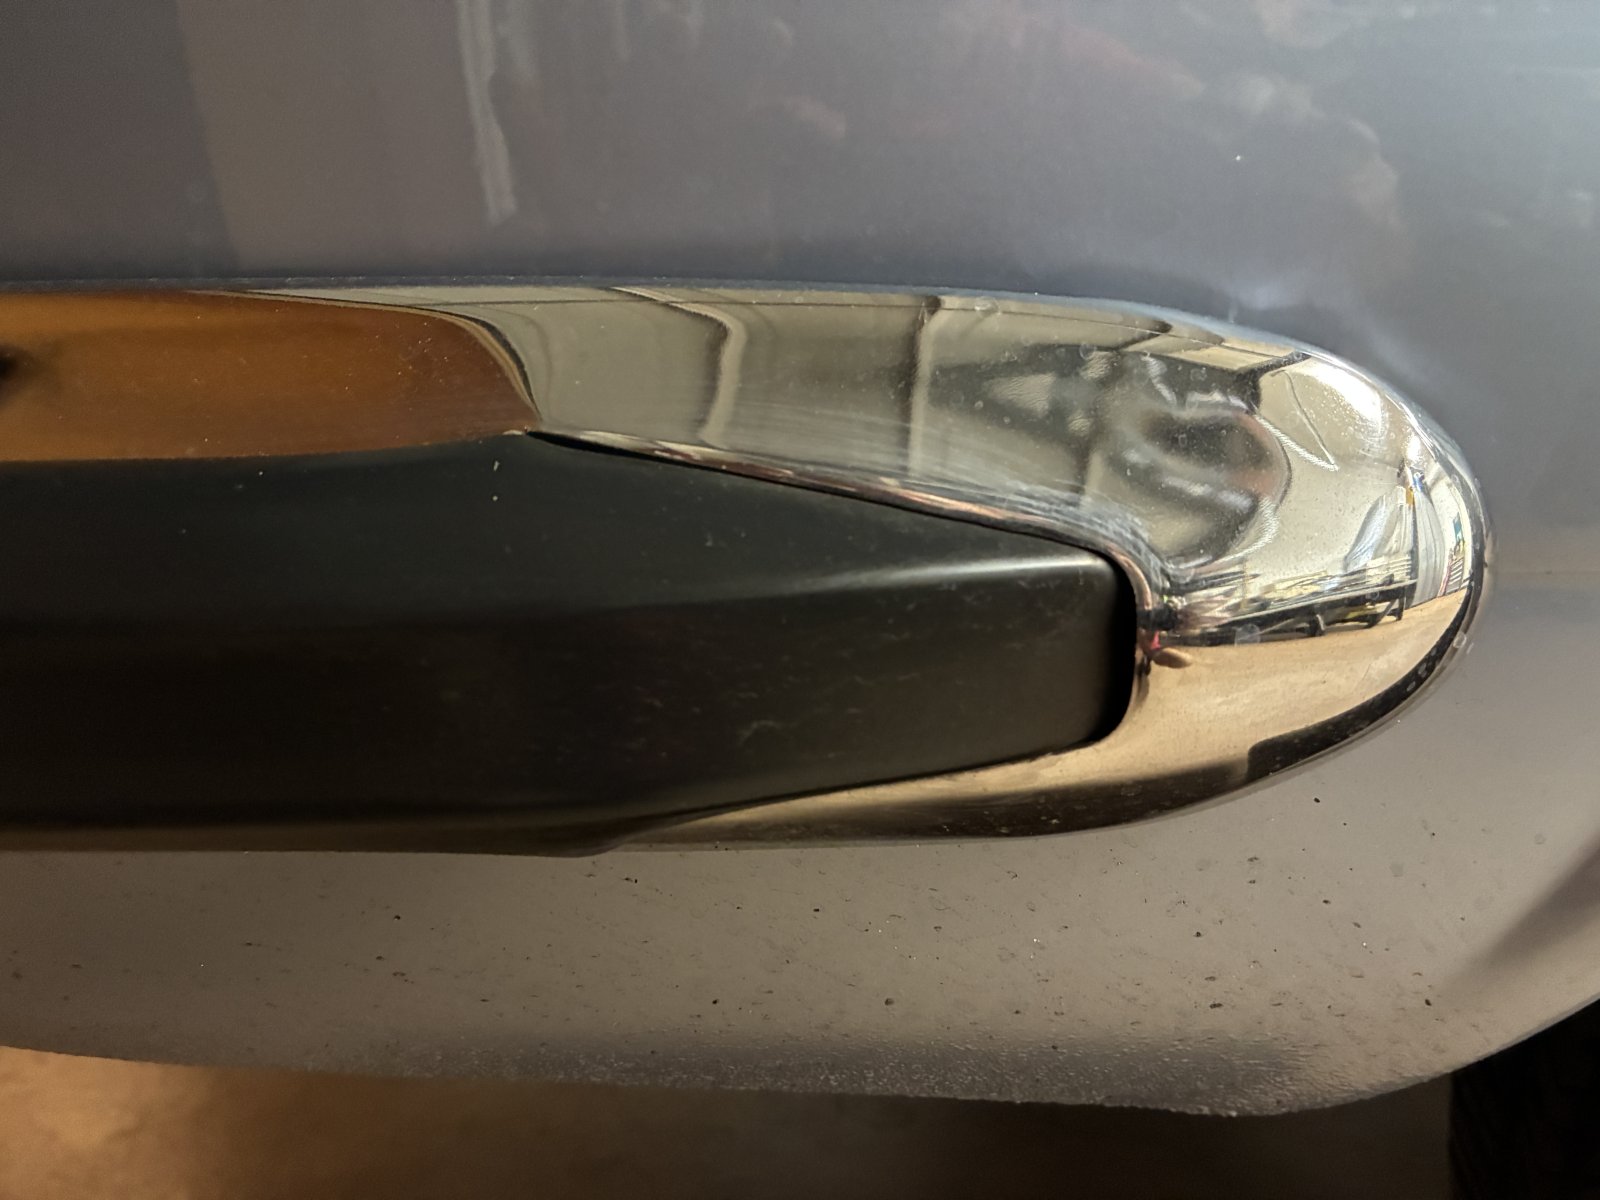
I attached pictures of the front bumper cutout, the whole bumper, and the rear bumper end for comparision. Thanks!
IMG_6151.jpeg
IMG_6149.jpeg
IMG_6152.jpeg
 
The rubber strip is fed from the back through the hole. So it just sticks out (well, "in") an inch or so.
It is trimmed inside the bumper if too long. The cut , if needed , is just an offset of the inner bumper surface.

So the cut actually is quite easy, as none of it affects fit or visual side.
 
The rubber strip is fed from the back through the hole. So it just sticks out (well, "in") an inch or so.
It is trimmed inside the bumper if too long. The cut , if needed , is just an offset of the inner bumper surface.

So the cut actually is quite easy, as none of it affects fit or visual side.
Feeding the rubber strip from inside the bumper seemed to be the right way. I attempted to put the end of the strip through the opening and it didn't seem to work. But, your comment tells me otherwise. Thanks.
 
I did this to a similar set and it was a very lengthy job. You can trim the end slightly to make it a point and I would use some rubber lubricant to help get it going. The part that ends up hidden is just that, hidden, so pulling on it with some pliers to get it pulled in there is ok. Pour yourself a beer before you start and keep it flowing during the process.
 
I’ve done two of these, I trim the end on both top and bottom at an angel and feed it in. I use a plastic tool to make sure it fits into the groove. It’s easier with new rubber as it is thinner than the original but fits fine over the metal strip.
 
Be aware that the rubber on the Vietnamese bumper is a bit less tall than the original. Perhaps that makes it a little bit easier to feed into the slot (I still found it hard) but means that even when done there is a little space between the rubber and the opening in the metal bumper, whereas the original ones have no such gap. I had gotten a front one because my bumper had some scratches and I was going to use the repro front, in the end I kept my original in place. But I agree that it overall looks quite good for the price
 
I’ve done two of these, I trim the end on both top and bottom at an angel and feed it in. I use a plastic tool to make sure it fits into the groove. It’s easier with new rubber as it is thinner than the original but fits fine over the metal strip.
Chris... do you feed the end of the rubber strip from inside the bumper onto the surface of the bumper or the other way around? The comments indicate to feed it from the inside. Thanks!
 
Feed from outside just mark where it disappears and cut out unneeded rubber. I’m able to twist it enough to hook onto the chrome. @e9Leveque Even the BMW and Walloth rubber is now thinnner.
OK. There seems to be more than one technique with both being opposite. Feed from the back or from the front. Whichever technique works for me, I will be sure to warm the rubber first and apply a good amount of liquid soap to allow for easy movement.
 
Inserting the ends from the backside may scrape the rubber. The thinner rubber is easier to work with. You peel it back on itself until
you get to the ends. It should have a relief in the center where it fits over the center cover. I’ve done it without heating or lube.
 
Last edited:
Ah @sfdon remember when we had to do this? Think I'd been awake for around 43hrs by that point, having just landed in the US.
If you have the old rubber use that as a template to trim an arrow head like shape that will feed into the recess on the bumper. Trim way less than you think you need and then keep marrying it up with trial and error. These new bumpers have a different shaped recess to OEM ones. If memory serves, the new ones are longer and more narrow. The other trick is don't try to push the rubber on, friction is not your friend. Push on the fist couple of inches then pull the remaining section back on itself. This will open up the rubble guides and the new rubber will just drop down over the bumper.
Hope this helps.
 
Hello all! Yesterday, I installed the rubber strips on the front bumper. It was a bit of a struggle, but I got it done without breaking or bending anything. Here is what worked:

  1. Measure and cut the rubber strip to length so that just enough of the ends extend into the dagmar and the cutout at the bumper end. Be sure not to cover the bolt hole that the dagmar connects to the bumper. Measure so just enough can be pushed into the bumper end so it just covers the triangular cutout.
  2. Pour liquid soap in the back mounting area of the rubber strip. Use lots!
  3. Slide the bumper strip from the dagmar end. It will go on easily at first, but then will require more effort as it approaches the end of the bumper. If you use enough liquid soap, it will not be that difficult.
  4. Here's where some effort is required. You need to push the end of the strip into the bumper cutout. On my second strip, I used a box cutter to cut angles on the end of the rubber to make it easier to push it into the opening. I used a block of wood with towels over the bumper for leverage and protection and pushed and pushed the end of the rubber strip into the hole. Now, when the end of the rubber strip is seated into the bumper cutout, it requires quite a bit of effort to push the other end of the rubber strip so that it slides that extra 1/2" into the cutout and enough to cover the opening. The awkward shape of the bumper and thinness of the metal doesn't allow much leverage. Again, use lots of liquid soap on the end so that it is thoroughly lubricated and able to move without providing too much resistance.
I spent at least 2-3+ hours assembling the bumper and attaching the rubber strips. I was figuring things out along the way as no instructions of any kind came with the bumper. That's OK. My time is free. I'm just glad I didn't break anything. Peace!

IMG_6158.jpeg
IMG_6159.jpeg
 
After @HB Chris posted I remembered that I tried to do it your way and in the end fed the cut end in from front to backside and then did the “fully bend over itself” trick to open up the side ridges to allow it to push into the ribs on the front edge of the bumper. I think one of us needs to do this again and take a video for future owners struggling
 
After @HB Chris posted I remembered that I tried to do it your way and in the end fed the cut end in from front to backside and then did the “fully bend over itself” trick to open up the side ridges to allow it to push into the ribs on the front edge of the bumper. I think one of us needs to do this again and take a video for future owners struggling
I really appreciate how helpful you are! I strive to follow in your footsteps. ;)
 
Back
Top