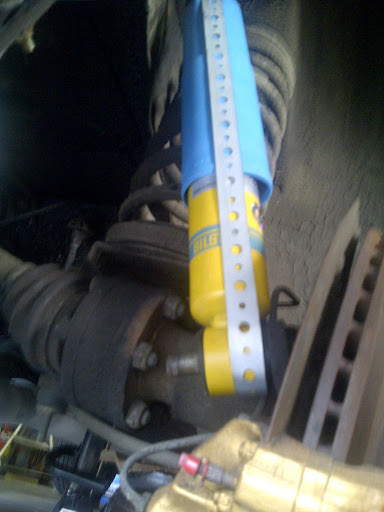
Bilstein install question

Stevehose

Well-Known Member
Site Donor $$
Messages
13,399
Reaction score
6,202
Location
Sarasota, FL
Have new rear Bilstein HD's on the way - do these come with suitable rubber mounts or do I need a special part from BMW? Any advice or pitfalls to watch out for when replacing these? I will also be inspecting the shock towers for the crack syndrome. If i can install these successfully I will try the fronts. Thanks.
 
Last edited:
Shocks or strut inserts usually come with new rubber bushings and bump stops, however the rubber bellows type boots that keep the grit & road dirt off the shock shafts generally have to be purchased from the dealer. Buy OEM boots, I put fake aftermarket boots on my Audi and they fell apart in under 3 years :cry:, without them the seals for your shock absorber shafts will be toast :cry: in no time. ~ John Buchtenkirch
 
Bilsteins don't need bump stops and should come with new dust boots. The shocks may come with extra rubber mounts that you don't actually need - they're for later models.
 
Nothing else needed. It takes a bit of work to get the lower mount onto the mounting bolt once top mount is installed. The angle of the screw can cause issues, I had to tap it on with a hammer, screw threads were fine.

Chris
 
I saw your post from a while back saying you had trouble getting the lower mount on - I got the original Boge's off tonight and noticed this thread mount angle that points downward - did you end up mounting the lower first then decompressing the shock up into the tower or vice versa? Seems like most advice says to do the lower first.

Nothing else needed. It takes a bit of work to get the lower mount onto the mounting bolt once top mount is installed. The angle of the screw can cause issues, I had to tap it on with a hammer, screw threads were fine.

Chris
 
I've had the rear shocks on and off my car about 4 times last year as I played with different springs and spring pads to get the desired ride height.

I always unbolted the top first then compressed the shock to clear the inner fender and slide off the lower mounting point. With the car on jackstands I used a floor jack to move the swing arm up and down to get the best angle for removing the shock. Maybe there's a better way but that's what I got to work.

Two things I did help get the lower mount over the threaded bold on the mounting point. First I filed a small amount of the inner metal sleeve on the shock to minimize it digging into and binding on the threads. Second use either a socket with an extension or just an extension fit into the outside of shock mounting sleeve to flex it within its rubber mount to better align with the threaded rod on the mounting point.
 
Kurt has some good suggestions. I attached the top first, there was no way to keep it compressed if mounting bottom first. I ended up tapping it on with a mallet, no threads were damaged. I also used a jack under the swing arms.
 
Thanks for this info - the shocks arrived today - what kind of tool is used to keep the shaft from rotating? It's not a hex key from what I can tell????
 
there's a hole in the top of the threads - looks like an odd key or something - a small flat blade screwdriver fits but I won't have any clearance for that when installed. Looks like I will have to improvise something.
 
Watch the half shaft arc limit so you're not damaging the CV joints/ boots. Support the trailing arm.

Or

Take the halfshaft loose. The arm drops down further and the shock fits without the big old hammer. Then you can check the bushings in the arms for play. You won't be fighting to compress the shock, fit the stud, or otherwise look like a monkey with four arms. Much more civilized in my opinion and leaves time for an adult beverage dejour.

Only ever seen the shocks with a shaped shank. There's a shock socket made just for that little puppy at your local Craftsman/ Sears, etc. Much better than shearing off the top of a nice new shock.

:)
 
If I get too much resistance I'll disconnect the half shafts...I'm all about maximizing adult beverage time admiring my work!


Watch the half shaft arc limit so you're not damaging the CV joints/ boots. Support the trailing arm.

Or

Take the halfshaft loose. The arm drops down further and the shock fits without the big old hammer. Then you can check the bushings in the arms for play. You won't be fighting to compress the shock, fit the stud, or otherwise look like a monkey with four arms. Much more civilized in my opinion and leaves time for an adult beverage dejour.

Only ever seen the shocks with a shaped shank. There's a shock socket made just for that little puppy at your local Craftsman/ Sears, etc. Much better than shearing off the top of a nice new shock.

:)
 
Did not want to remove the half shafts, that looked like a major PITA so I made a shock compressor out of some a/c duct hanger strip. Put the shock in the best possible position and tapped it in - no problem.

IMG-20110812-00500.jpg


I added a 3" washer between the shock and the shock tower to spread the load - so far I have no tower issues and hope this will spread the force off the crappy original design. Kept the original rubber bushing and metal sleeeve as these were in good shape. Test drive in the am - now enjoying a well-deserved adult beverage :)
 
For the record, a 5mm hex key fits the threaded shaft to enable tightening without spinning it. Took it for a long drive this am, no more squeaks and groans from the rear, gained 1/2" of height in the back to counter my old springs and level the stance (am planning on car lowering with Carl Nelson's springs and new Bilstein struts later in the year). Thanks for the input.
 
Back
Top