Control arm bushing replacement

Paulaner

Well-Known Member
Messages
82
Reaction score
32
Location
WA, USA
Hey! Anyone have any special tricks for pressing in new inner and outer control arm bushings?
I've silicon greased the shit out of the new bushings and inside the bores. Already have destroyed 2 of the bushings... Got super close on both but at the last second part of the inner rubber section worked it away out and it mushroomed.

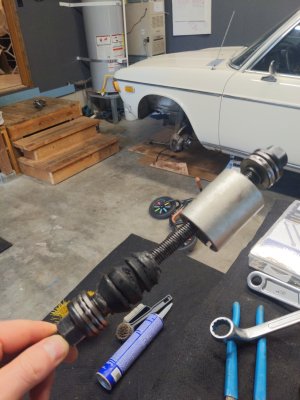
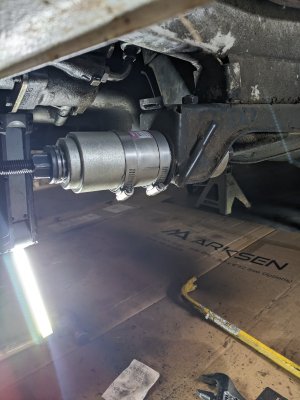
I am using a tool like this for the install.
 

Attachments

  • 17614135035746190455941707294981.jpg
    17614135035746190455941707294981.jpg
    255.5 KB · Views: 79
There is a tread of this (hope I write this correct)
 
Have not done those before, but I have had tremendous success with rubber in general by applying heat. Sometimes I keep a very hot bucket of water on hand for dipping rubber parts (for a while), until they get hot and malleable. Also, I have used a paint stripping tool (potent hair dryer - haha) to heat things up, from a good distance. Jobs involving rubber in the cold never work out for me. A good example are windshield gaskets - it is so easy to push a shield out on a hot summer day, but one risks breaking the glass when trying the same operation in the cold.
 
I basically did it the way you show in the pic..I just used a bunch of Astroglide lube to make it....uh, slide in there...since it's water based, it dries up and is gone pretty quick. They were definitely a real PIA, though.
 
Thanks guys for the added recommendations. I said ***k it last Sunday and ordered some powerflex. The ones I was trying to use for both the inner and outer control arm bushings were just never going to go in. I'll share an update on the powerflex and hopefully with the entire front end out back together.
 
While I wait for my power flex control arm bushing to show up, I decided to tackle the ever dreaded front tension rod bushings. These gave me a run for my money with days the of trial and error but I finally won out in the end. Was very nervous about the drivers side one as you can see in one of the before images the bore and mating surface were damaged by PO. With some MAP gas, yanking, pulling, and filing I was able to correct it before reinstalling the new bushing.
 

Attachments

  • IMG_0986.jpg
    IMG_0986.jpg
    365.2 KB · Views: 40
  • PXL_20251105_205822520.jpg
    PXL_20251105_205822520.jpg
    255.1 KB · Views: 32
  • PXL_20251105_212336989.jpg
    PXL_20251105_212336989.jpg
    289.1 KB · Views: 30
  • PXL_20251105_212321408.jpg
    PXL_20251105_212321408.jpg
    232.1 KB · Views: 35
Back
Top