Doing some forward research for when I have to do this to mine, this looks fairly easy for me except for the euro style dash grab rail. The one I have had the veneer stripped off already when I got the car and I'm keen to see how this can be re-veneered, it's the ends that I can't work out how to do as the wood curves in two directions and can't see how this can be done in one piece without cutting/joining it together.
You are using an out of date browser. It may not display this or other websites correctly.
You should upgrade or use an alternative browser.
You should upgrade or use an alternative browser.
Dash wood veneer redo.
- Thread starter e9john
- Start date
The grab rail is a solid piece of walnut and not veneered? That's the case on my early car, anyways... sand off the old finish, stain, and apply the finish of your choice. ...I think ")
Ed
Ed
I think there were some slivers of veneer left on the rail if I remember right, also I don't think mine's solid walnut, looks like it's a softwood and has never had any stain on it, I'll take photos when I get chance, do you have a close up photo of your's Ed, I know the US cars were covered with vinyl. I have seen a thread where a Euro spec car had a vinyl covering, was this ever the case, if so I could always go down this route but really want to veneer it.
I probably shouldn't have chimed in... The 2000CS is a odd duck and I'm sure the dash shares very little with the later Coupes.
Here's a Google pic of a 2000CS. The grab bar is one, solid piece. Everything else is veneered.
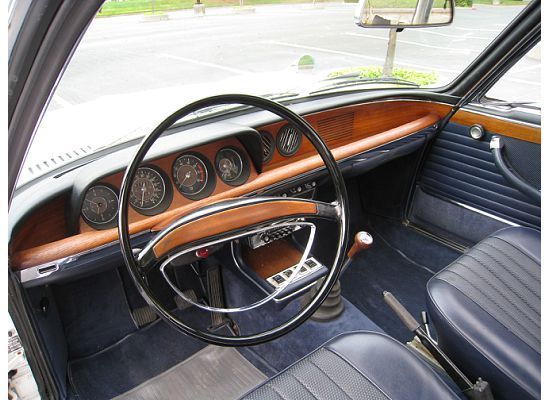
Here's a Google pic of a 2000CS. The grab bar is one, solid piece. Everything else is veneered.
Got me thinking now, maybe I could make a new one out of solid walnut.
I wish the USA e9's got the wood grab rail, it would put an otherwise beautiful interior over the top
Rek
Well-Known Member
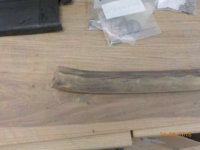
The grab rail is a pain to re-veneer.
First of all, I did not attempt to re-veneer the front facing section as that was just too much. I prepared this and used yacht varnish.
After a few goes at the side which faces the driver, I worked out that the veneer needed to be cut to shape at the ends. This entailed long triangular sections being cut out and then glued and pressed. As I am no expert and was learning on the job, the results are not great but passable as a first attempt.
There is always going to be small gaps once the press comes into action. There is also some overlapping in places. To finish these, I sanded down the overlapping sections until only one layer was present. For any gaps, I sanded down some veneer to create powdered wood, mixed these with clear glue and used it as cement to fill in the gaps.
The two part epoxy with a final finish of yacht varnish means it doesn't look bad. Not perfect but I learned a lot doing it.
Thanks for your post Rek, just as I thought, a nightmare job, your's looks pretty good. I'm going to attempt this later in the year but not looking forward to it.
Rek
Well-Known Member
Two attempts. It looks better than the photo's. The reflections make it look flawed, but it works well.
I have just noticed that my lights switch is now a shower switch.
I have just noticed that my lights switch is now a shower switch.