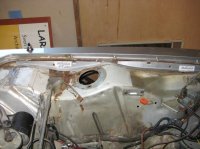
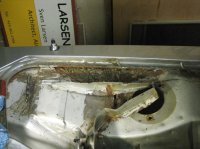
Dismantling car

Rob

New Member
Messages
5
Reaction score
0
Dear all,

Before wasting a lot of time searching the forum....
Is there anybody who can give me a link to a thread (or a site from somebody that restored a car and put evereything online) that explains me how to dismantle the front wing and rear quarter panel in order to repair my sills ?

Thank you !

Kind regards,

Robby
 

bmw art car

Well-Known Member
Messages
688
Reaction score
2
Location
florida
the search function is your friend

and there are links to sites in the FAQ , if i am not mistaken
 

Sven

Well-Known Member
Site Donor $
Messages
1,145
Reaction score
110
Location
Seattle
Rob,

Click on the "Links" button at the top. Then check out the two sites listed under "interesting sites". They will show you all the horrors that await those that remove their sills...
 

Rob

New Member
Messages
5
Reaction score
0
Thanks for your replies !

E9 driven is a really interesting site, unfortunately they are indeed using a saloon version (Bavaria) to explain the body work ( removing and installing rear door ;) )....

The larsenarchitect.com in the links is also very interesting, but as novice ( only dismantled a Range Rover of 1974 up till now) I would like to have more details of where to cut or drill the body to take off the front and rear panels, how to take off the windows, etc

If some more info, it would be great you'd share !
 

x_atlas0

Well-Known Member
Messages
1,799
Reaction score
141
Location
Clarkston, MI
Is that the Vranedom link?

I'm almost about to do the same thing, depending on the price I get from Matt here in Houston

No, no, Malc is a user on this board, over in Europe. He has torn his coupe apart and displayed most of the work. I haven't seen a post from him in a while, though.
 

Bwana

Well-Known Member
Messages
1,211
Reaction score
84
Location
Santa Fe, NM
Right! I figured that out a little while after the post. I've checked most of the threads he started but most of it is detailed (most excellent!) photos and descriptions of the re-assemly.

Does anybody have something similar for the disassembly of the left and right hand fenders? I figure I need to get some of those cool spot weld drills with the stepped tips but is there a procedure/sequence of removal? I've noticed there appears to be different split positions below the A pillar, different builds or just the guy's choice who took it apart?
 

MarksE9

Active Member
Messages
50
Reaction score
0
Location
Auckland New zealand
Me Too!

No satisfactory answers from anyone?

I've been searching too and haven't found a full description of removing the front fenders. I guess those who have done it have simply launched into it, learning as they go. Sure would be nice to have the detail though.
 

Sven

Well-Known Member
Site Donor $
Messages
1,145
Reaction score
110
Location
Seattle
Rob, yes there is a lot of learning as you go, but it is not rocket science, and it is definitely not a project for the timid. On my site I show a fair amount of detail for removing the rear panels. The front fenders are similar: 1. at the vertical seam of the door jamb (by the hinges - you will need to remove the door first). 2. at the bottom corner of the window at the two narrow sections (remove lead to expose welds, etc). 3. the front top corner of the fender to the front valence is a butt joint. You can see/feel it from underneath (take out head light assembly). It is a bit tricky getting to the weld below the headlights at the very bottom of the front.

Attached are some pictures of the two angle pieces that connect the top of the fender to the inner fender. These are spot welded on both the vertical and bottom leg. Remove the paint and tar and the welds are generally easy to see. You can also see the front joint to valence on the "Body Re-assembly" section. If you buy the replacement panels first then that will help to figure out how things go together/come apart.


There are also some spot welds alongside the headlight access cover (forward of the fender rain gutter).
 

Attachments

  • LeftFenderTop1.jpg
    LeftFenderTop1.jpg
    72.8 KB · Views: 175
  • LeftFenderTop.jpg
    LeftFenderTop.jpg
    79.7 KB · Views: 176

Bwana

Well-Known Member
Messages
1,211
Reaction score
84
Location
Santa Fe, NM
Excellent. Getting better all the time. Any one have photos of the procedure? Or better, photos of the leaded area after the paint has been sanded off but before the fender is removed? Sven, what's your site?
 

Sven

Well-Known Member
Site Donor $
Messages
1,145
Reaction score
110
Location
Seattle
Site: http://www.larsenarchitect.com/BMW/Restoration.html

The front fender two leaded joints by the window look almost identical to the rear quarter panels (which are shown on the site). BTW, the rear panels are far more difficult to remove than the fronts. So if you start at the front then the learning curve will help with the rear panels. If it is just the bottoms of the rear panels that are rusted you can get replacement patch panels for the lower 25-30 cm of panel and save yourself much aggravation - depends on the condition of the upper panel areas. I took mine completely off to get access to the otherwise difficult-to-reach-places.
 

PaulinPa

Well-Known Member
Messages
528
Reaction score
14
Location
Bainbridge,Pa.
What tools do you need to remove fenders?Will a canister torch like you use to solder pipe joints get hot enough to melt lead?Is there a special drill bit to use to drill out spot welds?
 

Sven

Well-Known Member
Site Donor $
Messages
1,145
Reaction score
110
Location
Seattle
Yes, the typical plumbing torch gets plenty hot enough. You will need a wire brush to remove the molten lead. I had a fan going that was blowing the lead fumes away from me while doing this. There are special spot weld drill bits. They are essentially a brad point bit that cuts a flat bottom hole. I used a 6.5 mm one that was about 2 inches long. There are some shorter ones, but then the chuck on the drill would hit the adjacent metal panel. I actually used a drill bit extender in a couple of locations. Make sure to use cutting oil with the bit otherwise it will not last too long.

Another essential tool is the dremel with the flexible shaft using the 1-1/2 metal cutting disks (and some of the pointed grinding bits).
 
Top