E24 seats

readie

Well-Known Member
Messages
182
Reaction score
21
Location
kent, england
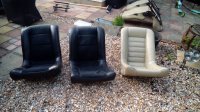
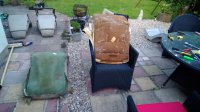
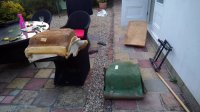
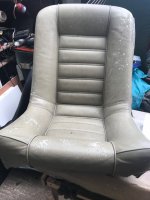
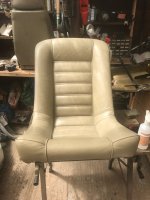
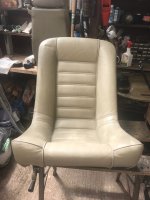
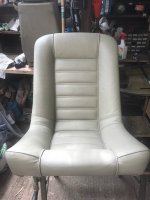
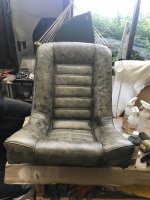
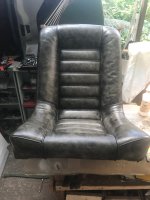
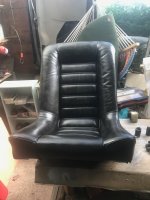
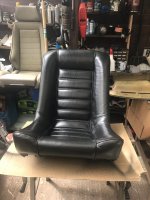
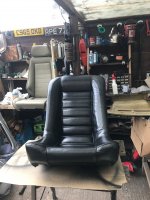
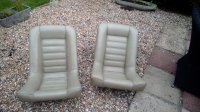
I managed to find a set of sports recaros from an e24 a couple of years ago before the car started to get stripped down.
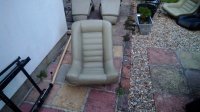
I had the driver side in and was using, but only a bodge job. Am now gonna try and do properly. This is how they are now.
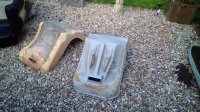
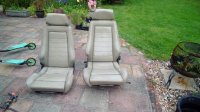
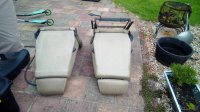
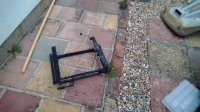
You can see the seat rails from the e9 attached to the driver seat. This is a simple bolt on bolt off and enables the fronts to be put in the e9.
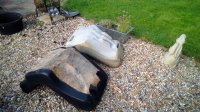
The seat rail on the floor on its own is the passenger side as unbolted from the e9 scheel seats.
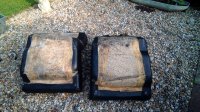
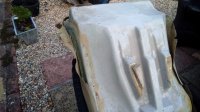
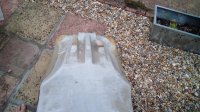
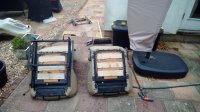
I understand the rears need a bit of work, either chopping the 'fillets' off the back or stripping both them and the e9 rears an just putting the e24 covers on the e9 seats. Not sure what I will do in this regard yet.
 

Attachments

  • IMG_20170528_1731272_rewind.jpg
    IMG_20170528_1731272_rewind.jpg
    1.1 MB · Views: 137
  • IMG_20170528_1733051_rewind.jpg
    IMG_20170528_1733051_rewind.jpg
    1.1 MB · Views: 135
  • IMG_20170528_1732303_rewind.jpg
    IMG_20170528_1732303_rewind.jpg
    1.2 MB · Views: 147
  • IMG_20170528_1731347_rewind.jpg
    IMG_20170528_1731347_rewind.jpg
    1.3 MB · Views: 145
  • IMG_20170528_1732142_rewind.jpg
    IMG_20170528_1732142_rewind.jpg
    1.3 MB · Views: 138
  • IMG_20170528_1733160_rewind.jpg
    IMG_20170528_1733160_rewind.jpg
    1 MB · Views: 137
Some more pictures, side by side rear seats showing differences
 

Attachments

  • IMG_20170528_1838500_rewind.jpg
    IMG_20170528_1838500_rewind.jpg
    1.7 MB · Views: 124
  • IMG_20170528_1838583_rewind.jpg
    IMG_20170528_1838583_rewind.jpg
    1.4 MB · Views: 132
  • IMG_20170528_1839295_rewind.jpg
    IMG_20170528_1839295_rewind.jpg
    1.4 MB · Views: 120
  • IMG_20170528_1841227_rewind.jpg
    IMG_20170528_1841227_rewind.jpg
    1.6 MB · Views: 116
Decided to try and swap the covers.
Not difficult.
Slowly ease the glue and rivets off the e9 seats,then glue and staples off the e24.
Remove each from 'clamshell' and swap over.
a bottle of wine down so will stop now!
 

Attachments

  • IMG_20170528_1949291_rewind.jpg
    IMG_20170528_1949291_rewind.jpg
    1 MB · Views: 123
  • IMG_20170528_2029129_rewind.jpg
    IMG_20170528_2029129_rewind.jpg
    1.2 MB · Views: 131
  • IMG_20170528_2029248_rewind.jpg
    IMG_20170528_2029248_rewind.jpg
    978.7 KB · Views: 147
  • IMG_20170528_2030280_rewind.jpg
    IMG_20170528_2030280_rewind.jpg
    1.7 MB · Views: 124
  • IMG_20170528_2030060_rewind.jpg
    IMG_20170528_2030060_rewind.jpg
    1.3 MB · Views: 125
  • IMG_20170528_2041580_rewind.jpg
    IMG_20170528_2041580_rewind.jpg
    1.2 MB · Views: 136
Excellent job. It has been said time and again that e24 seats fit but nobody has done a proper write up.
 
there was a write up a while back on modifying rear e24 seats to fit into an e9 coupe ... mainly it was cutting some material away to fit into the space properly. the fronts are known to fit as long as you remove the seat rails and use the aardvark brackets to mount the original sliders on.
 
I have a set already cut and will compare them to the stock seats once I get back to the shop tomorrow.


Sent from my iPhone using Tapatalk
 
yup, I saw that link viphoto, just that I am not to handy with a cutting tool and thought it may be easier to swap the clamshells rather than do a load of cutting, then I get the benefit of being able to use the e9 centre arm rest also.
Having said that, I am not yet finished as I now need to glue the covers and horse hair onto the clamshell.
Has anyone got any suggestions for super strong glue. I would normally use the brand 'evostick' impact adhesive. Whilst I have always been happy with the results does anyone have other suggestions ?
Once I have them all glued in place I will then recolour - black.....
further posts to follow...
 
If you have a dremel, it takes about 5 minutes to cut the clamshell to fit. It cuts through the plastic like a hot knife through butter. Messy job, and you would probably need to use the e24 armrest, but it's not hard. Two part epoxy would hold well, but you would need a good amount.
 
This is not hard. I followed BB73's notes a couple of years ago. It literally takes 5 mins with a dremel cutter. Remember, you can always cut more! If I can do it, you can. Once you do the first one, the second seat will literally take 2 minutes, if that. I did not use the E24 armrest and it looks fine.

Note that E24 seats fit fine width wise but they will leave a 2-3" gap behind the seat. For a more professional look, you will want to create a new backshelf which better follows the new seat contour.

That's right, forgot about the parcel shelf...
 
not quite finished but new colour now...
this is not quite the end, the sealant is still to go on and this will reduce the shine.
the process is quite simple...
 

Attachments

  • seats june a.JPG
    seats june a.JPG
    402.9 KB · Views: 115
  • seats june b.JPG
    seats june b.JPG
    486.1 KB · Views: 115
  • seats june c.JPG
    seats june c.JPG
    494.6 KB · Views: 126
  • seats june e.JPG
    seats june e.JPG
    429.3 KB · Views: 118
  • seats june f.JPG
    seats june f.JPG
    552.2 KB · Views: 109
  • seats june g.JPG
    seats june g.JPG
    493.9 KB · Views: 111
  • seats june h.JPG
    seats june h.JPG
    392.9 KB · Views: 111
  • seats june i.JPG
    seats june i.JPG
    528.4 KB · Views: 111
  • seats june j.JPG
    seats june j.JPG
    484.6 KB · Views: 112
  • seats june k.JPG
    seats june k.JPG
    717.5 KB · Views: 112
steps are as follows
a. just before cleaning with leather cleaner
b. after cleaning
c. after alcohol cleaning
e after solvent cleaning with scotchpad and wet and dry 800 paper
f. after first 'dab' coat
g after second 'dab' coat
h after first spray coat
I after second spray coat
j after third spray coat
k close up.

I will post a pic next week after sealant coat applied.
 
Sweet! I'm going to do this with my new seats also. Thanks for the walk through!
 
Back
Top