I'm very quickly moving up several grades from the newbie threads to expert restoration grade.
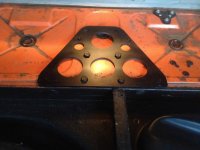
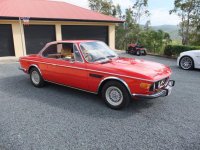
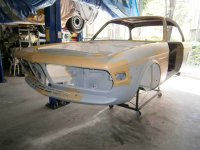
Three weeks ago I bought the Henna red CS auto shown below. Yesterday I bought the CSi manual shown in the second pic as a shell and parts. This is the "No rust" car that was for sale in the cars section recently with parts for a "museum standard restoration". A lot of the hard work has been done, the nasty stuff - stripping down, the increasing dismay and horror as you realize that your car doesn't have just a little rust, grinding, cutting out, NVH material removal, degreasing, blasting, painting and refinishing the thousand bits and pieces, etc etc and the shell has been primed and partially painted in Chamonix.
The seller has refurbished to new standard all of the subframes, polished the alloy, replated just about everything, has a kit that has new nuts, bolts, washers, screws etc for nearly everything on the car - it goes on and on. The engine is partially rebuilt with all new studs, balanced rods and pistons, ported fully refurbed head. I feel like I've won the lottery.
The really big thing for me is that I have jumped forward in time to the point where I would be if I had done all of this myself. A huge saving in time not to mention $$$$$$. Okay okay I know that I haven't been to school and paid my dues but hey, what would you do?
One challenge is that everything is in bits and if I didn't have the other CS, ( which though fairly clean is no where near the CSi ), as a reference it would be like a huge jigsaw puzzle without the picture on the front of the box. Another major challenge is moving all this stuff, there must be 100 tins, boxes and packets plus loose items to be packed and moved 150 klms.
So, there are a few minor mods I want to make including some chassis strengthening via gusseting in the engine bay, similar to what the racing CSL's have. A rear brace / battery box frame in the trunk ( we call it a boot in Australia ) and a few other minor fixes.
The seller has been a joy to deal with and is a real original thinker who also races his own built Bavaria. Thanks Dave.
Wish me luck but I don't think I'll need it.
Gazz
Attachments

Last edited: