M30b32 rebuild

Ezz

Well-Known Member
Site Donor
Messages
170
Reaction score
112
Location
Arizona
Hello,

This thread will be to share my first engine rebuild experience (m30b32). (Admin: Hopefully I am not creating too many threads. I am trying to isolate the topics)
My main goal is to learn from this experience and get some guidance along the way. Since this is a budget build, i will try to attempt to do most of it myself.

I will start with the cylinder head:

The good:
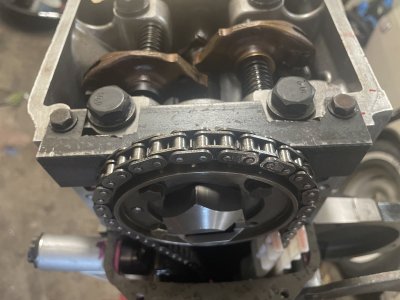
1. Camshaft lobes and journals are good no scoring/ridge
2. I pressure tested it and looks like no cracks! Later I will post pics of my pressure test setup.
3. All valves and seats are good. I think guides too but i will need to verify it again.

The bad:
1. It has a bow in the middle about 0.016”.
This bow causes the cam to turn more difficult when not bolted to the block. However, it was possible to turn by hand without a wrench (rockers removed)
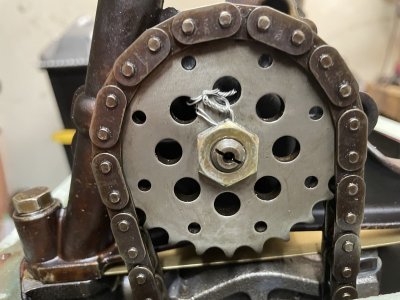
The rocker arms and cam were very easy to take out. I used an allen wrench (6mm i think) with a twist and pull motion and the rocker arms came right out. No hammering.

2. It will need to be resurfaced.

I took it to a machine shop (doesn’t really work with BMWs) but was recommended by a friend and has very good reviews.
the machinist said he could bolt it up to a plate with shims on both ends and heat cycle it overnight to straighten the head. Had anyone done this before? Any concerns about this method?
His price was $150 for straightening the head +$75 for resurface
Any advice is appreciated.

Thanks!
Ezz
 

Baikallackierung

Well-Known Member
Messages
129
Reaction score
57
Location
ME
I would be a bit concerned about that especially considering the price of another head should not be much more. Once the molecular structure of aluminum has been compromised, it does not simply "bounce back" like ferrous metals ( engineers feel free to chime in here). I do think the method could work, but there would be more risk after all of the work of rebuilding.
 
  • Like
Reactions: Ezz

Ezz

Well-Known Member
Site Donor
Messages
170
Reaction score
112
Location
Arizona
Repeated the pressure test today with better seals of coolant openings and it was holding pressure at 30 PSI. More pressure would break the seals so i left it at 30. I sprayed the head with soupy water to make sure and no bubbles at all.
1FD67406-3644-46B7-AA4A-37B270B72F4D.jpeg
64A9C33B-F633-4A9F-B264-1AD8CB68E465.jpeg
 

skk

Active Member
Site Donor
Messages
66
Reaction score
31
Location
Palo Alto, CA
Unwarping a head must be more art than science. Questions about reliability of method should be first put to the machinist who suggested them. You have a few questions:

Ask if your understanding is correct: that the unwarp MUST be accomplished first, because otherwise the resurface cut will
only make a flat bottom to a warped part, locking in the misalignment seen in the cam journals.

Will the cam journals still require line boring? Perhaps the cam can be test fit while the plate is on, and again after the heat is finished and the plate is off. That the cam spins fine when torqued to the block says it most likely will spin fine again, only
more so.

Does the bmw head alloy look similar in composition to other heads that have been successfully unwarped? The time they
take fly cutting tells them much about the inherent material properties.

Estimate the labor to completely remachine a head with cleaning, resurfacing, new guides and touched seats is around $1500, and getting another head sets you back to zero for inspection and work planning, why not stay the course? Mostly, ask the machinist any question you'd ask us non-machinists, and we'd love to hear the rationales.
 
Last edited:

Ezz

Well-Known Member
Site Donor
Messages
170
Reaction score
112
Location
Arizona
cam journals are not aligned and surfacing the bottom will leave the camshaft harder to spin but not too hard. No issues with the rocker shafts as I removed them with very little effort. The machinist did mention the possibility that the head will need new valve seats and guides.
I am reluctant to do it with this method due to the cost. Currently, looking into another method that could work. However, I am thinking of practicing this method on a junk b35 head that has some warpage before do it to the good cylinder head:
 
  • Like
Reactions: skk

Ezz

Well-Known Member
Site Donor
Messages
170
Reaction score
112
Location
Arizona
The method worked! The camshaft spins freely now.
The warpage is down to 0.005” from 0.016”
I used a tig torch to spot heat several places from the inside of the head.
Now to the machine to resurface for less than a $100.
 

Attachments

  • 891D7F69-1A3C-43FF-B471-A2E44AD67178.jpeg
    891D7F69-1A3C-43FF-B471-A2E44AD67178.jpeg
    411.8 KB · Views: 112
  • DBA2A487-561A-4DC9-9E69-882097CB54E3.jpeg
    DBA2A487-561A-4DC9-9E69-882097CB54E3.jpeg
    323.8 KB · Views: 98
  • 65DB2067-2C97-4B2B-8A58-AEE22F54C652.jpeg
    65DB2067-2C97-4B2B-8A58-AEE22F54C652.jpeg
    259.8 KB · Views: 106
  • Like
Reactions: skk

Ezz

Well-Known Member
Site Donor
Messages
170
Reaction score
112
Location
Arizona
Hello guys,
It has been some time since i got the head back from the machine shop.
Ended up taking 0.008”, but the depth dimples are still visible.
I have all the valves cleaned and ready for lapping.
However, the camshaft intake lobe for cylinder #1 is worn out (i did not notice at first) so i plan to use the b35 camshaft instead. Also plan to use the rocker arms and springs from that same b35 head. The b35 springs are longer (not sure if the b32 are worn out) and they are double springs per valve…
anyone know if there is any issue with this setup?
Any input is appreciated…
 

Attachments

  • 48678158-FFCC-463B-9E2B-5BD6E6CE7DD1.jpeg
    48678158-FFCC-463B-9E2B-5BD6E6CE7DD1.jpeg
    369.7 KB · Views: 111

Ezz

Well-Known Member
Site Donor
Messages
170
Reaction score
112
Location
Arizona
Bottom end and head are finally assembled.
Made a bracket out of an angle iron to hold the camshaft while torquing the cam nut with the head assembled to the block….
Notice something wrong though???
..

….
…..
……
…….
……..
Well i torqued the head bolts the first two stages (60 and 80 nm) but forgot to put on the oil sprayer bar!
Will be taking them off again soon.
 

Attachments

  • 28925A2D-F37C-4615-A4BF-B372B3FD38D9.jpeg
    28925A2D-F37C-4615-A4BF-B372B3FD38D9.jpeg
    244.2 KB · Views: 86
  • 538A85B7-960A-480D-AFE7-BAA55FE504ED.jpeg
    538A85B7-960A-480D-AFE7-BAA55FE504ED.jpeg
    321.7 KB · Views: 105
  • 8D6FB23C-8EE9-4822-9A44-5D0E41D39F6E.jpeg
    8D6FB23C-8EE9-4822-9A44-5D0E41D39F6E.jpeg
    270.7 KB · Views: 84

Ezz

Well-Known Member
Site Donor
Messages
170
Reaction score
112
Location
Arizona
Also, i did clay the valve to piston interference since I am using b35 camshaft (higher lift?) and have about 1.85mm clearance to the intake and 3.4mm to the exhaust. From what I read that is enough clearance. We’ll see i guess
 

Ezz

Well-Known Member
Site Donor
Messages
170
Reaction score
112
Location
Arizona
Finally, the car is on the road with the b32 engine rebuilt.
Still a long way to a road worthy vehicle, but it is coming a long. I think the last time this car was on the road was in the late 80s….

IMG_5698.jpeg

IMG_5695.jpeg
 

Ezz

Well-Known Member
Site Donor
Messages
170
Reaction score
112
Location
Arizona
HELP NEEDED!
Hello everyone, I made the mistake of replacing the thermostat housing without an actual/pressing need to do that. The replacement housing is from an e34 with the two black and blue temperature sensors.
I tried to unscrew the brass plug between the two sensors to add the correct E3 temp. sensor, but I think I bent it. I ran the engine up to the operating temperature, but luckily there was no leaks.
Did anyone run into this problem before? any idea on how to take that stuck (really stuck) brass plug out?
The existing blue and black sensors have different internal resistance than the E3's sensor and the reading would be incorrect on the instrument panel gauge.
 

Attachments

  • IMG_6332.jpeg
    IMG_6332.jpeg
    271.6 KB · Views: 50
Last edited:

Barry.b

Well-Known Member
Messages
627
Reaction score
439
Location
Ireland
Repeated the pressure test today with better seals of coolant openings and it was holding pressure at 30 PSI. More pressure would break the seals so i left it at 30. I sprayed the head with soupy water to make sure and no bubbles at all. View attachment 157839View attachment 157840
Hi there
I am thinking of pressure testing my cylinder head coolant passages also.
How did you keep those 2 box irons in place ?
Are they bolted though the head or did you use clamps or something
I might be purchasing a new head anyway, but I’d still like to pressure test my own one.
Thanks
 

Ezz

Well-Known Member
Site Donor
Messages
170
Reaction score
112
Location
Arizona
IMG_3501.jpeg
Hi Barry,

I drilled and tapped those 2”x2”x 0.25” tubes and used two head bolts per tube to keep them in place. I think i tired clamping them in place, but it didn’t work for me.
I used a junk head to test fit my setup as I was careful not to damage this one.
 

Barry.b

Well-Known Member
Messages
627
Reaction score
439
Location
Ireland
View attachment 177327Hi Barry,

I drilled and tapped those 2”x2”x 0.25” tubes and used two head bolts per tube to keep them in place. I think i tired clamping them in place, but it didn’t work for me.
I used a junk head to test fit my setup as I was careful not to damage this one.
Okay
Can you remember what size are the threaded holes
Ie are they m12 x 1.25 or something ??
 

rblongboarder

Well-Known Member
Messages
104
Reaction score
43
Location
Southern California
I noticed your vehicle has the chrome wheel well trim, but does not have the chrome trim that runs along the body line. The previous owner
of my E3/2800 installed aftermarket trim along the side and it looks awful; I plan to remove it and seal up all the holes.

It was really helpful to look at your vehicle photos and visualize what mine will look like once I tear that aftermarket junk off.
 
  • Like
Reactions: Ezz
Top