mwds
Member
Hi All,
Yes, this has been covered before. I had my switch returning to the off position each time it was depressed. The switch is NLA and only some are lucky to hold spares. So, the rest of us have to fix them. Here is how I got mine to work.
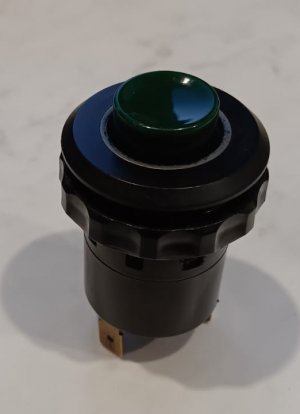
Firstly, this would relate to all e9, e3 (and similar) round switches (see Pic 1). I would suggest that the rear heated window switch (amber - 61 31 1353 590) is the same except for the coloured lens / button. This mechanism would also be the same for the hazard switch. The switch comes apart into the following items;
* The base body where the connectors are
* The top body
* The lens / bulb / switch slider
* The main spring between the switch slider and the base
(I did not list the retaining nut and other stuff not associated with the fix)
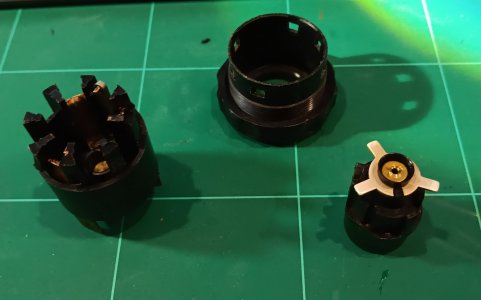
The first thing is to carefully separate the base from the top. This is done by depressing the 6 tabs that lock into the top (easier said than done). I slightly deformed two adjoining tabs with a hobby knife so as to get a little movement between the two halves. Using a very small flat bladed screwdriver, I managed to get enough movement that the two halves separated (see Pic 2 - spring not shown).
Next, inspect everything for signs of dirt, etc. The top does nothing except retain the assembly, so once cleaned, place it aside.
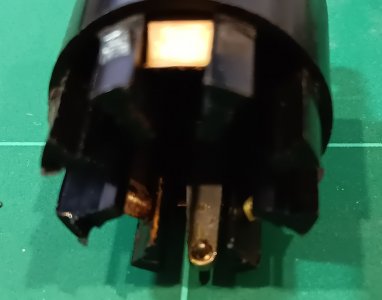
The base (connector half) has a hinged plate (finger) with a pin that follows a set of grooves in the slider. This should be inspected and cleaned, then lightly lubricated at the base and outer face (where it rubs on the base) with a small amount of sewing machine oil. The rivet at its base is the pivot point. Ensure it moves freely without being sloppy (see Pic 3).
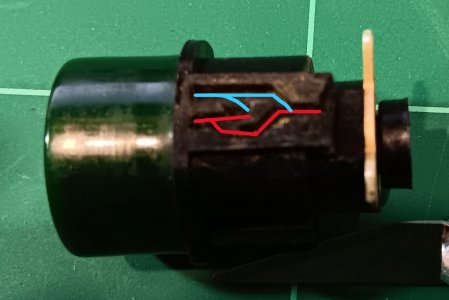
Now for the important part; The switch slider (see Pic 4) has a groove in it for the pin previously mentioned to following in. This groove may very well be contaminated with old grease, etc. Use IPA (sparingly) with a very small flat bladed screwdriver to clean all the surfaces without scoring or damaging them. Take time and care during this process. Wash excess dirt with more IPA and blow it off with compressed air.
The switch operation is simple (see Pic 5). The red path is the Off to On movement and the blue path is the On to Off movement. where the two paths meet at the lens end there is a little rest allowing the switch to stay On until depressed again. There is probable a building up of crap here causing the malfunction.
Temporarily install the spring and slider into the base and test the action. You will see how simple the action is. If you're happy with it, reassemble the switch, being careful to align the base and top correctly by lining up the tabs with the holes.
I hope this works for you. These switches will work for thousands of applications and a mere 50+ years is not even close to the working life of the switch. Enjoy...


