Happy Friday!
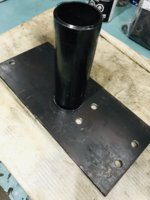
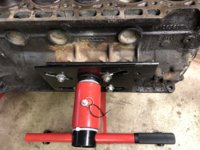
I was wondering how I'd change the rear engine seal (easily) until I saw this post on Instagram and thought 'I can make one of those!"
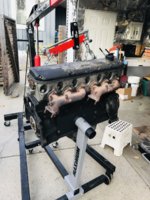
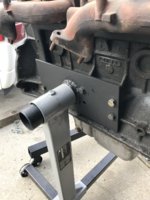
So far so good... even 'bounced' as a stress test.
I think I should make a Resto forum. Or just include a link to a shareable Google pictures folder.
Regards,
Bill
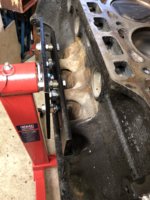
I was wondering how I'd change the rear engine seal (easily) until I saw this post on Instagram and thought 'I can make one of those!"
So far so good... even 'bounced' as a stress test.
I think I should make a Resto forum. Or just include a link to a shareable Google pictures folder.
Regards,
Bill