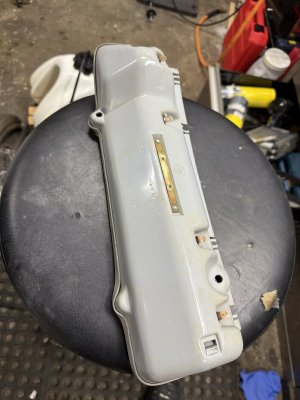
This part has sat on my desk for ages, but I have been refinishing dirt bike plastics with pretty good results, so I thought I'd put a half hour into this. I used 3M foam wet sanding pads. Fine, Ultra Fine and Superfine, then polished it with Mother's mag polish on a buffer with a foam pad held in a vise. . I could make them better , but that also risks getting a copper bulb terminal snagged in the buffer. They looked pretty gross before.
You are using an out of date browser. It may not display this or other websites correctly.
You should upgrade or use an alternative browser.
You should upgrade or use an alternative browser.
Taillight housing polish
- Thread starter Nicad
- Start date
looks pretty darn good. knowing what these things tend to look like, i think you have done an amazing job. could be a growing cottage industry for you ... although i am sure there is way too many labor hours to make it a viable concern
Looks very good. These things take a beating when a car is really used.
I am amazed by how well the plastic react to sanding; often its smudges due to the heat being developed, but i guess here the plastic has become brittle enough to allow it to be sanded.
Buffing must be a tedious job, I'd be afraid to also snag and rip off the 8 little pins that are on he bottom to locate the wiring.
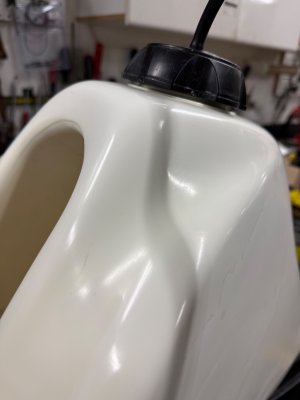
I'd say that took 1/2 hour start to finish. The buffing took about 5 minutes of dabbing the Mother's polish on and dropping it on the buffer held in a vise set to lowest speed. . I used a cheap foam pad. I'm a total newby with buffers and would probably not take one to a car until I had a lot more experience. I bought the buffer to keep a faded boat's gelcoat looking decent. Using this approach on a dirt bike plastic gas tank (1998 Honda XR400R) worked nicely.. That required sanding with 180, then wet sanding in stages up to 1000, followed by buffing with the Mother's polish. On the next sunny day, I will coat it with a hair stylist product (40 volume cream developer), wrap it in cellophane and leave it in the Sun to bring back the White color it is supposed to be. Turning yelowed plastic white might have some car restoration crossover. I'll be interested to see how that works.looks pretty darn good. knowing what these things tend to look like, i think you have done an amazing job. could be a growing cottage industry for you ... although i am sure there is way too many labor hours to make it a viable concern
Attachments
Last edited:
ScottAndrews
Well-Known Member
Interesting idea. Let us know if it works! There are quite a few plastic parts on these cars that yellow with age.. And, while still functional, look like crap..On the next sunny day, I will coat it with a hair stylist product (40 volume cream developer), wrap it in cellophane and leave it in the Sun to bring back the White color it is supposed to be. Turning yelowed plastic white might have some car restoration crossover. I'll be interested to see how that works.
I'm only trying to get the bike gas tank whiter. Today it is sunny but cool, so the results of my experiment should be ready by sundown.@Nicad; I don't think they were ever white. They are grey, a tone not much different from the floor boards. Still, it may take the yellowing out of it and produce a more uniform / clear grey?
Mo Brighta
Well-Known Member
Whoa, very nice result! I have a (much less refined) technique that I use when I restore and upgrade lights, but this is a darn sight
better! They look almost too good... We should talk.
I can suggest a cure for the 'snagging on the copper terminal' issue, and would stay clear of the two-fingered wire retaining doo-dads by the wiring slots. These are the first victims of tail light removal / installation.
Andy
better! They look almost too good... We should talk.
I can suggest a cure for the 'snagging on the copper terminal' issue, and would stay clear of the two-fingered wire retaining doo-dads by the wiring slots. These are the first victims of tail light removal / installation.
Andy