I've read several post where people mention applying seam sealer prior to painting. I wanted to double check the critical locations where this should be done in the engine bay area.
So far I am thinking:
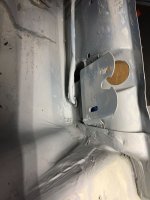
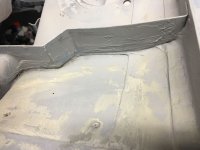
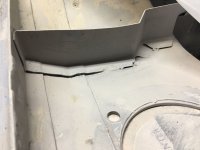
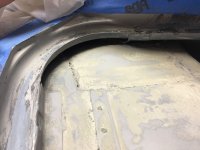
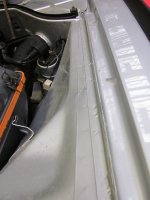
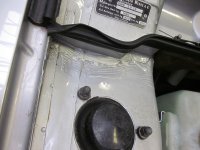
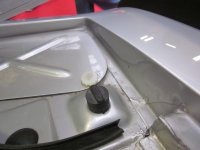
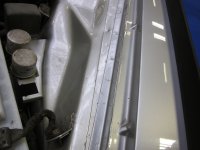
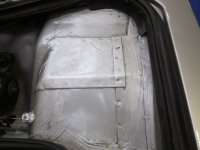
- Where the upper part of the firewall is welded to the fender and the heater fan area. (First 3 pics)
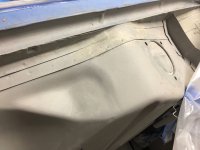
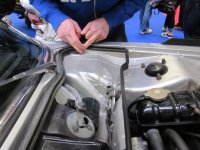
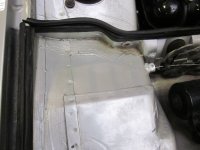
- All along the flat horizontal area where the fender lip goes over the inner fender. (Fourth pic)
- In the two far left and right corners flat area near the A pillars. There is a scary looking cavity there which looks to be a perfect water trap. I have seen a piece of rubber that seems to make a fairly weak barrier to keep water from entering that area but I would think water can sneak in there from either side of that rubber. The tricky part would be to be able to push the seam sealer deep enough since it is only about a centimeter or so high but more like 4 or 5 cm deep. (Last pic.)
Does that make sense?
Here is what I am talking about:
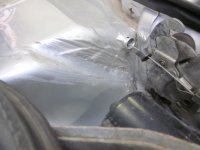
So far I am thinking:
- Where the upper part of the firewall is welded to the fender and the heater fan area. (First 3 pics)
- All along the flat horizontal area where the fender lip goes over the inner fender. (Fourth pic)
- In the two far left and right corners flat area near the A pillars. There is a scary looking cavity there which looks to be a perfect water trap. I have seen a piece of rubber that seems to make a fairly weak barrier to keep water from entering that area but I would think water can sneak in there from either side of that rubber. The tricky part would be to be able to push the seam sealer deep enough since it is only about a centimeter or so high but more like 4 or 5 cm deep. (Last pic.)
Does that make sense?
Here is what I am talking about: