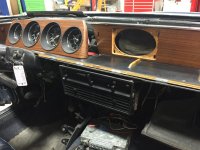
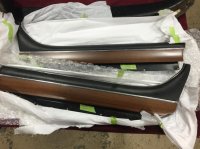
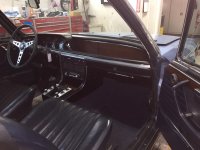
wood trim renovating

readie

Well-Known Member
Messages
182
Reaction score
21
Location
kent, england
Hi all. The clear lacquer / varnish has cracked and peeled in places so wanted to remove it before I revarnish.

Is it ok to use nitromors or similar paint stripper to take of the varnish ?
Alternatively any other suggestions?
 
(Cough cough :) ). Before you do anything, search this message board for professional refurbishing options. There was a recent thread that just rolled off of the top of this message board that discussed the two major options for pro refinishing. As you know, the panels are a wood veneer and over 40+ years or wear and tear, stripping the finish with even the most gentle approach may fail. All that after spending hours and hours getting the wood pieces extricated from the Bavarian jaws of death.

Of course if you are a talented woodworker, you might get a good result. My limit was refinishing the shift knob.
 

Attachments

  • IMG_1488.jpg
    IMG_1488.jpg
    93.2 KB · Views: 262
  • IMG_1489.jpg
    IMG_1489.jpg
    91.2 KB · Views: 244
  • IMG_1588.jpg
    IMG_1588.jpg
    87.7 KB · Views: 251
There are a few of us that have done this. Preface by saying I have been doing wood refinishing for years. I used Bix stripper and it took a while, the lacquer is quite tough and hard....hardness is one reason it peels off in sheets or chips since it has zero tolerance for expansion and contraction. Stripper and 0 steel wool and follow with 4-0 steel wool. The actual laminate stayed in place when I did it this way.
 
Either go super professional and get a great finish, or DIY job. I did mine, blast up and take I look I am just up the road in Essex.
PM me if you are interested.
 
my thoughts depend on what the condition of the veneer and sub-strait are. if the veneer is not flaking and is not cracked (no water has caused any delamination), you can either sand or chemically remove the lacquer ... but be careful of not going too deep. if there is delamination in the sub-strait, i think replacing the veneer becomes more important. replacing the veneer requires some woodworking experience / skill. the material costs are not great - probably $100 to 125 (veneer, glue + finish), if you have the basic tools and clamps. the labor aspects is where the cost is, but if you have to buy all of the other tools such as vacuum bag or paint sprayer ... it will be much more cost effective to send your cores to Bela.
 
It's not as difficult as you think, especially with help from the web. My issue was a decomposed end to the curved dashboard piece which I rebuilt using a template from the other side. A vacuum bag is essential. The only really tricky bit was getting a fit for the veneer on the compound curves on the wooden rail. The veneer cracks and under vacuum splits and overlaps. My solution (probably repeating myself here) was the minimise this, sand down and then grind down some veneer material to make a powder to mix with clear substrate and use it as a filler. Once finished, it is difficult to see where this was.

I wanted to learn from doing it rather than just send it off but thats because I had the time. Its in the car but needs a bit of adjustment which on a very long list of things to do.
 
this is not that hard to do i dont why it such a big deal
just remove the (E) w/ a chisel fill the holidays ., sand
get the vaneer , soak it in water far a bit
add wood glue let dry overnite
then with a towel iron it on with a steam iron
will go around all curves and rounds without cracking ive done mine twice now and will do the right door again as it chipped
 
How about you show us some pics of your dash?
I just finished restoring the entire dash of my CSL.
If you need to replace the veneer than probably go professional. If you are only 'restoring' then you can get excellent results via the DIY approach provided you tackle it the right way.
 
this is not that hard to do i dont why it such a big deal
just remove the (E) w/ a chisel fill the holidays ., sand
get the vaneer , soak it in water far a bit
add wood glue let dry overnite
then with a towel iron it on with a steam iron
will go around all curves and rounds without cracking ive done mine twice now and will do the right door again as it chipped

I wish I had known this when I was doing mine. It just makes more sense than doing it dry.
 
Back
Top