What did you do to your E9 today?

boonies

Boonies
Site Donor $$
Messages
1,144
Reaction score
817
Location
US - Philadelphia suburbs
Spent some time in the garage, reorganization and adding some power to a wall where I have moved the zinc plating set-up. I filtered the zinc solution and was able to get some very satisfying results from plating and yellow chromate. The parts shown are a few bits that I removed from the engine compartment earlier this year, knowing that they would go back in once the winter engine bay project is finished.


Yesterday @CSteve set up a well attended meet-up and scenic drive along the Delaware river in New Jersey and Pennsylvania. The weather was perfect with the fall foliage looking great!

IMG_5941.JPG
Road Dogs 10282023 - 3.JPG
Road Dogs 10282023 -1.JPG
 

Johan_CS2800

Active Member
Site Donor
Messages
72
Reaction score
132
Location
Antwerp Belgium
I've never seen that technique - are you using the alan keys to wedge and turning to break the piston free? How do you pull upward on the piston with this setup?
I saw a guy on YouTube that used this technique. The (w)edges of the alan keys seize in the piston when you turn. From then on you just keep on turning with a slightly upward force. Slowly the piston will come out. I removed all eight pistons of the front calipers like that.
 

Stevehose

Well-Known Member
Site Donor $$
Messages
13,009
Reaction score
5,681
Location
Sarasota, FL
Waiting for parts before the last push to finish my engine project so I disassembled and refreshed the horns from this:

IMG_4281.jpeg


To this:

IMG_4344.jpeg


Finished up my early E12/E24 wiper motor rebuild and E9/E3 plug conversion (DIY tutorial coming for this). As delivered:

IMG_4285.jpeg


Cleaned, painted, regreased and rewired:

IMG_4365.jpeg


Time on my hands:

IMG_4342.jpeg


IMG_4356.jpeg
 

eriknetherlands

Moderator
Site Donor
Messages
2,773
Reaction score
2,007
Location
Netherlands, Eindhoven area
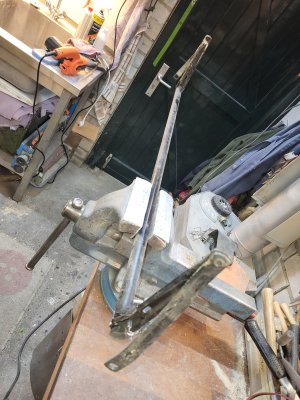
Reviewed what's salvageable on my hood torsion mechanism....

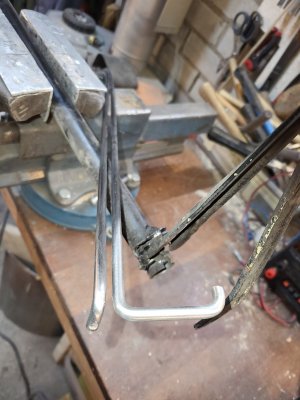
Disassembled the system from the car, in the upright position there is no tension on the system.

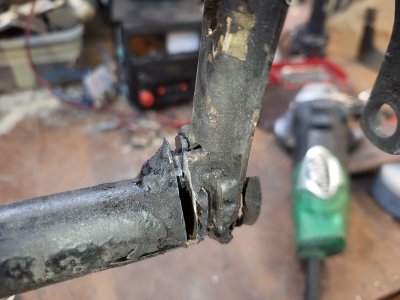
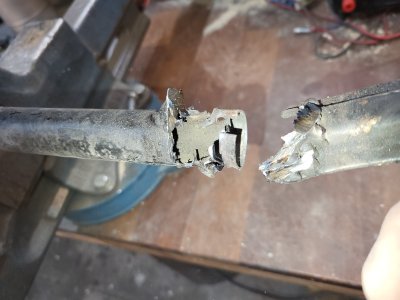
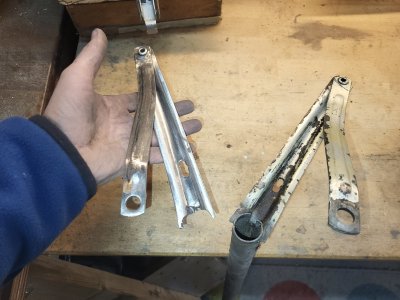
- Chopped 1 of the welded and broken again arm. Cleaned it to see what I had to work with; it's not missing much, but has a tear in the arm itself. I may choose to strengthen the arms as well. I left the other arm still attached to the tube, so i can copy the exact placement onto a new, thicker tube.
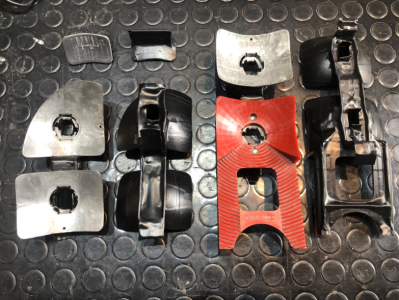
- Cleaned the bracket that holds the soft metal block to the hood. It was (unintentionally?) touched with an angle grinder and welded upon. removing the corroded remains left quite a hole to patch a new piece of 2,5 mm thick steel in.
- cleaned the torsion twist rods. They have not suffered anything over the past 50 years. Will have them electrolytically zinc treated before 2k painting them black (they are originally black from factory) .

Ordered a new 1062x26x22 mm steel tube. I hope to weld the arms to it, and have it re-zinced as well.

One open question to the gruppe: does anyone have experience with setting placing a new rivet like the ones used in the hinge of the arms?
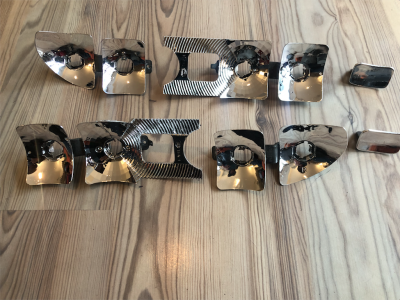
The hinge point is made with a rivet, the two arm sections, and a ring between the two arms.
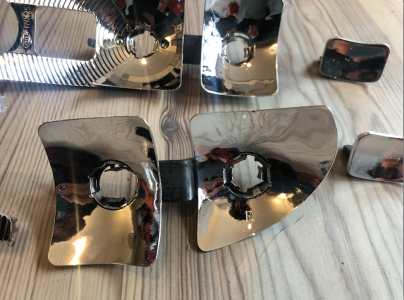
As Ii would like to re-zinc the system, I think the inside surfaces of the hinge , the rivet and the ring do not coated very well with Zinc due to the electric fields being very weak around these narrow openings. So one option is to drill out the hinge, and place a new rivet.

But I've never seen anyone do that at home - does it needs special equipment to press it to give it it's nice, round head shape? I guess one would also have to have the rivet custom made.
 

Attachments

  • 20231107_121649.jpg
    20231107_121649.jpg
    386.9 KB · Views: 72
  • 20231107_121657.jpg
    20231107_121657.jpg
    249.8 KB · Views: 60
  • 20231107_121854.jpg
    20231107_121854.jpg
    218.9 KB · Views: 54
  • 20231107_131747.jpg
    20231107_131747.jpg
    294.8 KB · Views: 55
  • 20231107_132238.jpg
    20231107_132238.jpg
    397.7 KB · Views: 60
  • 20231107_121745.jpg
    20231107_121745.jpg
    229.9 KB · Views: 84
Last edited:

alprada70

http://www.oilsdesigngroup.com/
Site Donor $
Messages
1,011
Reaction score
697
Location
Bogota, Colombia
"chrome" taillight reflectors
 

Attachments

  • Captura de pantalla 2023-11-08 a la(s) 8.57.11 a. m..png
    Captura de pantalla 2023-11-08 a la(s) 8.57.11 a. m..png
    914 KB · Views: 77
  • Captura de pantalla 2023-11-08 a la(s) 8.51.57 a. m..png
    Captura de pantalla 2023-11-08 a la(s) 8.51.57 a. m..png
    1.3 MB · Views: 91
  • Captura de pantalla 2023-11-08 a la(s) 8.52.18 a. m..png
    Captura de pantalla 2023-11-08 a la(s) 8.52.18 a. m..png
    1.2 MB · Views: 82

eriknetherlands

Moderator
Site Donor
Messages
2,773
Reaction score
2,007
Location
Netherlands, Eindhoven area
@alprada70 ; the reflectors look very nice. Will make a big difference for traffic behind you. It may just even save you having someone plough into the back.
Perhaps your insurance rates may come down...?

Question; what technique did you use for the reflective layer?
 

alprada70

http://www.oilsdesigngroup.com/
Site Donor $
Messages
1,011
Reaction score
697
Location
Bogota, Colombia
Erik, Insurance company don't take it as an improvement here…
They call the process metallic, and I know they use a mold like powder cote...
 

Barry.b

Well-Known Member
Messages
626
Reaction score
439
Location
Ireland
I made a 3D-model for a rotisserie. Don't know whether I'm ever gonna built it. It's probably too much for a one time restoration. But if anyone is interested in the drawing-file, let me know!
View attachment 171449
It looks really good
Thankfully I have all of my weld repairs finished so I don’t actually need one now.
Did you have to make a 3d model of the e9 also ?
 
Last edited:
Top