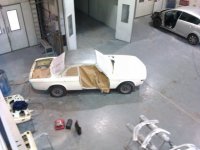
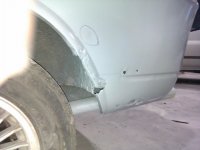
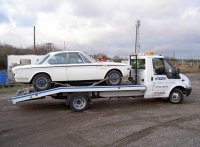
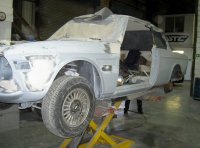
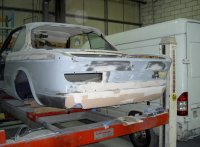
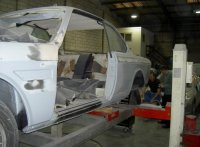
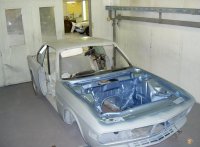
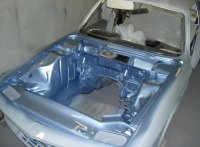
Here she is getting ready for respray. Doors rotten with much filler - need new skins and few other spots need attention but lucky as overall very solid
You are using an out of date browser. It may not display this or other websites correctly.
You should upgrade or use an alternative browser.
You should upgrade or use an alternative browser.
72 3.0 csi resto
- Thread starter Beemer70
- Start date

e9coupe
Active Member
nice any cut and weld???
Oh dear - bad news now...
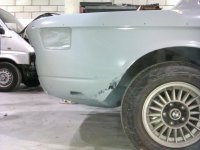
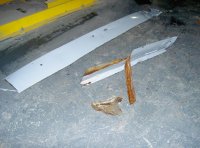
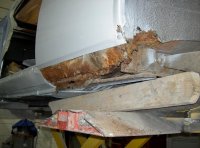
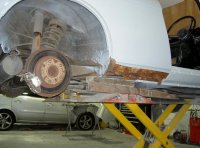
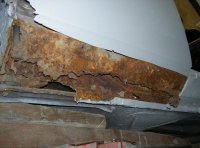
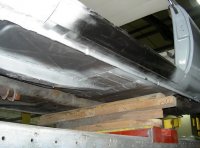
A lot of time and trouble has been taken to hide corrosion instead of cutting it out and fitting fresh metal. New front outer seals have been welded over rotten inner sills. The lower box section of the chassis at the rear had been covered with filler and undersealed then painted to match the factory finish, this now means the rear axle and suspension will have to come out and new floor/box sections welded in. This only came to light as the panel beater was starting to take the paint back to the metal, to repair the lower wheel arch.
When the grinder was used to find fresh metal to weld the repair section in, what looked like factory stone chip paint had hidden what was a very big bodge. The trouble is BMW on this model fitted a black overseal which carried the lower chrome rails.
Attachments

Discouraging . . . but that how it goes with these old cars. The half-assed "repairs" of previous owners never cease to amaze. My car was not as bad as that but close. I estimate these two areas (rockers, forward of the rear wheels) consumed perhaps 30% of my total metal restoration time. I didn't have the resources to purchase the replacement sheet metal so I ended up making my own panels for this multi-layer repair. Just figuring out what the hell I was looking at (and what shape the new panel should be) was a challenge given all the overlapping bits of corroded steel!
That said, once you have addressed these areas you will be filled with the satisfaction of owning a car with repairs done correctly. For me, this was extremely gratifying!
That said, once you have addressed these areas you will be filled with the satisfaction of owning a car with repairs done correctly. For me, this was extremely gratifying!
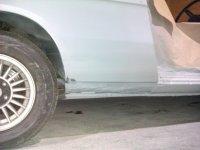
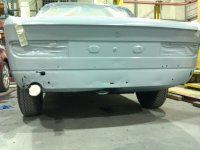
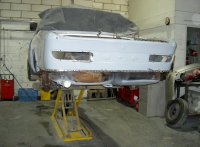
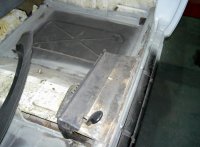
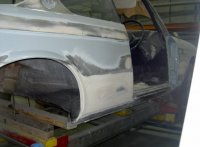
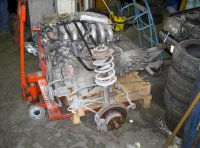
Axle and suspension all removed to weld up corners of floor. New floor section fitted (first stage).Arch, offside sill and lower rear panels have been repaired. Inside floor section (n/s), sealed and new outer sill.
Attachments

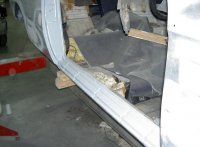
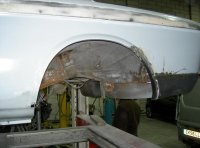
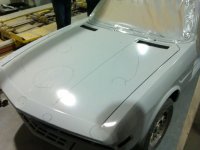
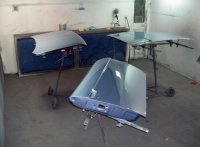
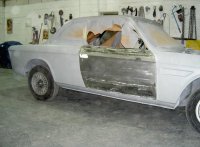
Slowly but surely! Rear lower panel done - light layer of filler as is a repair panel. Inner rear sills all done/floor panels. Door skins are next - then ready for re-spray.
Attachments
Last edited:
revitoff1o
Member
Looks like it's coming together nicely. It'll be nice to know no rust is going to come creeping through in the rocker area.
You are working fast - will be nice when done.
Does it need much mechanically?
Does it need much mechanically?
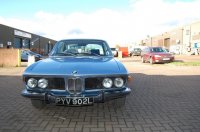
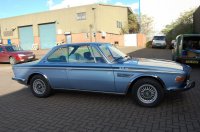
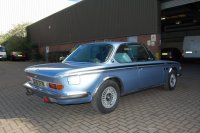
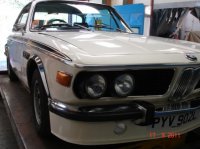
Well done - great job! The 16" wheels will really set it off. Not sure the side decals look right still but each to their own. Is it mechanically ok?
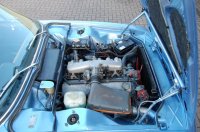
Mechanically all good & drives very well - everything works except the fuel gauge....
'Go faster' stripes I think were only originally on CSL's? - not sure - just like the look - but decided not to put back front valance as everyone else said was butt-ugly...
'Go faster' stripes I think were only originally on CSL's? - not sure - just like the look - but decided not to put back front valance as everyone else said was butt-ugly...
Nice work"
dj_efk
Well-Known Member
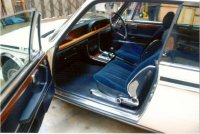
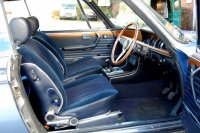
Smashing effort! Love the colour and the interior. Get it properly hot wax injected so it stays like that!
Congratulations on saving this one. It looks great. Hope you can keep those receipts hidden from the boss.