'73 3.0cs 30 year restoration

Yes, the rubber breaks down or the thackery washers loosen (if using those). Or if not installed correctly will leak right away. I've used regular gaskets for 8 years with no issues, and no leaks.

So it is a soft mount, which followed the strong recommendation from Korman. Is the air leak something that happens over time as the rubber breaks down, or something people see immediately?
 
After a multi-year slow down and just lack of posting updates, may as well get this back up to date. Although completed some time ago, completed the engine and dropped in the car, along with the subframes that were restored previously. More than 2 years past after these pictures were taken before there was any real progress, basically just getting the point that the fuel system was in, and the engine could be started.
 

Attachments

  • IMG_0620.jpeg
    IMG_0620.jpeg
    396.1 KB · Views: 311
  • IMG_0622.jpeg
    IMG_0622.jpeg
    415.5 KB · Views: 271
  • IMG_0623.jpeg
    IMG_0623.jpeg
    374.7 KB · Views: 236
  • IMG_0603.jpeg
    IMG_0603.jpeg
    461.4 KB · Views: 275
After these years of almost no progress, I finally made the call to take the project home and do it myself, reuniting with the ‘74. Since then:

  • Completely removed the suspension, axles and brakes. Installed all new hardware
  • Rebuilt the axles
  • Installed new calipers, rotors, pads
  • Installed and rebuilt all the parking brake assembly
  • Installed the Getrag 265 5 speed conversion with 2002s Only new shift platform
 

Attachments

  • IMG_3627.jpeg
    IMG_3627.jpeg
    309.5 KB · Views: 253
  • IMG_3628.jpeg
    IMG_3628.jpeg
    461.2 KB · Views: 237
  • IMG_3744.jpg
    IMG_3744.jpg
    399.6 KB · Views: 230
Last edited:
More Pics
 

Attachments

  • IMG_3718.jpg
    IMG_3718.jpg
    187.3 KB · Views: 218
  • IMG_3727.jpg
    IMG_3727.jpg
    199.3 KB · Views: 219
  • IMG_3737.jpg
    IMG_3737.jpg
    255.5 KB · Views: 209
  • IMG_3765.jpg
    IMG_3765.jpg
    318.1 KB · Views: 206
  • IMG_3805.jpg
    IMG_3805.jpg
    253.8 KB · Views: 207
  • IMG_3807.jpg
    IMG_3807.jpg
    264.5 KB · Views: 200
  • IMG_3810.jpg
    IMG_3810.jpg
    209.6 KB · Views: 200
  • IMG_3813.jpg
    IMG_3813.jpg
    233.3 KB · Views: 192
  • IMG_4006.jpg
    IMG_4006.jpg
    299.3 KB · Views: 197
  • IMG_4018.jpg
    IMG_4018.jpg
    389.5 KB · Views: 206
  • IMG_4017.jpg
    IMG_4017.jpg
    406.6 KB · Views: 207
  • IMG_4015.jpg
    IMG_4015.jpg
    303.7 KB · Views: 218
  • IMG_4014.jpg
    IMG_4014.jpg
    321.8 KB · Views: 210
  • IMG_4013.jpg
    IMG_4013.jpg
    429 KB · Views: 221
  • IMG_4009.jpg
    IMG_4009.jpg
    201.9 KB · Views: 201
  • IMG_4008.jpg
    IMG_4008.jpg
    265.3 KB · Views: 210
  • IMG_4150.jpg
    IMG_4150.jpg
    387.7 KB · Views: 199
  • IMG_4152.jpg
    IMG_4152.jpg
    308.1 KB · Views: 198
  • IMG_4144.jpg
    IMG_4144.jpg
    180.1 KB · Views: 198
  • IMG_4145.jpg
    IMG_4145.jpg
    430.8 KB · Views: 201
  • IMG_4151.jpg
    IMG_4151.jpg
    332 KB · Views: 182
  • IMG_4143.jpg
    IMG_4143.jpg
    274.7 KB · Views: 201
  • IMG_4148.jpeg
    IMG_4148.jpeg
    312.4 KB · Views: 172
  • IMG_3744.jpeg
    IMG_3744.jpeg
    495.5 KB · Views: 183
  • IMG_6277.jpeg
    IMG_6277.jpeg
    689.8 KB · Views: 4
Next project - interior insulation. Mostly through the first layer of 2mm butyl insulation. Need to finish up on the tunnel and read. Then next step is a layer of butyl-backed hybrid insulation with closed cell foam on the firewall, roof, tunnel, and trunk divider
 

Attachments

  • IMG_4429.jpeg
    IMG_4429.jpeg
    618.9 KB · Views: 197
  • IMG_4425.jpeg
    IMG_4425.jpeg
    669.7 KB · Views: 187
  • IMG_4309.jpeg
    IMG_4309.jpeg
    392.3 KB · Views: 185
  • IMG_4310.jpeg
    IMG_4310.jpeg
    565.5 KB · Views: 202
  • IMG_4335.jpeg
    IMG_4335.jpeg
    541.2 KB · Views: 179
  • IMG_4337.jpeg
    IMG_4337.jpeg
    577.2 KB · Views: 175
Just about finished with the insulation. Took quite a bit more time than expected but, very happy with the end result.
 

Attachments

  • IMG_4451.jpeg
    IMG_4451.jpeg
    640.9 KB · Views: 172
  • IMG_4445.jpeg
    IMG_4445.jpeg
    476.3 KB · Views: 176
  • IMG_4449.jpeg
    IMG_4449.jpeg
    564.6 KB · Views: 175
  • IMG_4446.jpeg
    IMG_4446.jpeg
    490.2 KB · Views: 172
  • IMG_4437.jpeg
    IMG_4437.jpeg
    356.8 KB · Views: 173
  • IMG_4438.jpeg
    IMG_4438.jpeg
    355 KB · Views: 193
  • Like
Reactions: Dlc
Under the category of projects I wish I did not start, also restored the steering column. After loads of research on here for different method the fix chips or wear spots, I decided to completely sand down and refinish. Future reference, I do not recommend this - if you can just touch up, go that route as it is a ton of work.

That said, I tried about 3 different methods and about 5 different paints to recreate texture. My theory was to use a textured paint and sand a little between layers to give it the smoothed splatter texture. Experiments with wrinkle, generic textured, hammered and combinations thereof did not work at all. Eventually I found Dupli-color DM 109 splatter trunk spray. It is very strong and adhesive, and sands/paints well. The results photographed best on my test strip, but you can see the process. Ultimately I could have gone a bit thicker, but in person, it came out really well with a satin black top coat
 

Attachments

  • IMG_4079.jpeg
    IMG_4079.jpeg
    78.9 KB · Views: 184
  • IMG_4081.jpeg
    IMG_4081.jpeg
    86.5 KB · Views: 171
  • IMG_4083.jpeg
    IMG_4083.jpeg
    115.6 KB · Views: 176
  • IMG_4084.jpeg
    IMG_4084.jpeg
    139.9 KB · Views: 167
  • IMG_4085.jpeg
    IMG_4085.jpeg
    119.4 KB · Views: 174
  • IMG_4099.jpeg
    IMG_4099.jpeg
    98.3 KB · Views: 206
Have you seen, that I wrote a how to a few days ago?

I figure out a kind of paint that work great for those.


Breiti
 
Have you seen, that I wrote a how to a few days ago?

I figure out a kind of paint that work great for those.


Breiti
No, I did not see that! Another great solution. I do not have a spray gun like that, but looks like yours came out great
 
Quick decision point - bought a black powder coated valve cover on impulse and deciding which looks better and more correct. I am attempting to keep on the Alpina theme in line with a B2S. I have found conflicting imagery on if black or bare aluminum is more correct. So two part question - which is more correct, and separate of that, which looks best. I am leaning to the black
 

Attachments

  • IMG_4607.jpeg
    IMG_4607.jpeg
    507.6 KB · Views: 170
  • IMG_4606.jpeg
    IMG_4606.jpeg
    437.6 KB · Views: 191
Almost finished on the fuel system. Installed a Holley style low pressure regulator on the firewall with a pressure gauge neatly tucked in behind the coolant reservoir. Carter 4070 fuel pump mounted in near stock CSI location. Revolution electronics fuel pump controller hooked up to the factory fuse slot for power, tapped into the tach signal right at the cluster connector in the dash (still need to splice in) and will mount it in a blank relay bracket spot. Tested and all works perfectly with consistent pressure.
 

Attachments

  • IMG_4609.jpeg
    IMG_4609.jpeg
    281.6 KB · Views: 153
  • IMG_4608.jpeg
    IMG_4608.jpeg
    425.6 KB · Views: 145
  • IMG_4613.jpeg
    IMG_4613.jpeg
    245.1 KB · Views: 139
  • IMG_4610.jpeg
    IMG_4610.jpeg
    401.6 KB · Views: 147
  • IMG_4611.jpeg
    IMG_4611.jpeg
    369.2 KB · Views: 142
  • IMG_4612.jpeg
    IMG_4612.jpeg
    272.4 KB · Views: 133
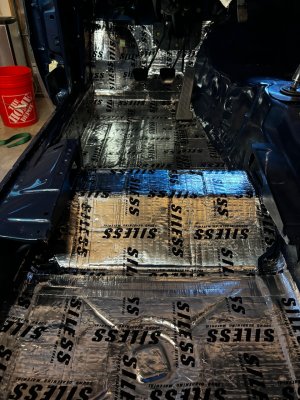
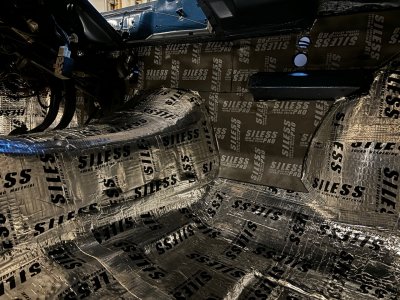
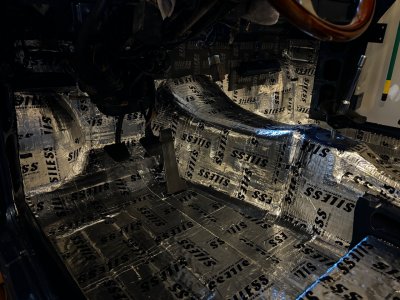
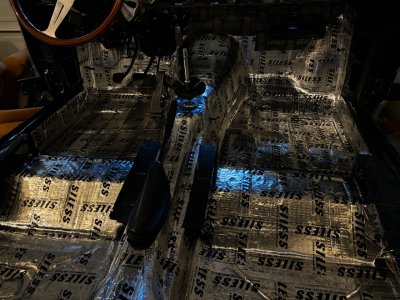
Been a while since an update, so will break it up into a few posts.

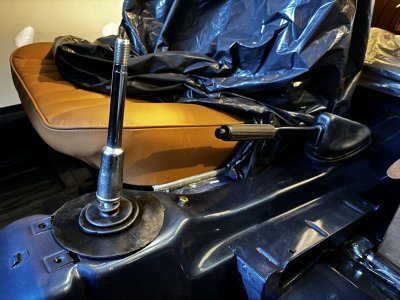
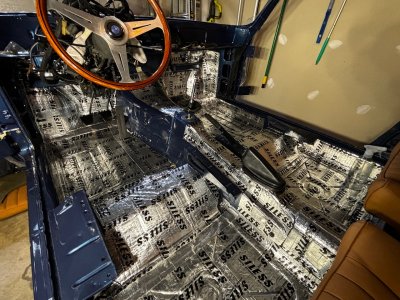
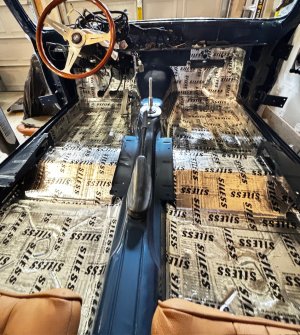
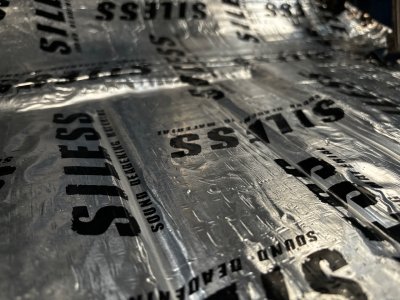
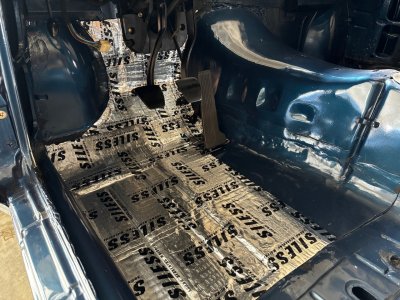
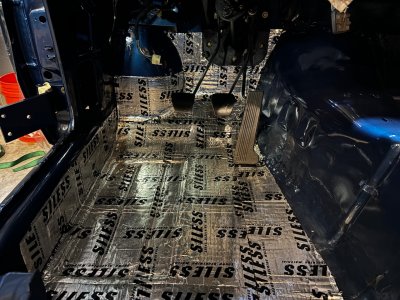
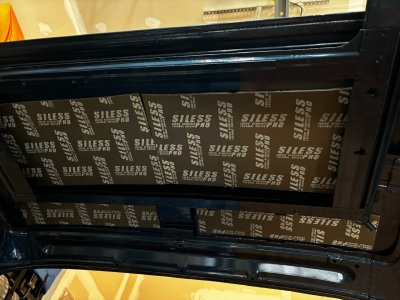
Finished up interior prep with the sound insulation complete, added the seat rail trim. Found a self-adhesive vinyl on amazon that matches the brown carpet perfectly, and relatively easy to cut and install. One sheet did all four rails with leftover.

IMG_6066.jpeg


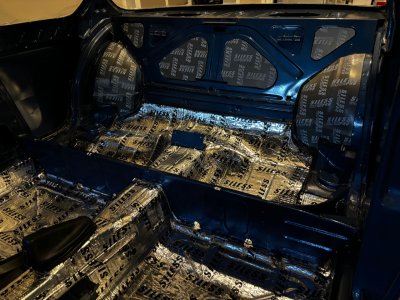
I then moved on to the trunk interior. First step I prepped the trunk, pulled and touched up the tank before putting back. The entire tank hand been previously restored, but I didn’t like the finish, so hit with VHT all weather black satin epoxy paint (no pic)

IMG_5446.jpeg


For the trunk, I worked with 
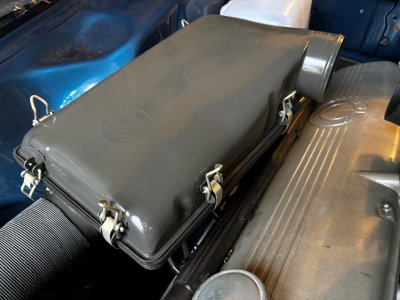
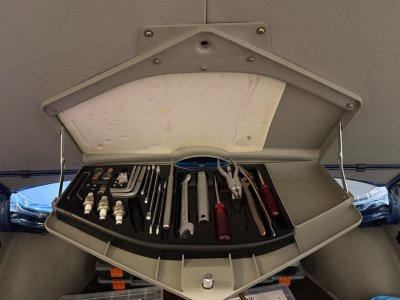
@alprada70 to make new US spec 73 and before floor panels (fit great), and got his new side panels. I then recovered by old trunk lid panels and back of trunk panel using W&N material. The trunk organizer and white rubber trim came from CS Werks, carpet was a brand new one that came with my other CS. Finally, in installed the very old NOS wheel arch trim. These were a bit brittle, so I first treated the back side with a rubberized undercoat to give them more structure and prevent future cracking. Still have my original rear panel to rover, but mostly done

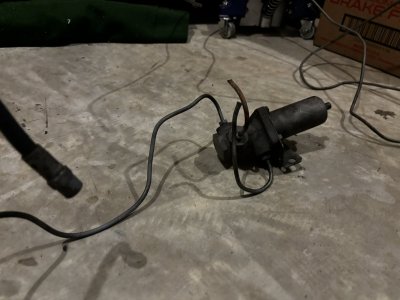
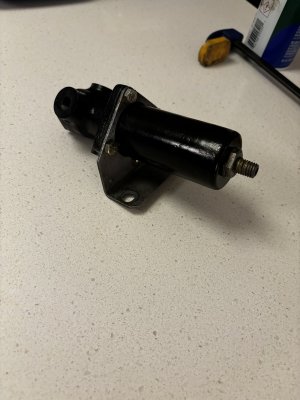
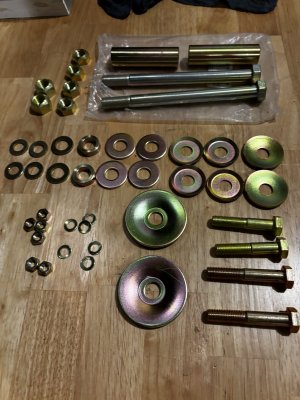
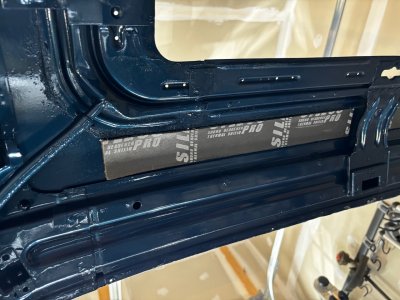
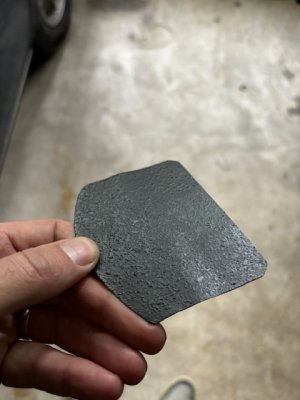
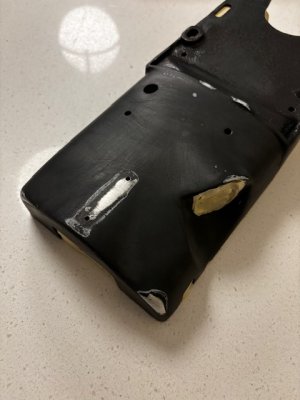
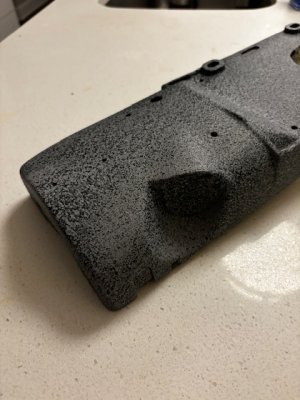
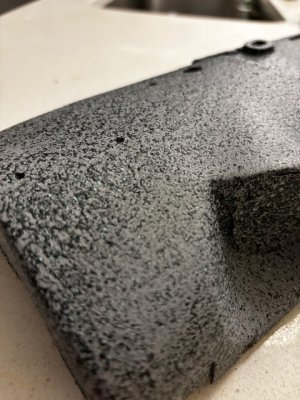
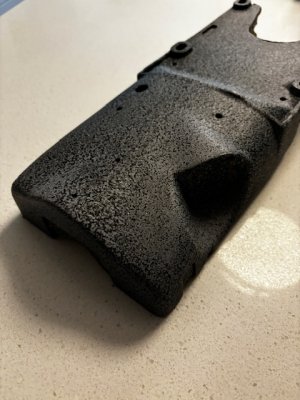
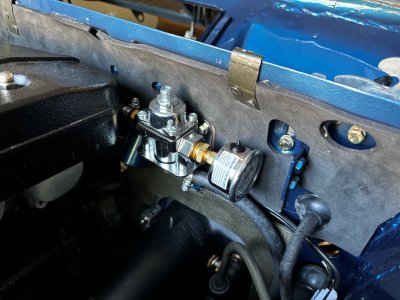
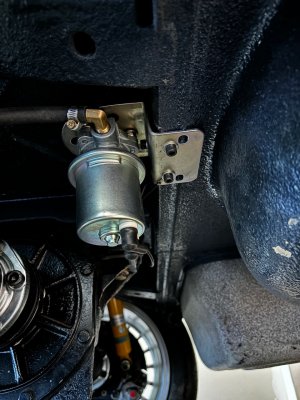
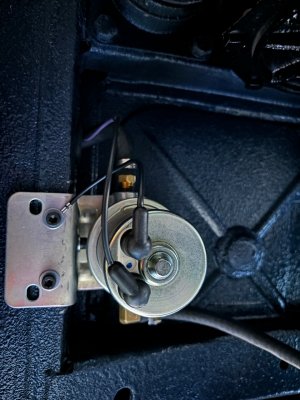
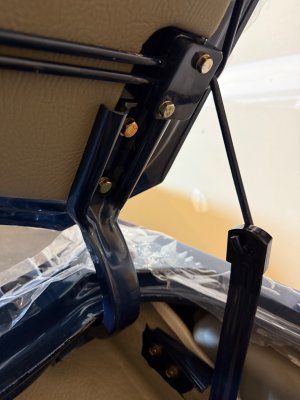
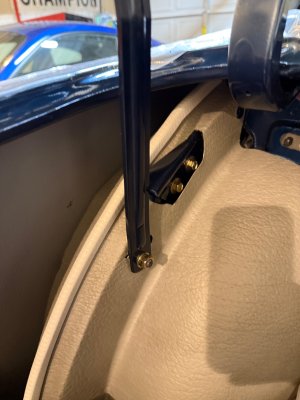
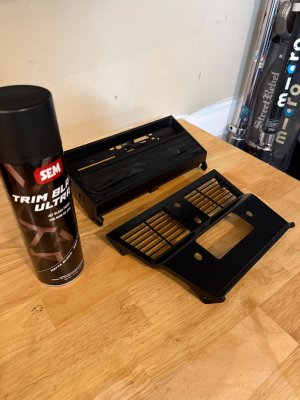
Additionally I was missing the hinge spring and hardware when I restored the exterior, so I purchased the pieces from all over the world here, and went about refinishing and painting myself. After getting bare and using a good primer, I have found this Auto Paint Depot paint code matched spray paint to be an exceptional match. Used it for a number of brackets and the finish comes out nearly indistinguishable from the professional paint job on the exterior.

IMG_5378.jpeg
IMG_5681.jpeg
IMG_5679.jpeg
IMG_5678.jpeg


I also couldn’t help myself but to tear fit the rear seats and deck
IMG_5684.jpeg
 

Attachments

  • IMG_6287.jpeg
    IMG_6287.jpeg
    353.1 KB · Views: 15
  • IMG_6290.jpeg
    IMG_6290.jpeg
    414.9 KB · Views: 15
  • IMG_6286.jpeg
    IMG_6286.jpeg
    401.5 KB · Views: 19
Last edited:
Little out of order chronologic, but also just restored the HVAC plates. Following some others advice, I us d the SEM ultra trim finish in satin. After about 7 different paint tests, this is by far the closest to OEM. I combined this with a set of @m73 decals, and protected with a thin layer of satin clear.
 

Attachments

  • IMG_6116.jpeg
    IMG_6116.jpeg
    572.9 KB · Views: 29
  • IMG_6257.jpeg
    IMG_6257.jpeg
    533.9 KB · Views: 30
  • IMG_6256.jpeg
    IMG_6256.jpeg
    458.5 KB · Views: 26
  • IMG_6258.jpeg
    IMG_6258.jpeg
    471.9 KB · Views: 31
  • IMG_6274.jpeg
    IMG_6274.jpeg
    449.2 KB · Views: 31
  • IMG_6275.jpeg
    IMG_6275.jpeg
    512.1 KB · Views: 34
Using many of the good threads here as a guide, and went through the HVAC boxes, disassembled and restored

Heather box initially looks real bad. All the foam was deteriorated, and though it would be a full heavy restoration. After disassembling everything, tediously removing all the foam and adhesive, everything actually cleanup up well. The metal platings were all in surprisingly shape, heater motor worked great. I replaced all the internal flap foam with 1/8” thick closed cell foam, and drilled and replaced all the rivets. Cleaned the motor and fan assembly throughly, and replaced all the hardware. I also tested the heater core and refinished. All the box perimeter foam was replaced as well.

On the AC box, no pictures, but replaced the fan motor, removed and deep lace all the foam, replaced the expansion valve and all copper washers, and tested the core, also repaired those delicate side intake grill spokes. For the connecting vent portion that connects the two boxes to the cabin center output vent, I removed and replaced all the felt insulation. This was a serious PITA to remove, but has to come off completely to restrict the new material, ordered from Amazon.
 

Attachments

  • IMG_5538.jpeg
    IMG_5538.jpeg
    445 KB · Views: 27
  • IMG_5528.jpeg
    IMG_5528.jpeg
    517.2 KB · Views: 24
  • IMG_5452.jpeg
    IMG_5452.jpeg
    529.6 KB · Views: 25
  • IMG_5453.jpeg
    IMG_5453.jpeg
    507.5 KB · Views: 24
  • IMG_5211.jpeg
    IMG_5211.jpeg
    451.3 KB · Views: 27
  • IMG_5450.jpeg
    IMG_5450.jpeg
    617.2 KB · Views: 32
I did the same work on my heater box a few years ago and it was very satisfying.

I now wish that I had found a way to pressure test the AC connections as I have a leak that I think must be at the expansion valve. If you can find a way to pressure test the evaporator and expansion valve before you install them it would be worth the time.
 
Back
Top