You are using an out of date browser. It may not display this or other websites correctly.
You should upgrade or use an alternative browser.
You should upgrade or use an alternative browser.
'73 3.0cs 30 year restoration
- Thread starter CharlesJ
- Start date
Headliner and Carpet:
After a quick stint at an interior shop, made some substantial progress in the past couple weeks.
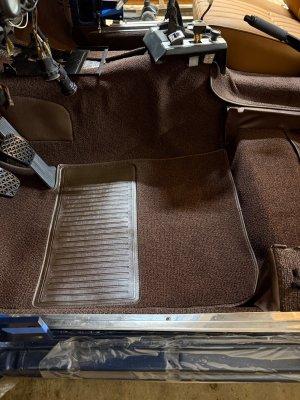
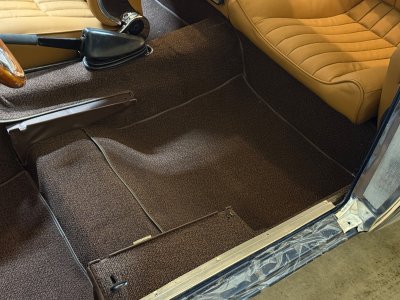
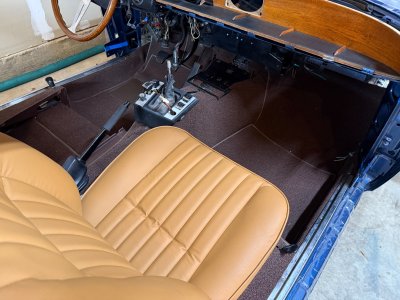
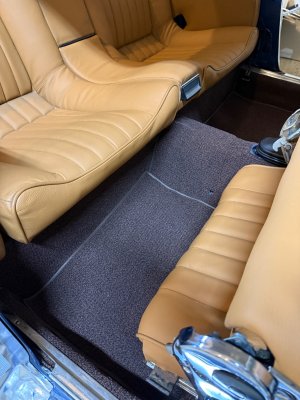
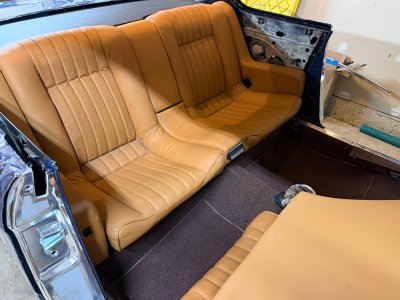
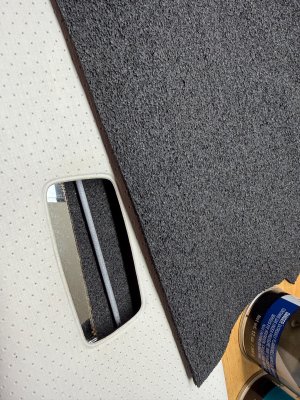
Had them install a complete carpet kit from GAHH, which by all accounts went in smoothly with no issues, and the final product looks great and extremely close to the remaining pieces of the original brown carpet that came in the car.
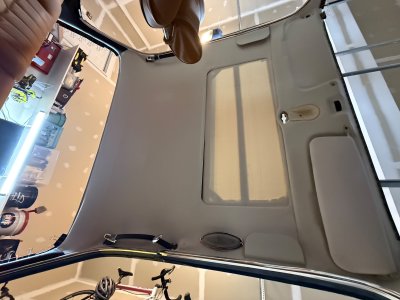
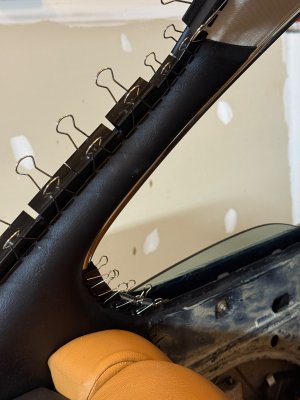
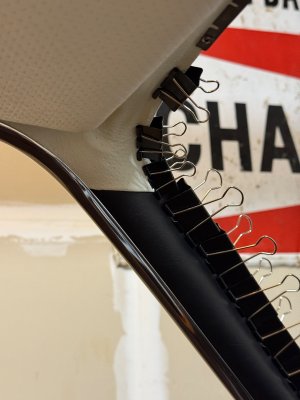
Additionally had them install a Coupe King headliner kit. The original cardboard/fiberboard reinforcement, so they had to rebuild a new one (no pics of this). I used black MB Tex vinyl from GAHH for the A and C pillars.
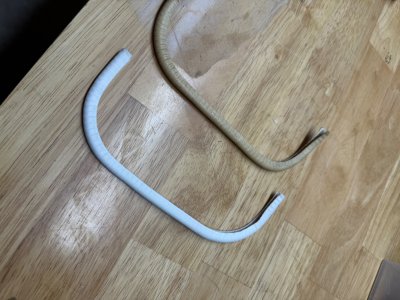
Also, thanks to a tip, I refinished some of the headliner slot edge trim with SEM Ranger White vinyl paint, a perfect match.
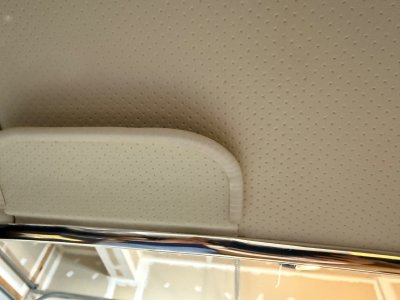
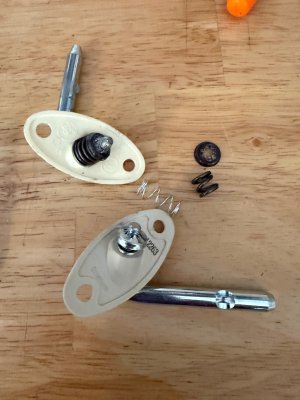
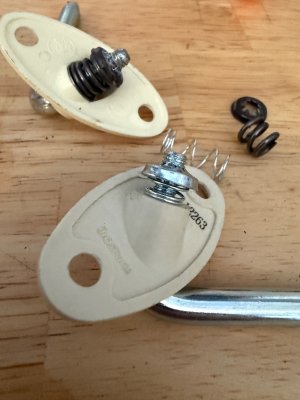
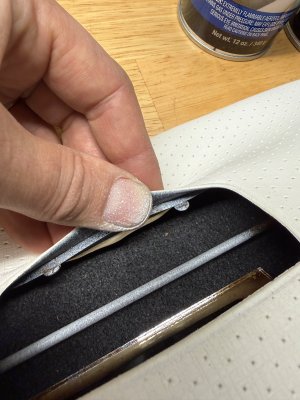
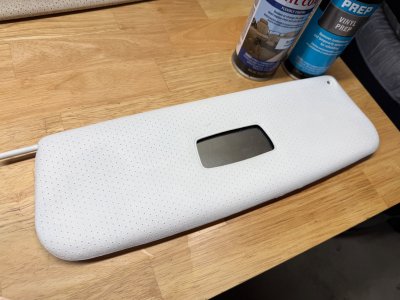
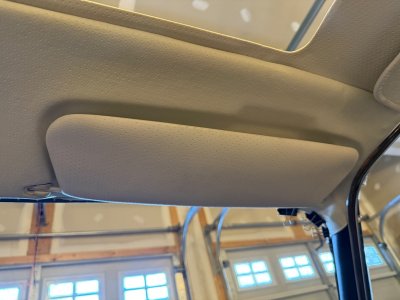
Completing the packager, restored the driver side visor to match the NOS driver one. To do so, popped out the hinge, mirror and end clip and gave a thorough cleaning, removing all the crumbling interior foam. After that, used the SEM vinyl prep and Ranger white, making a perfect match. New foam lining was added and the original mirror glue back in the slot. Since my hinges were all cracked, I used new URO hinges, but they have slight shortcoming. The factory hinge has a built in spring to keep tension, and the URO does not. This made it floppy with no resistance. While the OEM spring did not work on the new part, I found a lighter spring in my collection that worked perfectly. Quick five minute operation, functions like OEM.
After a quick stint at an interior shop, made some substantial progress in the past couple weeks.
Had them install a complete carpet kit from GAHH, which by all accounts went in smoothly with no issues, and the final product looks great and extremely close to the remaining pieces of the original brown carpet that came in the car.
Additionally had them install a Coupe King headliner kit. The original cardboard/fiberboard reinforcement, so they had to rebuild a new one (no pics of this). I used black MB Tex vinyl from GAHH for the A and C pillars.
Also, thanks to a tip, I refinished some of the headliner slot edge trim with SEM Ranger White vinyl paint, a perfect match.
Completing the packager, restored the driver side visor to match the NOS driver one. To do so, popped out the hinge, mirror and end clip and gave a thorough cleaning, removing all the crumbling interior foam. After that, used the SEM vinyl prep and Ranger white, making a perfect match. New foam lining was added and the original mirror glue back in the slot. Since my hinges were all cracked, I used new URO hinges, but they have slight shortcoming. The factory hinge has a built in spring to keep tension, and the URO does not. This made it floppy with no resistance. While the OEM spring did not work on the new part, I found a lighter spring in my collection that worked perfectly. Quick five minute operation, functions like OEM.
Attachments
-
 IMG_6479.jpeg793 KB · Views: 145
 -
 IMG_6478.jpeg747.7 KB · Views: 145
 -
 IMG_6474.jpeg359.8 KB · Views: 125
 -
 IMG_6475.jpeg547.3 KB · Views: 127
 -
 IMG_6486.jpeg445 KB · Views: 129
 -
 IMG_6485.jpeg500.8 KB · Views: 129
 -
 IMG_6482.jpeg601 KB · Views: 138
 -
 IMG_6484.jpeg455.1 KB · Views: 129
 -
 IMG_6480.jpeg559.4 KB · Views: 131
 -
 IMG_6481.jpeg534.6 KB · Views: 135
 -
 IMG_6688.jpeg722.6 KB · Views: 83
 -
 IMG_6703.jpeg446.5 KB · Views: 77
 -
 IMG_6704.jpeg404.4 KB · Views: 70
 -
 IMG_6706.jpeg979.7 KB · Views: 81
 -
 IMG_6707.jpeg550.6 KB · Views: 74
 -
 IMG_6705.jpeg485.8 KB · Views: 73
 -
 IMG_6474.jpeg359.8 KB · Views: 78
 -
 IMG_7089.jpeg384.7 KB · Views: 75
Last edited:
HVAC
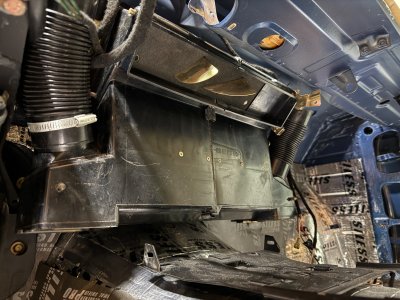
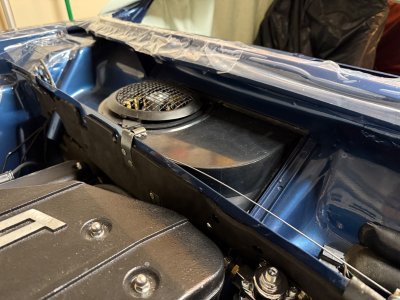
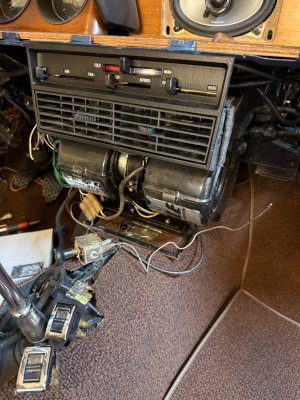
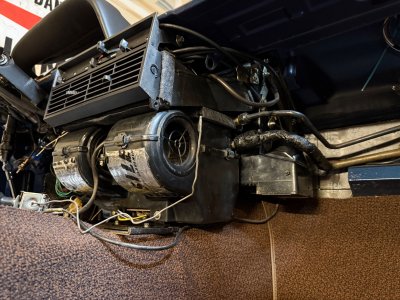
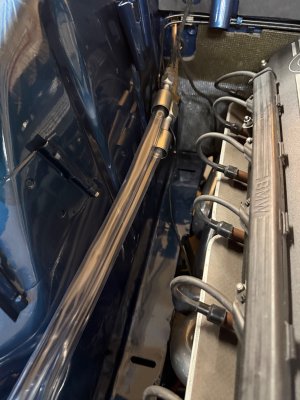
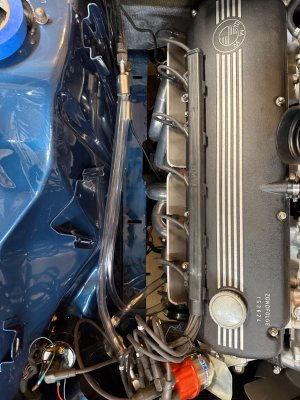
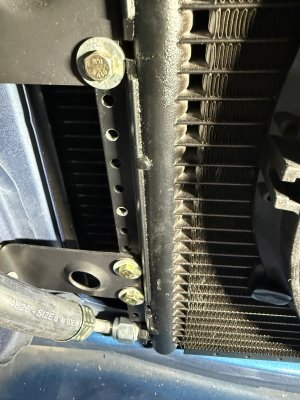
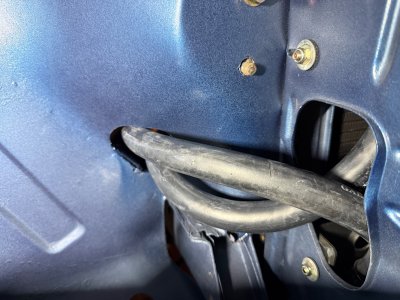
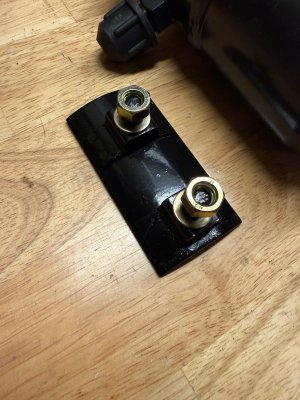
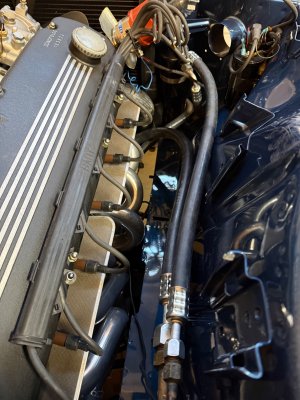
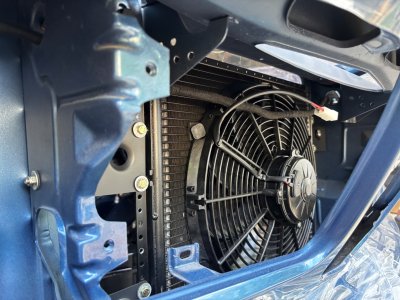
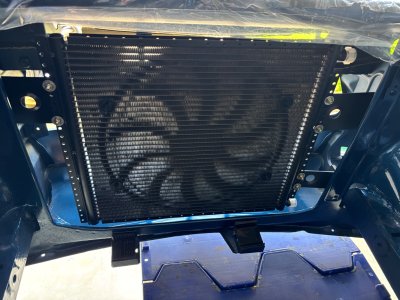
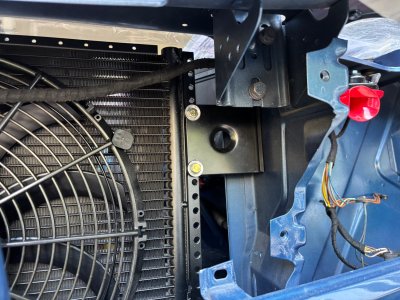
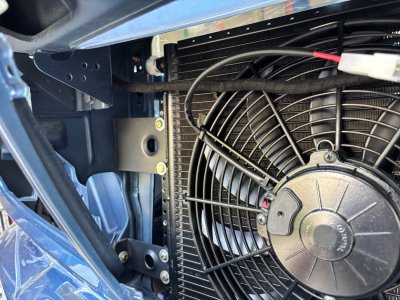
Little out of order as I did the following in pieces over the last several months, but just finishing up the full HVAC install including full compressor and condenser upgrade.
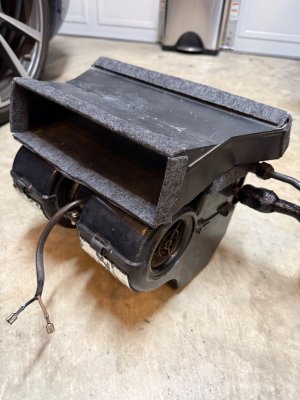
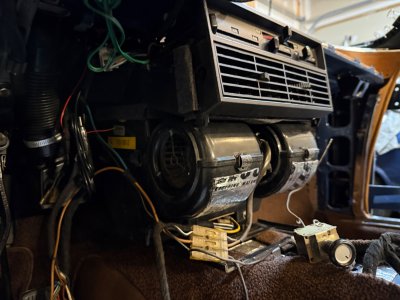
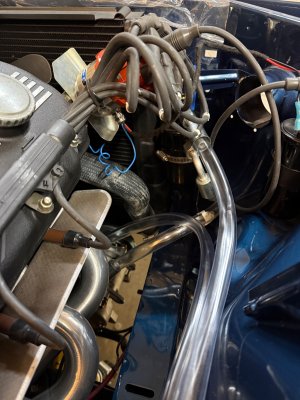
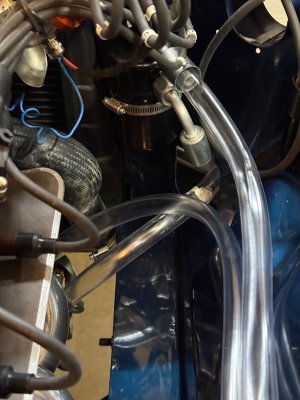
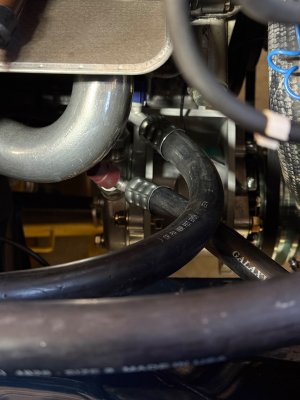
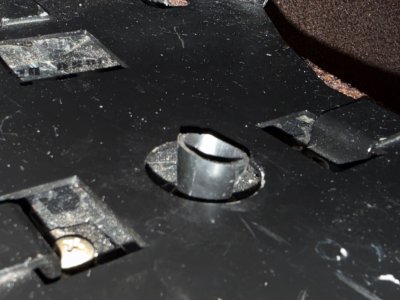
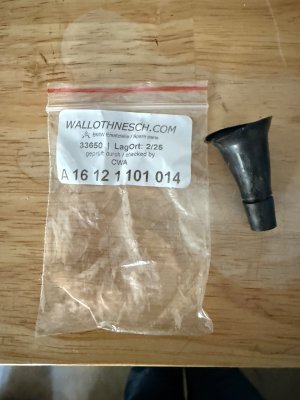
To start, installed the restored heater box and AC evaporator boxes. One key item here was the drain - I did not love the idea is using clamped or glued clear hose, and got a little lucky. I figured out that a completely unrelated part was near perfect and still available (see pics) just trim a tiny bit off the top, and the funnel fits perfectly with both the chassis hole and the evaporator box. Little tricky to line it up and slid the evaporator box down into it, but works great
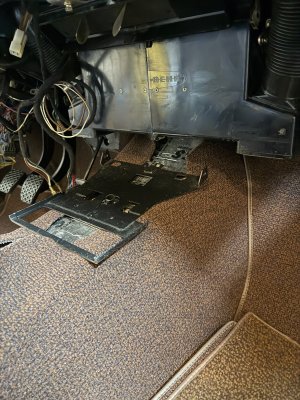
Aside from being a general PITA, interior job was relatively straightforward forward, noting order of operations is critical. Heater box, Dash top, temperature control probe into ac box, connecting vent on top of ac box, slide that whole thing in, then the heater controls and cables. Getting out of order will be a headache.
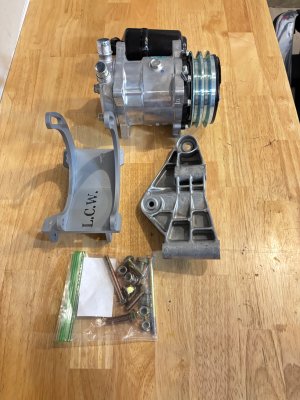
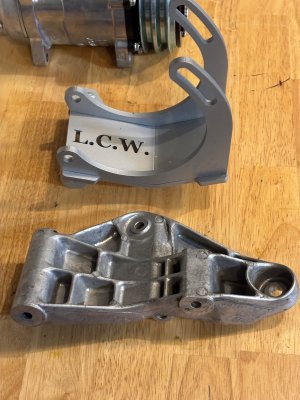
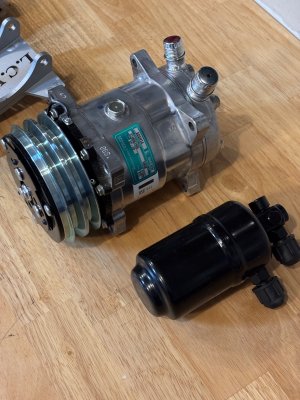
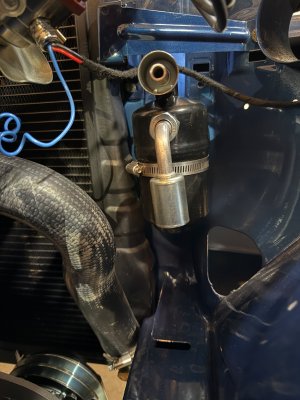
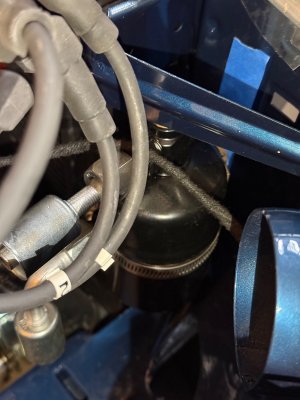
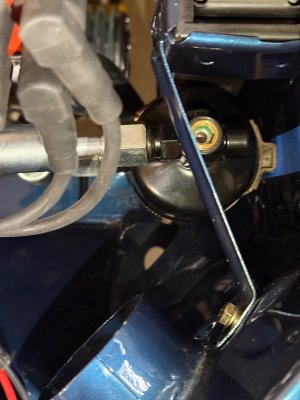
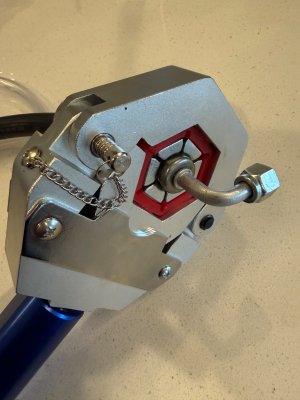
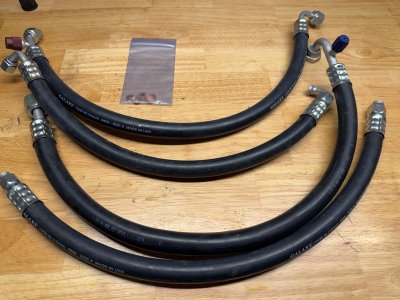
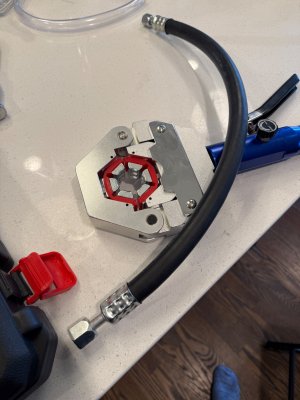
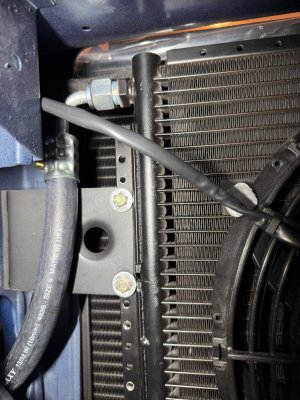
Moving into the engine compartment, did the full sanden and parallel condenser upgrade according to the great DIY threads linked below. I used the LC Wylie bracket, coupe king parallel kit with mounting brackets, and fittings/lines from Cold Hose exactly as listed in the DIY. I found it super easy to use the Vevor crimp and make the lines myself, first using clear tubing as recommended. My line lengths were a little different than the DIY thread as I mounted the drier slightly differently, but they were perfect for estimating the order, and I had left over.
Will update this post with a few more pics once fully complete
Reference threads
Little out of order as I did the following in pieces over the last several months, but just finishing up the full HVAC install including full compressor and condenser upgrade.
To start, installed the restored heater box and AC evaporator boxes. One key item here was the drain - I did not love the idea is using clamped or glued clear hose, and got a little lucky. I figured out that a completely unrelated part was near perfect and still available (see pics) just trim a tiny bit off the top, and the funnel fits perfectly with both the chassis hole and the evaporator box. Little tricky to line it up and slid the evaporator box down into it, but works great
Aside from being a general PITA, interior job was relatively straightforward forward, noting order of operations is critical. Heater box, Dash top, temperature control probe into ac box, connecting vent on top of ac box, slide that whole thing in, then the heater controls and cables. Getting out of order will be a headache.
Moving into the engine compartment, did the full sanden and parallel condenser upgrade according to the great DIY threads linked below. I used the LC Wylie bracket, coupe king parallel kit with mounting brackets, and fittings/lines from Cold Hose exactly as listed in the DIY. I found it super easy to use the Vevor crimp and make the lines myself, first using clear tubing as recommended. My line lengths were a little different than the DIY thread as I mounted the drier slightly differently, but they were perfect for estimating the order, and I had left over.
Will update this post with a few more pics once fully complete
Reference threads
Attachments
-
 IMG_5783.jpeg570.4 KB · Views: 83
 -
 IMG_5784.jpeg525.8 KB · Views: 82
 -
 IMG_5785.jpeg551.2 KB · Views: 98
 -
 IMG_6288.jpeg450.1 KB · Views: 85
 -
 IMG_6289.jpeg475.9 KB · Views: 85
 -
 IMG_6292.jpeg617.7 KB · Views: 84
 -
 IMG_6294.jpeg503.1 KB · Views: 78
 -
 IMG_7065.jpeg631.7 KB · Views: 82
 -
 IMG_7066.jpeg662.7 KB · Views: 84
 -
 IMG_7068.jpeg416.6 KB · Views: 85
 -
 IMG_7074.jpeg523.3 KB · Views: 83
 -
 IMG_7075.jpeg473.7 KB · Views: 82
 -
 IMG_7073.jpeg712 KB · Views: 89
 -
 IMG_7076.jpeg437.6 KB · Views: 79
 -
 IMG_7078.jpeg445.5 KB · Views: 80
 -
 IMG_7077.jpeg608.5 KB · Views: 80
 -
 IMG_7079.jpeg523.7 KB · Views: 86
 -
 IMG_7080.jpeg478.3 KB · Views: 77
 -
 IMG_7083.jpeg475.6 KB · Views: 82
 -
 IMG_7084.jpeg597.9 KB · Views: 81
 -
 IMG_7082.jpeg445.8 KB · Views: 79
 -
 IMG_7085.jpeg648 KB · Views: 82
 -
 IMG_7086.jpeg607.5 KB · Views: 85
 -
 IMG_7087.jpeg623 KB · Views: 96
 -
 IMG_7092.jpeg681.9 KB · Views: 89
 -
 IMG_7093.jpeg570.8 KB · Views: 82
 -
 IMG_7094.jpeg473.8 KB · Views: 90
 -
 IMG_7095.jpeg521.9 KB · Views: 89
 -
 IMG_6844.jpeg410.4 KB · Views: 60
 -
 IMG_6842.jpeg924.7 KB · Views: 62
 -
 IMG_6509.jpeg418.5 KB · Views: 63
 -
 IMG_5665.jpeg534.1 KB · Views: 64
 -
 IMG_5668.jpeg610.1 KB · Views: 66
 -
 IMG_5666.jpeg634.7 KB · Views: 67
 -
 IMG_5667.jpeg609.5 KB · Views: 75
Last edited:
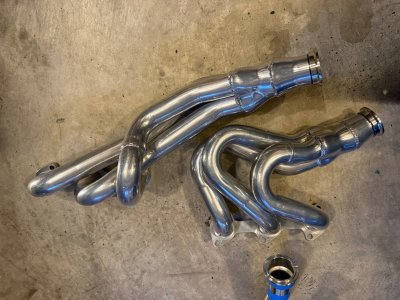
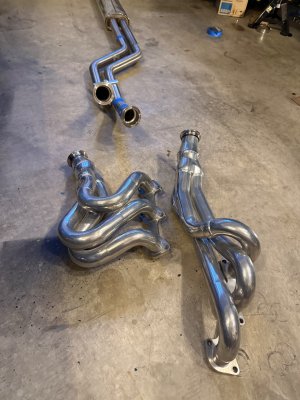
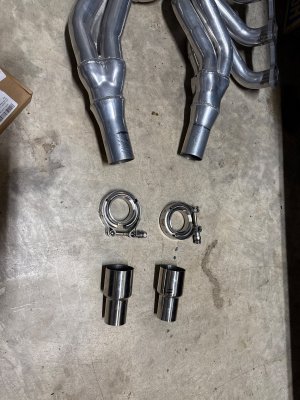
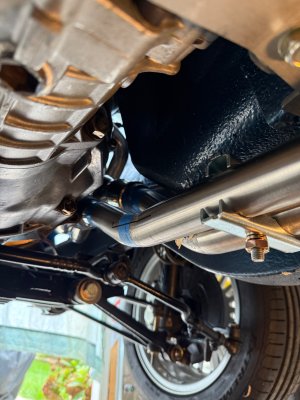
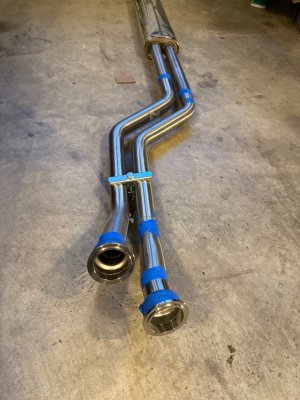
Exhaust
Another update I have been working on in parallel - reworking my W&N exhaust to work with Ireland Engineering headers. The header fit perfect, clear the frame rail nicely, but are universal for all M30s. To make it work, I did a few things
Probably did this the hard way, but was able to make it match up. Currently works, but I will be going back in the add a flex pipe and middle bracket.
Another update I have been working on in parallel - reworking my W&N exhaust to work with Ireland Engineering headers. The header fit perfect, clear the frame rail nicely, but are universal for all M30s. To make it work, I did a few things
- Cut the header back a bit to give more clearance to the transmission
- Added v-band clamps instead of standard flanges - gives a bit more room, easier to disconnect, no gasket
- Added a reducer to match the exhaust size
- Cut the standard downpipes way back and customized to get the angles right.
Probably did this the hard way, but was able to make it match up. Currently works, but I will be going back in the add a flex pipe and middle bracket.
Attachments
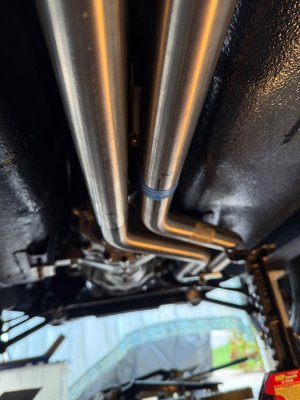
What are you using to mount pipes to trans?
Using the bracket you can see in the pics, moving it closing to the trans mount spot, and fabricating/welding a portion onto it to connect to the mounting tab off the back of the trans.. I could not make any of the more standard methods work.What are you using to mount pipes to trans?
A close up pic would be great
Will take one once I get it togetherA close up pic would be great