74 CSi Project - Gets Underway

revitoff1o

Member
Messages
32
Reaction score
3
Location
Chicago Area
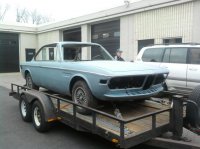
74 CSi Project - Gets Underway - Updates

Hello - Just starting to attack my new project. A '74 Fjord CSi - that came as a project. A big thanks to E911 for finally letting me buy the project from him and for being a huge help and wealth of knowledge.

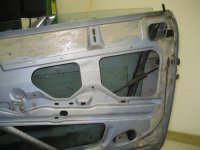
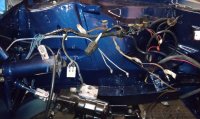
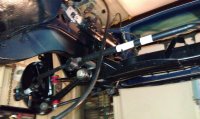
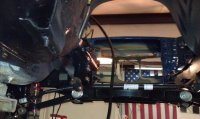
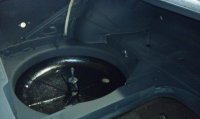
The car was originally an Italian delivery and was later brought into CA. Car has VERY little rust on it. I plan to continue to strip the car, put on a rotisserie, repair the rust that is there, strip and repaint, and then put the car back together. Still debating how much work to farm out - paint will be one item.


This will be a very nice driver - but probably not a show winner (well maybe a winner if there is not stiff competition). I will update this thread periodically and will also try to update other relevant thread topics as I tackle various projects.

Car is registered already.
 

Attachments

  • coming home.jpg
    coming home.jpg
    88.1 KB · Views: 297
Last edited:

Peter Coomaraswamy

Well-Known Member
Site Donor $$
Messages
3,787
Reaction score
896
Location
Austin, TX
Nice!!!

I've been doing a total rebuild on mine since September 2011. I'm trying to do a complete rebuild with an eye on making it a daily driver. Austin, TX is perfect for cars like these so I'll probably never "show" it but I hope to have it look and perform as good-if not better- than the original. The interior is the thing I'm dreading most as the mechanics are very straight forward. I'm also going from an auto to a 5 speed so although its common I still have a little anxiety about it. This forum is so much help though I'm really not worried. I just rebuilt the rear end and installed it today- please post pics as you move along-there are some great craftsmen out there!

Good luck and congratulations!
 

Attachments

  • rear up1.jpg
    rear up1.jpg
    93.3 KB · Views: 255

revitoff1o

Member
Messages
32
Reaction score
3
Location
Chicago Area
A couple more pics - the exhaust is out and the drive shaft. The underside of the car has a couple of places where is looks like it was scraped a bit at one point in it's life, so some light surface rust is a couple small places. But nothing to worry about. It will all get stripped down and redone.

Also a quick shot of the work space.

Today the windows, vent windows and trim, and power window motors came out. Other than some clean up, they're in great shape. I just have to figure out the best way to take off the sound deadening stuff that is stuck to the inside. I don't want that harboring any rust in the future.

Peter - you're doing great if you started in 2011. I'm hoping for a 2 year project. I work less on projects in the summer between vacation and track days, so I'm trying to get a lot done over the winter. So far it's going a little slow.
 

Attachments

  • body shots (25).jpg
    body shots (25).jpg
    93.8 KB · Views: 236
  • body shots (1).jpg
    body shots (1).jpg
    87.7 KB · Views: 241
  • doors inside (39).jpg
    doors inside (39).jpg
    88.8 KB · Views: 226

Peter Coomaraswamy

Well-Known Member
Site Donor $$
Messages
3,787
Reaction score
896
Location
Austin, TX
weekends work

Your car looks great to start! Mine did need some floor work- re welding etc. I spent most of Sunday unwrapping , cleaning and re-wraping the wiring harness and now I'll tighten up the work before starting on the engine. I also prepped the trunk for paint, I had a bit of pitting in the bottom of the wheel well so I taped it off and used a bed-liner product to fill in the pits. Here are some pics.
 

Attachments

  • front up5.jpg
    front up5.jpg
    97.9 KB · Views: 246
  • front up6.jpg
    front up6.jpg
    95.2 KB · Views: 236
  • front up.jpg
    front up.jpg
    92.1 KB · Views: 227
  • front up7.jpg
    front up7.jpg
    97.8 KB · Views: 226

revitoff1o

Member
Messages
32
Reaction score
3
Location
Chicago Area
I've made some good progress on the car this summer and fall. Maybe not the best of progress, but the car is getting worked on. I haven't had time to post anything, so I'll try to catch up over the next couple of weeks.

The car was stripped of everything. Pictures taken, parts bagged and tagged. The engine and trans came out as one unit with the sub frame. It helps having a lift!

I also scrapped as much sound deadening out as I could.

Next, I built some door bars. I was a little nervous about moving the car and lifting it without the doors in place since there is no B pillar. I thought door bars were safe insurance.

Some pics -

resize001_005.jpg

resize001_004.jpg
 

revitoff1o

Member
Messages
32
Reaction score
3
Location
Chicago Area
Inspected the car for rust and other body problems. Some rust holes in the rear quarter/sill area further back from the doors. Front fender has a dent/cracked area as if someone just kissed a wall with in when pulling in. Other than some minor patch work in the floor, along with some floor dents (I wonder if someone got a little off-road with the car), the car looked pretty solid. I also got one of those inspection camera and looked in the rear wheel well area as well as the rockers - that all looked good. :smile:

Some pics of the 'bad' areas.

Body (13).JPG

Body (19).JPG

Body Shots (39).JPG
 

revitoff1o

Member
Messages
32
Reaction score
3
Location
Chicago Area
Time for 1 more post tonight.

Next step was to figure out who should do the body work - me (very limited experience) or a good body shop. Also, strip the car and how - or don't strip.

There is a pretty good network of vintage BMW enthusiast up here in MN. Some have redone there 2002's that are gorgeous. So I asked around for a local shop for the restore. I also checked out the Werk Shop just outside of Chicago. I have family there, so I stopped in when I was back home.

I have no complaints about the Werk Shop, they took plenty of time to show me their projects, talked about some of their past projects, and walked me through the restore process. They were more than willing to let me do as much work as I wanted and ship the the car to them for things I wasn't comfortable with. I would have probably sent the car there except I got a lot of good recommendations for a local shop with experience and enthusiast for the older cars. They again took the time to talk to me about the project and walk through the steps. I've seen some of their work on some local cars and also saw a 2002 turbo that they were working on in the shop.

A great local shop has many advantages (to me at least) - you're supporting you neighbors and you can stop in and see the car ;-) They encourage drop ins and photo taking as the car was in progress. More on the body work in a later post (currently in progress). But the shop the car is at is Sears Imports Auto Body in the Minneapolis area.

They helped me answer the 'stripping' question. I was researching various ways to strip te car of the paint (it didn't seem right to not strip the car since it was already disassembled and I only wanted to do it once). The shop recommend chemically stripping the car. They had great experience with it, as well as another local shop that restored classic Porsche. They all recommended the same place.

Now the next step was to find a way to 'roll' the car to and from the shops. It was sitting on my lift with no suspension, sub fames, etc. I bought some square tubing and some big caster wheels and built a little cart. It attaches to the car where the front and rear sub frames did. I also used some square tubing to attach the front and rear carts together through the trans tunnel. The car was now movable.

Some pics of the car on the cart.

resize001_011.jpg resize001_019.jpg

resize001_009.jpg
 
Last edited:

revitoff1o

Member
Messages
32
Reaction score
3
Location
Chicago Area
Hopefully the pictures are showing up from everyone. When I log in, you have to click on them to show up, they aren't showing up in the post nicely. Let me know if you can't see them.

The place that I sent to get the car stripped of paint is outside of Milwaukee. Apparently, state regulations make it hard to run a place such as this in every state. I got some recommendations from some local restoration shops that use them, and did some general internet searching for people that have used the process. I called to talk to them about the process and get some pricing. They were brief on the phone, but answered all my questions and gave me prices. It is a smaller business, so the people that answer the phone are most likely those working with the cars.

They dip the car into the chemicals to strip the paint, bondo, etc. There is no etching of the metal. (I will let chemist debate this - but there was no etching that I could see on the metal when I got it back.) If there is heavy seam sealer in places or thick sound deadening, it may not get it all 100% the first time. I chose to scrape up as much sounds deadening as I could prior to sending the car out. They do a 80% dip the 1st time (depending on what you want, they could do more). More on that in a minute.

When they dip the car, areas such as the wheel wells and roof may 'collect' paint and stuff if the liquid gets stuck in an pocket and does not flow out or around well. I was asked if they could drill 1/8th in holes in the roof and wheel wells to allow the liquid to flow through. Imagine taking a bowl and submerging it into a bucket of water, inside of the bowl facing downward. Stuff will get stuck up in the middle. I was Ok with the wheel wells but not the roof. So they said that their might be residual pain't left up there that I could take care of or they could. I chose to take care of it my self with a little paint stripper.

The car got the 80% dip because the plan was to strip it, get the metal work done and any patch panels put on, then it will go back for a 2nd dip to get an any flash rust off (and clean the welds well) and then it will be e-coated. The 80% dip was more like 95%. the 1st dip took about a month to get back (they wait till they have a batch of things to go in, so the car was waiting a bit) and they were able to store the car a week or two for me so I could come down and get it. They also put some type of coating on it to slow down any flash rusting.

Here is the shop: http://www.rsi-metal-cleaning.com/main.html

The car has only gone for the 1st dip. The car was super clean, well worth getting it done and truely knowing where all the bad parts of the car are. :)

Pics and details of the car's bad areas in the next post.
 

revitoff1o

Member
Messages
32
Reaction score
3
Location
Chicago Area
There weren't a ton of surprises after getting the car back after being stripped. The front fender had some previous work down to it and needed some more fixing, the area behind the door in the lower rear quarter need some patch panels, and there was some previous work to the trunk area that needed a little more help. Some of the previous repairs were a little under par. The rest of the work is working out some dings and dents. The underside of the car looks like someone drove it off the road at some point; it's dented in some places.

Dropped off to get stripped.
resize001_028.jpg

Some after shots once it got stripped.
resize001_010.jpg

resize001_012.jpg
 

revitoff1o

Member
Messages
32
Reaction score
3
Location
Chicago Area
A pic of the door - with some previous under par work done. A new door skin will be put on. That was the only problem with the doors. No rust at all.

IMG_3005.jpg


Also, some pics of the front fendor. Some previous work done here too - again it will be redone better.


IMG_2989.jpg

IMG_2990.jpg

IMG_3053.JPG

IMG_3048.jpg
 

revitoff1o

Member
Messages
32
Reaction score
3
Location
Chicago Area
I spent a little bit of time on the car after I picked it up from the stripper. I scraped out any remaining seam sealer, paint, etc. I also forgot some plastic plugs in the car; those had to be pulled out. They did not look harmed at all in the stripping process.

I also took a little time to bang out the smaller dings in the car. I've taken an intro to body work class, so the smaller stuff I feel comfortable with. I also did a little clean up of some welds done on the previous repairs. Here is a pic of the underside of the trans tunnel where some repair/reinforcements were done by the shifter opening. Not the best work I've ever seen.

resize img_491.jpg
 
Last edited:

revitoff1o

Member
Messages
32
Reaction score
3
Location
Chicago Area
The car is currently at the body shop getting the metal work done.

One of the rear, us spec side markers is filled.

Metal Work - rear quarters.jpg


And the dents in the spare tire well have been fixed. Some before and after. Pictures are from a slightly different angle, but the wrinkled dents are out of it.

metal work - trunk before.jpg Metal Work - after trunk.jpg
 

revitoff1o

Member
Messages
32
Reaction score
3
Location
Chicago Area
Bob,

I built a 'cart' for the car to roll on. You can see it in some pics. With casters at all four corners and two people you can push the car up the trailer ramp. Three people makes it really easy! The cart and wheels make the car sit just high enough when pushing it in the trailer that th nose does not scrape.

The car is at the body shop on the cart and they love it. They work on the car in between other insurance jobs, but they have a big temp controlled storage space so they wheel the car back and forth a lot.
 

revitoff1o

Member
Messages
32
Reaction score
3
Location
Chicago Area
Some more updates. Slow progress on the body, but it's coming along. I just bought a new project car, so I can use the extra storage space this winter :).

Some before and after of the area around the fuel tank. The after photo has some poor lighting, so I'll have to retake the pictures the next time I take a look at it.


Also a picture of the car at the shop on the cart.

Metal Work - fuel floor after (1).JPG

metal work - fuel floor before (3).JPG

metal work - fuel floor before (4).JPG

Body Shop (1).JPG
 

revitoff1o

Member
Messages
32
Reaction score
3
Location
Chicago Area
I'm cleaning some of the interior parts while the car is out. Here are some pics of the visors mid cleaning. You can see the dirty versus clean sides. I used some mild soap and water on the visors and it got off the initial layer of dirt. The dirty side of the visor is after the mild soap. The clean side was done with a Mr clean magic eraser.


IMG_0779.JPG
IMG_0781.JPG

Also, some cleaning of the rear seats. Used some meguires leather cleaner - not much of a difference. Then went to some saddle soap. Much better results. If you look at the picture of the seat, the right bolster area has not been cleaned yet. The center and left bolster have already been cleaned.

IMG_0791.JPG
 
Top