B "pillar" glass alum trim & dash defroster vents

Bob

Well-Known Member
Site Donor
Messages
363
Reaction score
65
Location
Salinas
Hello,
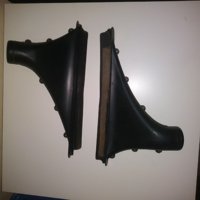
I have a pair of plastic dash defroster vents. All the screw tabs intact. L (left) and R (right) marked. Sold thanks

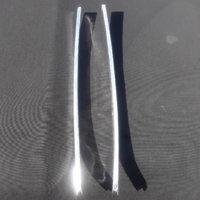
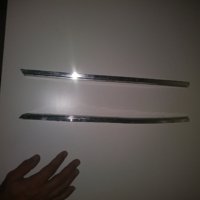
Pair of curved "B pillar" aluminum trim that attaches to rear windows. $75 pair

Thanks,
Bob
 

Attachments

  • 20180114_134020.jpg
    20180114_134020.jpg
    779.1 KB · Views: 158
  • IMG-20180114-WA0096.jpg
    IMG-20180114-WA0096.jpg
    91.9 KB · Views: 138
  • IMG-20180114-WA0097.jpg
    IMG-20180114-WA0097.jpg
    89.6 KB · Views: 142
  • IMG-20180114-WA0092.jpg
    IMG-20180114-WA0092.jpg
    105.1 KB · Views: 150
  • IMG-20180114-WA0094.jpg
    IMG-20180114-WA0094.jpg
    123.7 KB · Views: 126
  • IMG-20180114-WA0095.jpg
    IMG-20180114-WA0095.jpg
    144.2 KB · Views: 141
  • 20180115_081414.jpg
    20180115_081414.jpg
    233.1 KB · Views: 169
Last edited:

rsporsche

Moderator
Site Donor $$
Messages
10,685
Reaction score
3,713
Location
Atlanta, GA
you should show pics of the tops of the defroster vents ... that's the part that is usually damaged. (cracked or deformed edges)

fyi - the new window trims from W+N is 54 euro. 78 bucks ea. from getbmwparts. part # is 51377740138 + 139. the usual issues of the older / used trims are 1. deformation from removal of the window, 2. deformation of the slot to hold the gasket edge (they should have uniform reveals) + 3. scratches on the chrome work.
 

Tony.dreamer

Raider of the lost parts
Site Donor $
Messages
770
Reaction score
193
Location
Edmond , Oklahoma
I agree with RSporsche 100% . The Window pieces have two surfaces that gets covered with rubber and two surfaces that are revealed. I had bought one from W&N (as they only offered one side , not sure left or right) and the other I had polished and chromed !
Used ones normally have scratches and bends that show...
For what is worth when installing the rubber piece (which are available for both sides about $70 each from BMw or W&N , make sure to put the rubber on the glass First and then press the trim onto the rubber that is on the glass. After the metal piece and the rubber are completely sandwitched together then roll the bouncy section of the rubber that faces the outside the car and press it in Little at a time . With this approach in less than 8 min I was able to do each side .. if you make the mistake of putting the bouncy section of the rubber on the trim Before attaching it to the glass it would be very difficult to force it on the glass, and you would most likely give up...

Good luck !
 
Top