BMW 2800cs -> S38b36 project

BMW3.0CSi

Well-Known Member
Site Donor
Messages
125
Reaction score
79
Location
The Netherlands
Hi All,

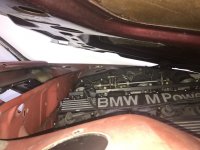
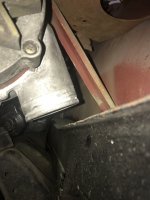
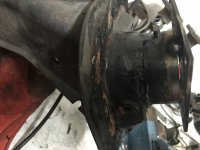
Approximately 2 months ago I bought myself my second e9. Driven by the enthousiasm for this type of car and my goal to have a S38 swap done once in my life I bought myself from Sweden this 2800CS, VIN#2221283. Just an almost bare chassis, but a very good one with almost no rust. With only 20% of the parts with it, nicely painted in different colors, a 3.0CS rear subframe and brakes underneath it's a mix of everything. Originally the car came in polaris metallic and was delivered in the Netherlands in 1970 according to the seller. The rest of the history of the car is lost in time...

This project will take some time (years) and I'm not in a rush, both from time and money perspective.. ;) Probably it will stay in the garage over the coming winter and I will start early next year with this project. I bougth myself a e34 M5 in the past for a future project like this, so a few parts I have already available, like the engine. I will try to update this thread from time to time.

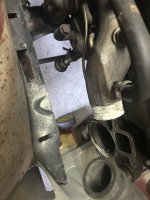
IMG_1528[1].JPG

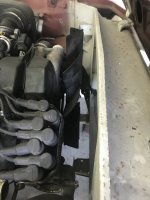
IMG_1378[1].JPG

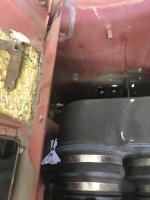
IMG_1379[1].JPG

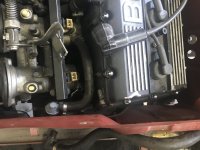
IMG_1381[1].JPG
 
Last edited:
FYI, the front valance or lip is from a 73 with the shorter outside slots which changed to implement the US 74 shock absorbing bumpers. Nice project you have though.
 
New season, new first (small) update, made myself a kind of moveable car lift because of limited space in my garage.
Took of the Swedisch tires with spikes! (on an e9 o_O), will put them for sale, but tires are really old and gone.
Also made a first start with dismantling the rear axle and the interior ceiling plus trim.


IMG_3490[1].JPG


IMG_3516[1].JPG


IMG_3509[1].JPG


IMG_3527[1].JPG
 
Nice project that will keep you busy for some time!
What's your opinion on this kind of car lift? Is it possible to work on the bottom/under of the car? I'm hesitating buying one, since they're quite cheap.
 
Nice project that will keep you busy for some time!
What's your opinion on this kind of car lift? Is it possible to work on the bottom/under of the car? I'm hesitating buying one, since they're quite cheap.

It's a cheap alternative for a real carlift, but with being cheap it comes also with some disadvantages. It's easy to handle, but the part of the car within the square of were the lift is, is hard to reach. Working under the car goes fine, as long as you don't have to work at a spot were the carlift is. Carlift reaches high enough to lift the chassis in that way that you can take away the rear axle with shock absorbs mounted.
You can make the lift even wider, parts are with it, but I have chosen for this approach. I must admit that it's good for lifting a bare chassis, when the car is fully equipped its better for both the car and the lift to lift only one side of the car. I also used a car jack at the back of the car to keep it horizontal. But that is also because the car is not tightened to the car lift. Still have to do that. ;)
 
Small update after having dismantled the complete car over de last few weeks, except for the bonnet, trunk lid and the steering column. No big surprises, except for the sheet metal part above the glovebox, nicely hidden behind the sound deadening and mounted with pop nails. Took out all the sound deadening and wiring. Previous owner made quit a bit of cuts and extra switches, not sure what the purpose was of all those switches.

By today I'm making the first preparations to put the engine in the engine bay to make sure everything fits. First issue already came across, the engine mounts don't fit the subframe mounts. Have seen several topics on the forum here, which say that it's a drop in, but it is definitely not I experienced. I know the KMS/Brett adapter plates, but am not sure which adaptor and mounts are the correct ones. Need to check some topics still and otherwise will open a topic.

IMG_3785.JPG


IMG_3788.JPG
IMG_3722.JPG

IMG_3746.JPG
IMG_3809.JPG


First picture of the subframe and the engine. I've put some red lines in the pictures for the contact points, but the one in the top left corner is just to mention the engine mount, but the bottom of the mount is not even visible.
IMG_3854 edit.jpg
 

Attachments

  • IMG_3854.JPG
    IMG_3854.JPG
    335.6 KB · Views: 290
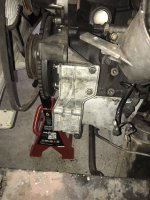
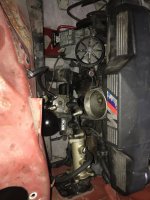
Yesterday I completed the first step in the e9/S38 marriage. With an other e24/e28 M30 oil pan underneath the engine I managed to get the engine in.
I list a few items here where I have to look at to make it fit. I will try to list as many as small details in this thread.
IMG_3983.JPG


I used the standard e9 engine mounts and the standard e9 subframe for this setup.

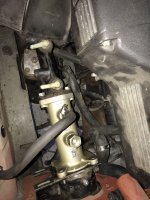
1.- The subframe needs some small cutting at the thermostat housing tubing end.
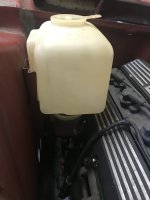
2.- The wiper reservoir won't fit and needs to be placed somewhere else.
3.- The relais holder bracket is coming to the air intake.
4.- The original S38 dynamo fits, but if I want to make use of the cold air intake the frame need some adjustment.
5.- The header of the last 3 cilinders is hitting the floor and therefore blocking the engine to become more straight.
6.- The bonnet support needs to be removed because it is hitting the fuel line.
7.- The air intake support, which on the S38 is mounted to the engine/engine mount is taken of because if you use the original gas linking system it comes exactly at the point were the gas linking hinge is mounted.
8.- Brake system not mounted yet, but I do have an hydraulic booster.
9.- The battery bracket will be removed.

Things to think about at the moment:
1.- The engine fits quit well, but can move +/- 2 cm backwards, but I'm doubting to do that with the KMS engine brackets for instance, or just to order a custom made radiator. I also have just 1/1.5 cm space left between the oil pan and the subframe, needs another M30 oil pan possibly in that case. Not clear to me how many different M30 oil pans there are?
2.- Where to mount the wiper reservoir, at the headlight section or just on the side of the interior air intake box.
3.- Should I use the S38 dynamo or just the e9 dynamo. The e9 doesn't have that heavy amount of electronics on board.
 

Attachments

  • IMG_3956.JPG
    IMG_3956.JPG
    275.1 KB · Views: 306
  • IMG_3957.JPG
    IMG_3957.JPG
    220.3 KB · Views: 304
  • IMG_3959.JPG
    IMG_3959.JPG
    240.5 KB · Views: 311
  • IMG_3960.JPG
    IMG_3960.JPG
    275.9 KB · Views: 319
  • IMG_3961.JPG
    IMG_3961.JPG
    195.1 KB · Views: 312
  • IMG_3967.JPG
    IMG_3967.JPG
    197 KB · Views: 308
  • IMG_3971.JPG
    IMG_3971.JPG
    168.7 KB · Views: 318
  • IMG_3975.JPG
    IMG_3975.JPG
    261.8 KB · Views: 326
  • IMG_3980.JPG
    IMG_3980.JPG
    239.5 KB · Views: 300
  • IMG_3981.JPG
    IMG_3981.JPG
    216.8 KB · Views: 288
  • IMG_3985.JPG
    IMG_3985.JPG
    190.8 KB · Views: 316
From over the weekend a small update.
-. Fixed the hydraulic brake booster and shorten the original brake booster hub. I now have +/- 1 cm clearance between the master brake cylinder and the air intake tubing.
I will have to cut off the brackets for the coolant water tank also because of the clutch cylinder that has to come in. What also needs to be fixed is the gas pedal hinge. I have taken it out to make the brake booster fit. Should be possible to fix, will have to make it a little bit eccentric.
-. Taken of the battery holder, relais holder and the CSi analysis plug. This should give more then enough space to get everything fixed.
-. Attached the e9 dynamo and servo pump adapter plates to the engine, but doubting what to do with the servo pump because of the pressure the original pump can give (100 bar) were the original delivers 130 bar. I don't have the self leveling system from the M5 any more, but am not sure if it is enough for the brake booster.
 

Attachments

  • IMG_4007[1].JPG
    IMG_4007[1].JPG
    348.8 KB · Views: 322
  • IMG_4045.JPG
    IMG_4045.JPG
    203.2 KB · Views: 325
  • IMG_4050.JPG
    IMG_4050.JPG
    327.7 KB · Views: 323
  • IMG_4067.JPG
    IMG_4067.JPG
    408.9 KB · Views: 332
  • IMG_4070.JPG
    IMG_4070.JPG
    302.3 KB · Views: 296
  • IMG_4071.JPG
    IMG_4071.JPG
    430 KB · Views: 334
  • IMG_4116[1].JPG
    IMG_4116[1].JPG
    265.8 KB · Views: 770
  • IMG_4117[1].JPG
    IMG_4117[1].JPG
    263.4 KB · Views: 226
  • IMG_4118[1].JPG
    IMG_4118[1].JPG
    191.6 KB · Views: 244
Last edited:
It's been a while since my last update, mainly due to other priorities at work. But since then I have sourced several parts to fullfill this project. Also some sheet metal parts from W&N to replace a few pieces. Over the summer period last year I also decided to go for an AC upgrade, a record hot summer in the Netherlands made me decide to go for it.
I managed to source almost all AC parts over the last several months, last ones are on their way to the Netherlands.
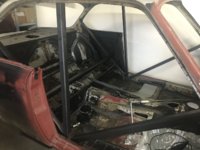
The chassis was already almost stripped, but is now completly stipped.

I wanted to start reinforcing the chassis with welding several seams which normally are only spotwelded. But because the car has still quit some 'tarmac/kit' as undercoating it gave me some fire during welding, which is of course a bit tricky. Based on that I have decided to first have it paint stripped via a dip bath. https://www.autobeitserij.nl/en/
The feedback I got from the company is to reinforce the chassic a bit for the forklift truck, so I started to reinforce it on the inside and will also add a kind of rack underneath. Hope to have this step done by the end of March.
 

Attachments

  • IMG_5125.JPG
    IMG_5125.JPG
    249.9 KB · Views: 254
Last edited:
I HAD A LOT LESS TO DO ON MINE
AS I USED A TII BRAKE BOOSTER
YES THE AIR INTAKE IS VERY CLOSE TO THE BOOSTER
CHECK OUT 4310316 POST FOR MY S38 INSERT
MY BATTERY IS IN THE TRUNK
USED TWO GAS LIKAGE TOGETHER AND IT FITS PERFECT
 
It's been a while since my last update, mainly due to other priorities at work. But since then I have sourced several parts to fullfill this project. Also some sheet metal parts from W&N to replace a few pieces. Over the summer period last year I also decided to go for an AC upgrade, a record hot summer in the Netherlands made me decide to go for it.
I managed to source almost all AC parts over the last several months, last ones are on their way to the Netherlands.
The chassis was already almost stripped, but is now completly stipped.

I wanted to start reinforcing the chassis with welding several seams which normally are only spotwelded. But because the car has still quit some 'tarmac/kit' as undercoating it gave me some fire during welding, which is of course a bit tricky. Based on that I have decided to first have it paint stripped via a dip bath. https://www.autobeitserij.nl/en/
The feedback I got from the company is to reinforce the chassic a bit for the forklift truck, so I started to reinforce it on the inside and will also add a kind of rack underneath. Hope to have this step done by the end of March.

Great to see you getting on with the car, really looking forward to seeing how this turns out, really wanted an S38 in mine before I decided to go with the M30 Alpina Turbo!

In my opinion, acid dipping can cause more trouble than it's worth. I was looking into getting it done for mine.
Problem being the acid can getting into all the many many seams in our cars, stripping off all the paint and protection. If every single panel and spot welded piece of metal isn't getting removed from the car and these areas being properly painted, it will just accelerate corrosion, I've seen it occur even with the car being dipped in e coat as air pockets preventing the coating from sticking to it can leave areas of bare steel.

Personally for removing sound deadening I'd use dry ice to freeze it at which point it comes off relatively easily, then have the vehicle media blasted by a reputable company (some can do this too aggressively and warp bodywork).

Not in any way trying to cast doubt on you or be negative, just one coupe owner trying to stop another's from premature rustulation!
 
surprizes me you still dare to do such mods.... here in Belgium we may forget that , you never pass tech inspection (MOT).
All has to be original..... up to little stupid parts .

Do you still get away with that in the Netherlands ??
 
I HAD A LOT LESS TO DO ON MINE
AS I USED A TII BRAKE BOOSTER
YES THE AIR INTAKE IS VERY CLOSE TO THE BOOSTER
CHECK OUT 4310316 POST FOR MY S38 INSERT
MY BATTERY IS IN THE TRUNK
USED TWO GAS LIKAGE TOGETHER AND IT FITS PERFECT

Hi Alan, thanks for the link, I have been reading your 43! pages of your project. Very nice! The difference between yours and mine is of course the M88 vs S38, the intake plenum of the S38 is a bit bigger and the Tii booster won't fit to my opinion. What I made now (relatively easy to be honest), does fit.
I will also place the battery in the back, with the Racetep shock tower brace I think.
The one thing that triggers me from your thread is the fact that you are using stock e9 motor brackets and that you are able to fit in the radiator and fan in the engine bay.
As you can see from my pictures I'm not able to do with mine so I'm considering to buy the KMS brackets for the S38. I don't know if the differences between the M88 and S38 are that big in terms of size?
 
Great to see you getting on with the car, really looking forward to seeing how this turns out, really wanted an S38 in mine before I decided to go with the M30 Alpina Turbo!

In my opinion, acid dipping can cause more trouble than it's worth. I was looking into getting it done for mine.
Problem being the acid can getting into all the many many seams in our cars, stripping off all the paint and protection. If every single panel and spot welded piece of metal isn't getting removed from the car and these areas being properly painted, it will just accelerate corrosion, I've seen it occur even with the car being dipped in e coat as air pockets preventing the coating from sticking to it can leave areas of bare steel.

Personally for removing sound deadening I'd use dry ice to freeze it at which point it comes off relatively easily, then have the vehicle media blasted by a reputable company (some can do this too aggressively and warp bodywork).

Not in any way trying to cast doubt on you or be negative, just one coupe owner trying to stop another's from premature rustulation!

Appreciate your concerns, really, but of course I checked this also. It was also one of my concerns. The company has done already quit some projects and uses NaOH which doesn't react with ferrous metals. After that you need to de-rust the car and if you would use HCl you indeed in the end may end up with rest acid which will eat up your car. But instead of HCl they use H3PO4 which will end up in FePO4 after it reacts with air and that is irrversible. After that is gets a KTL treatment as primer layer.

I have done thermal paint stripping and sand blasting, but with both I have bad experience resulting in wrapped/wavy sheet metal as a result.
 
Last edited:
surprizes me you still dare to do such mods.... here in Belgium we may forget that , you never pass tech inspection (MOT).
All has to be original..... up to little stupid parts .

Do you still get away with that in the Netherlands ??

Yes and no, I did some research in the past. In the Netherlands it is still that the day of registratoin of the chassis is leading in terms of what is allowed in terms of emissions, not the engine. So I'm allowed to take of the exhaust recirculation pump and that kind of stuff and I will.

The big thing is that the engine is of course bigger then normal with more horsepower. They can send me to 'Lelystad' (of all places) were the Dutch 'RDW' can put the car for a test in driveblity and espacially safety in terms of brake power. I will improve brake power with an upgrade. The thing is that it also depends who you will meet at the normal RDW offices for car registration. If you meet a car enthousiast it probably won't be an issue and all those tests won't be nessecary. If they see that you are an enthousiast, have put lots of effort in it to get it to what you want it to be, it's an oldtimer and it is not too much of a race track car they won't do that difficult is my experience and expectation.
I want to have it on paper that the car has the bigger engine so that I won't have any issue with the insurrance in the future if an incident might happen.

In Dutch from the RDW site:
https://www.rdw.nl/particulier/voer...an-of-ingrijpende-reparaties-aan-een-voertuig
 
Depending on Bureaucrats would have me nervous. Very interesting project.
 
nice progress.

Would you be willing to sell that CSi bracket?

img_4116-1-jpg.110638


553FDF56-F352-4DAB-96D6-9457126CB2F9.jpeg
 

Attachments

  • 9D3B7DE0-429C-4F46-A37D-A5E2D7C6E125.jpeg
    9D3B7DE0-429C-4F46-A37D-A5E2D7C6E125.jpeg
    251.2 KB · Views: 235
Last edited:
Back
Top