Hi guys
I am looking for advice please.
I only just got my engine up and running and I don’t know if a previous owner has made adjustments to her or not, but I do know she is running way too fast on zero throttle.
My engine is ticking over at approximately 1900 to 2000 rpm so I believe it is getting excessive air from somewhere.
I have checked all intake manifold gaskets and the all seem good.
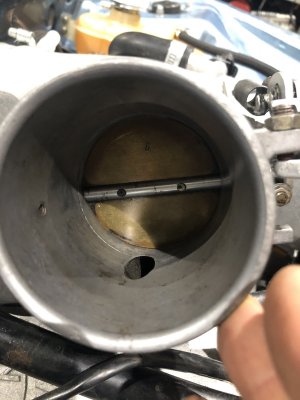
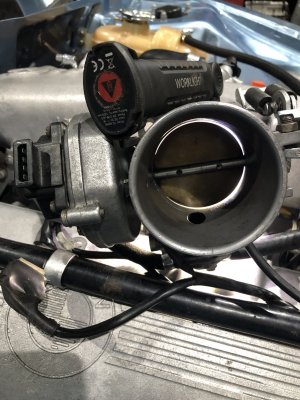
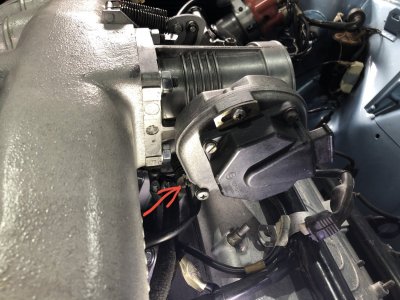
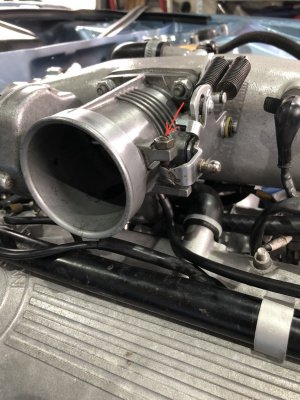
I have noticed that the butterfly on the throttle body does not actually close completely .
If I shine a light behind the butterfly I can clearly see light all around between it and the throttle body housing.
Is that normal or should it be closed fully ?
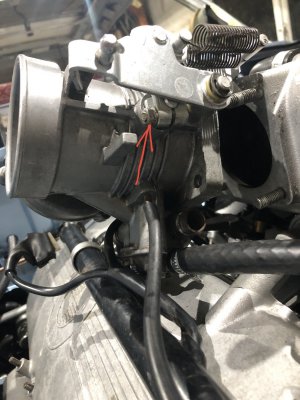
If it should be closed I think I might need to loosen the shaft clamp bolt as backing off the throttle stop screw does not seem to allow the butterfly to close. ( please advise)
Then can I also ask should I adjust the air adjustment screw to get her to tickover normally ?
I have already rebuilt the auxiliary air valve with a new wax bulb so I believe it should be working properly, although I might temporarily bypass that system just to rule it out.
Then one last question, I set all of the timing to TDC when putting her all back together, so I think that means that my ignition timing might need adjusting/ setting
Is there a “how to “ for that somewhere ?
I am looking for advice please.
I only just got my engine up and running and I don’t know if a previous owner has made adjustments to her or not, but I do know she is running way too fast on zero throttle.
My engine is ticking over at approximately 1900 to 2000 rpm so I believe it is getting excessive air from somewhere.
I have checked all intake manifold gaskets and the all seem good.
I have noticed that the butterfly on the throttle body does not actually close completely .
If I shine a light behind the butterfly I can clearly see light all around between it and the throttle body housing.
Is that normal or should it be closed fully ?
If it should be closed I think I might need to loosen the shaft clamp bolt as backing off the throttle stop screw does not seem to allow the butterfly to close. ( please advise)
Then can I also ask should I adjust the air adjustment screw to get her to tickover normally ?
I have already rebuilt the auxiliary air valve with a new wax bulb so I believe it should be working properly, although I might temporarily bypass that system just to rule it out.
Then one last question, I set all of the timing to TDC when putting her all back together, so I think that means that my ignition timing might need adjusting/ setting
Is there a “how to “ for that somewhere ?

")