By what I would hesitate to call "popular demand", but a request from a brave few at https://e9coupe.com/forum/threads/alpine-lcd-behind-speaker-grille.42510/post-419276 -- here is how I've solved HVAC in my EV projects. This would be an extreme solution to problems from the factory heat and a/c systems, which have always been a tad less than great.
As mentioned in that previous post, Restomod Air makes a compact, electronically controlled HVAC unit that will fit under the dash of an E9. Note: I have no affiliation with Restomod Air. They don't give me any free products or discounts. There are probably many similar aftermarket units out there. Personally, I installed a Vintage Air unit in my 1967 Camaro and I love it. That said, the Restomod Air unit is compact and works well but, like any generic aftermarket unit, it is far from a bolt-in solution and poses a number of new challenges:
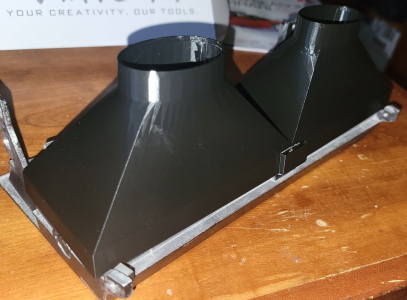
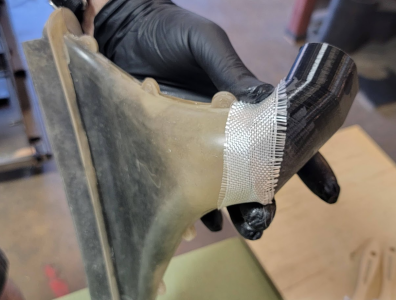
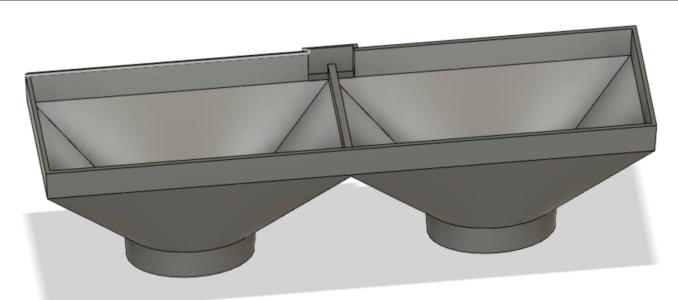
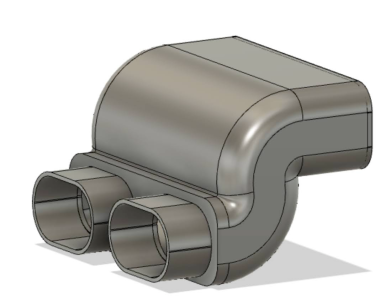
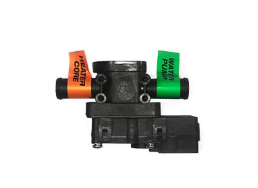
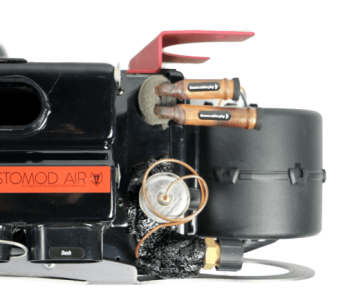
The evaporator core measures 11" x 6" x 2.5". the heater core measures 11" x 6" x a.5". The A/C blows cold but is still limited to the two "freeze your knees" dash vents (at least in my installation -- there are 4 dash ducts if you want to try to run a couple extra hoses somewhere else but I blocked off two).
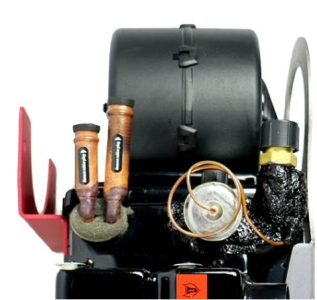
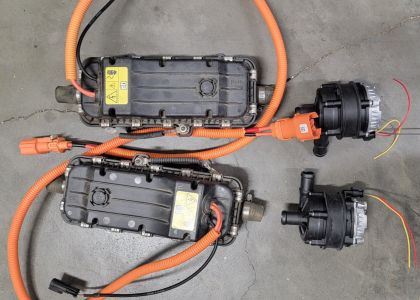
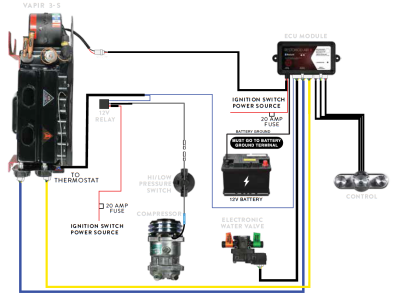
They use a Spal 009-A70-74D variable speed blower fan which can draw up to 19.6 amps and moves up to 319 CFM at high speed.

Mounting
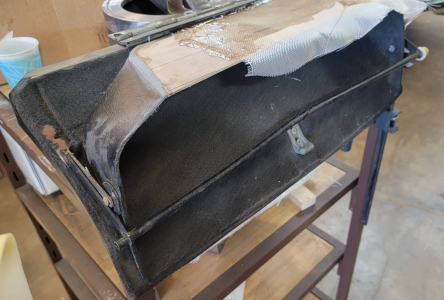
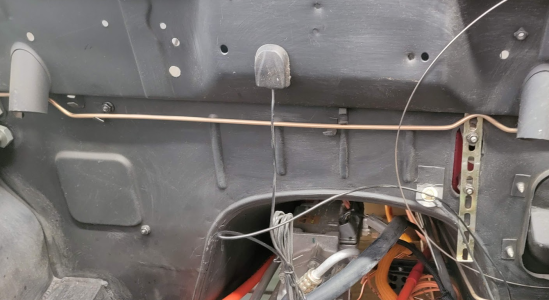
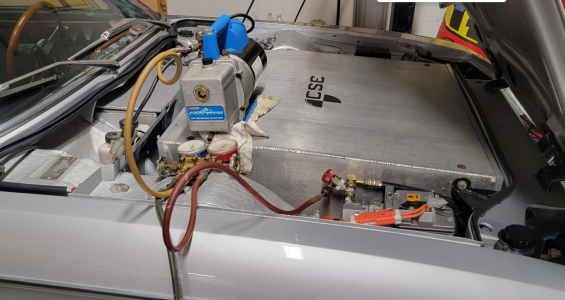
I used the Vapir 2-S in the first car and the Vapir 3-S in the next two cars. The 3-S is slightly larger but has separate ducting for floor heat and better configured defroster ducts (they point up, not back). This allows for independent adjustability between dash, defrost and floor mode whereas with the 2-S there are only two modes with 4 ports each so typically floor and defroster share ducts. Both units come with an aluminum plate that has 4 holes to mount to the firewall. I mounted with rubber isolated studs to set the unit 3/4" or so back from the firewall. I forget exactly where the holes lined up with the 2-S but I recently did the 3-S and the left-side holes align right where the oval hole in the firewall for the heater hoses resides. This may pose a challenge. More on heater hoses later.

Controls
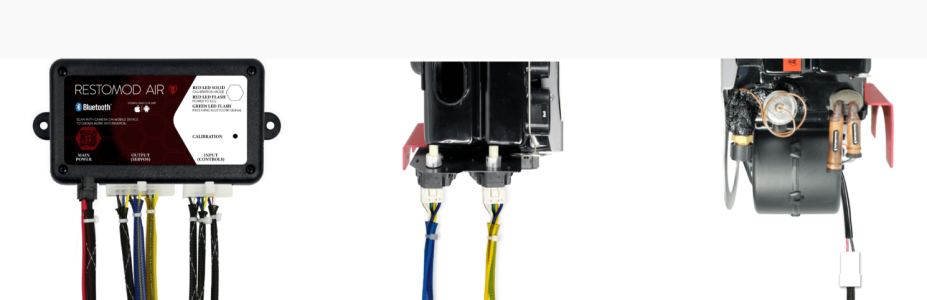
All the Restomod Air units are Bluetooth enabled. This would be by far the easiest way to control the units. Just install the app on your phone and control it via the app. Alternatively, they have a small key-fob remote you can use if you don't like phone apps. Finally, they have all sorts of options for physical switches (dials/knobs). You don't have to pick one method -- you can freely switch between using the App, the Remote Control, and hard mounted dash controls.


Despite this thread being all about aftermarket solutions, I am a big fan of making things look stock so I opted to make the original heater levers control the units. This is a challenge, made easier by the fact that Restomod Air sells a "EZ CABLE INTEGRATORS W/ LINEAR SWITCH- 3 SPEED BLOWER" kit for $199. You won't find this item on their website but you can call and order it. It includes a 3-position switch and two linear potentiometers and the wiring to connect them to the Vapir unit. The switch controls the blower fan and the potentiometers control the blend door (temperature) and the diverter door (dash, floor, or defrost).
There are probably a few ways to do this. With the Vintage Air unit in my Camaro, the pots have cable ends that attach directly to the control levers in place of the original Bowden cables. I couldn't figure out how to make that work with the pots in the kit so I started by designing a new plate to replace the original lever plate. I also designed some lever extensions and had then laser cut. These are necessary to both extend the levers and to make them thicker so the original knobs attach securely. I welded the extensions to the switch and pots and mounted them to the plate.


There is no "fresh air vent" option with this setup so I used the original vent lever to control the A/C compressor. In this case, I was able to use the original lever. It triggers a microswitch to turn the compressor on and off. Additionally, specific to my installation, it moves another linear potentiometer that I use to control the PWM signal to the Tesla A/C compressor, thus speeding it up or slowing it down. You don't need to do any of this because the temperature control automatically turns off the compressor when moved to full warm. Image the possibilities of having a free lever.


The final step was to dress it all up and make the labels match the functionality. For that, I designed a new label plate and 3D printed it. It took a lot of iterations before I got the fit perfect. I attempted to make it light up like the original but failed so I paused the print and swapped filaments to create the white lettering on black background instead of having to paint it. (Note: the interation in one photo is missing the WARM label -- I overlooked that for a while but eventually fixed it). In the final version, this plate also closes up the slots around the sliding levers to make them narrower.


More to come (10,000 word limit)....
As mentioned in that previous post, Restomod Air makes a compact, electronically controlled HVAC unit that will fit under the dash of an E9. Note: I have no affiliation with Restomod Air. They don't give me any free products or discounts. There are probably many similar aftermarket units out there. Personally, I installed a Vintage Air unit in my 1967 Camaro and I love it. That said, the Restomod Air unit is compact and works well but, like any generic aftermarket unit, it is far from a bolt-in solution and poses a number of new challenges:
- Mounting
- Controls
- Closing up the original heater blower hole
- Glovebox modification
- Defroster vent modification
- Dash vent adapter
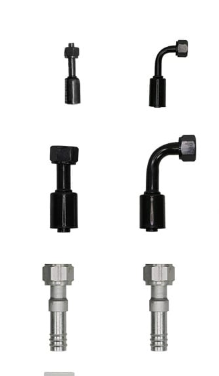
- A/C hose adaption
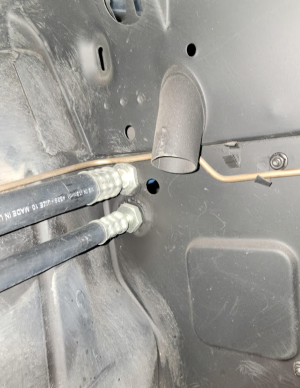
- Heater hose re-route
The evaporator core measures 11" x 6" x 2.5". the heater core measures 11" x 6" x a.5". The A/C blows cold but is still limited to the two "freeze your knees" dash vents (at least in my installation -- there are 4 dash ducts if you want to try to run a couple extra hoses somewhere else but I blocked off two).
They use a Spal 009-A70-74D variable speed blower fan which can draw up to 19.6 amps and moves up to 319 CFM at high speed.
Mounting
I used the Vapir 2-S in the first car and the Vapir 3-S in the next two cars. The 3-S is slightly larger but has separate ducting for floor heat and better configured defroster ducts (they point up, not back). This allows for independent adjustability between dash, defrost and floor mode whereas with the 2-S there are only two modes with 4 ports each so typically floor and defroster share ducts. Both units come with an aluminum plate that has 4 holes to mount to the firewall. I mounted with rubber isolated studs to set the unit 3/4" or so back from the firewall. I forget exactly where the holes lined up with the 2-S but I recently did the 3-S and the left-side holes align right where the oval hole in the firewall for the heater hoses resides. This may pose a challenge. More on heater hoses later.
Controls
All the Restomod Air units are Bluetooth enabled. This would be by far the easiest way to control the units. Just install the app on your phone and control it via the app. Alternatively, they have a small key-fob remote you can use if you don't like phone apps. Finally, they have all sorts of options for physical switches (dials/knobs). You don't have to pick one method -- you can freely switch between using the App, the Remote Control, and hard mounted dash controls.
Despite this thread being all about aftermarket solutions, I am a big fan of making things look stock so I opted to make the original heater levers control the units. This is a challenge, made easier by the fact that Restomod Air sells a "EZ CABLE INTEGRATORS W/ LINEAR SWITCH- 3 SPEED BLOWER" kit for $199. You won't find this item on their website but you can call and order it. It includes a 3-position switch and two linear potentiometers and the wiring to connect them to the Vapir unit. The switch controls the blower fan and the potentiometers control the blend door (temperature) and the diverter door (dash, floor, or defrost).
There are probably a few ways to do this. With the Vintage Air unit in my Camaro, the pots have cable ends that attach directly to the control levers in place of the original Bowden cables. I couldn't figure out how to make that work with the pots in the kit so I started by designing a new plate to replace the original lever plate. I also designed some lever extensions and had then laser cut. These are necessary to both extend the levers and to make them thicker so the original knobs attach securely. I welded the extensions to the switch and pots and mounted them to the plate.
There is no "fresh air vent" option with this setup so I used the original vent lever to control the A/C compressor. In this case, I was able to use the original lever. It triggers a microswitch to turn the compressor on and off. Additionally, specific to my installation, it moves another linear potentiometer that I use to control the PWM signal to the Tesla A/C compressor, thus speeding it up or slowing it down. You don't need to do any of this because the temperature control automatically turns off the compressor when moved to full warm. Image the possibilities of having a free lever.
The final step was to dress it all up and make the labels match the functionality. For that, I designed a new label plate and 3D printed it. It took a lot of iterations before I got the fit perfect. I attempted to make it light up like the original but failed so I paused the print and swapped filaments to create the white lettering on black background instead of having to paint it. (Note: the interation in one photo is missing the WARM label -- I overlooked that for a while but eventually fixed it). In the final version, this plate also closes up the slots around the sliding levers to make them narrower.
More to come (10,000 word limit)....
Attachments
-
 1744305594322.png1.9 MB · Views: 137
 -
 1744304635498.png2.1 MB · Views: 129
 -
 1744304710679.png1.6 MB · Views: 143
 -
 1744305062406.png1.7 MB · Views: 144
 -
 1744305088040.png1.7 MB · Views: 133
 -
 1744305124162.png1.2 MB · Views: 133
 -
 1744305224532.png711.1 KB · Views: 136
 -
 1744305483496.png299.8 KB · Views: 130
 -
 1744305506213.png396.6 KB · Views: 132
 -
 1744305710594.png747.1 KB · Views: 138
 -
 1744306058059.png257.7 KB · Views: 127
 -
 1744306079143.png27.4 KB · Views: 136
 -
 1744306219047.png1.7 MB · Views: 141
 -
 1744306250336.png1.3 MB · Views: 133
 -
 1744306442280.png406.8 KB · Views: 122
 -
 1744307384113.png325.7 KB · Views: 129
 -
 1744304412376.png1.6 MB · Views: 122
 -
 1744302523924.png271 KB · Views: 131
 -
 1744302554767.png224.7 KB · Views: 131
 -
 1744302643911.png27.6 KB · Views: 136
 -
 1744302788824.png602 KB · Views: 140
 -
 1744304368119.png20.1 KB · Views: 132
 -
 1744304574093.png2.5 MB · Views: 138
Last edited: