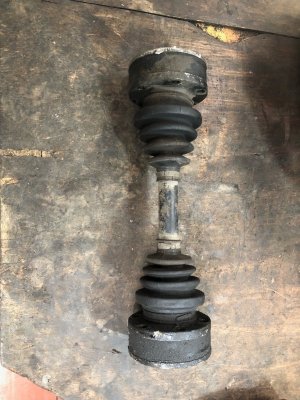
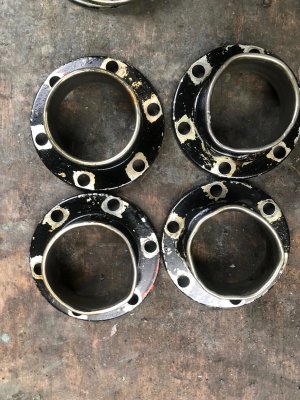
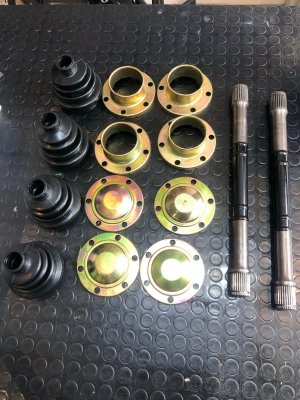
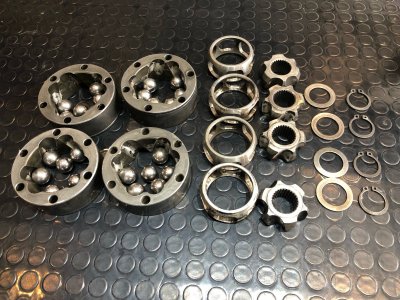
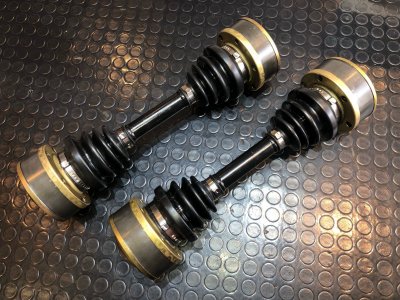
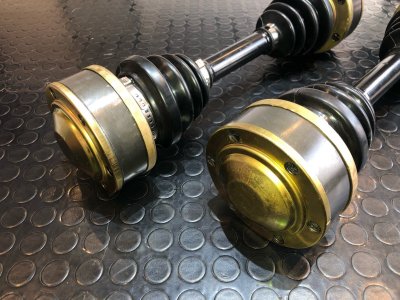
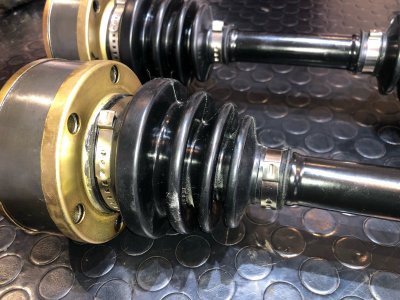
Half Shaft Restoration
You are using an out of date browser. It may not display this or other websites correctly.
You should upgrade or use an alternative browser.
You should upgrade or use an alternative browser.
Colombian 3.0 CS
- Thread starter alprada70
- Start date

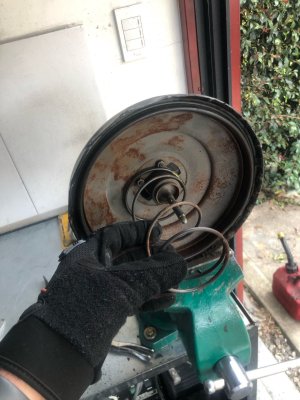
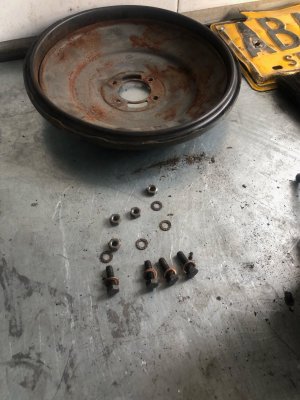
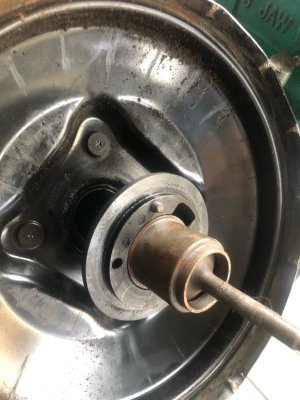
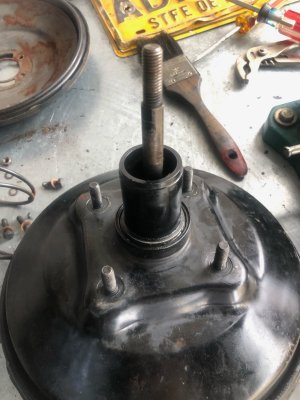
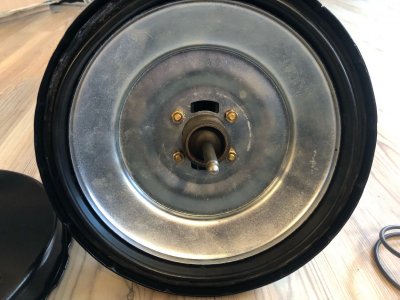
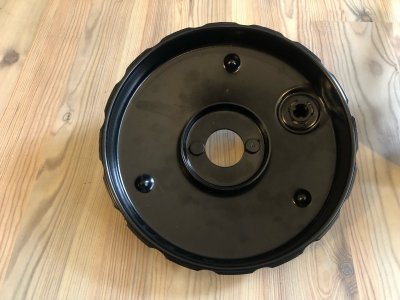
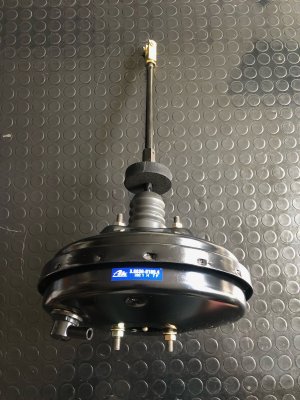
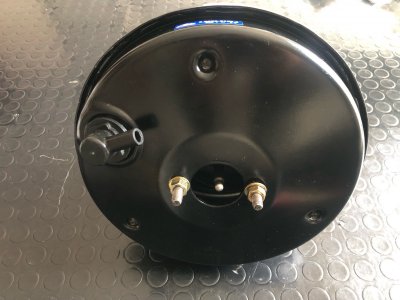
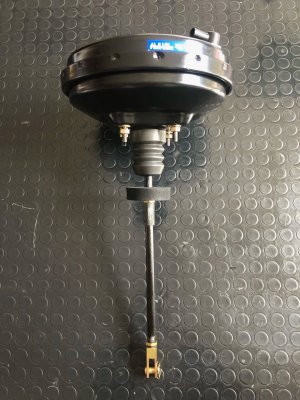
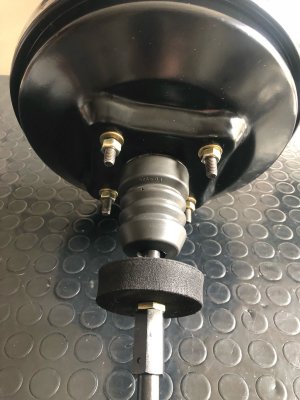
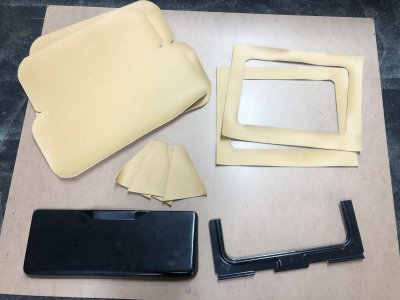
Booster Restoration
Attachments
-
 IMG_7651.jpg311.3 KB · Views: 265
 -
 IMG_7656.jpg285.2 KB · Views: 248
 -
 IMG_7660.jpg310.7 KB · Views: 254
 -
 IMG_7661.jpg289.1 KB · Views: 255
 -
 IMG_7662.jpg262.4 KB · Views: 249
 -
 IMG_8011.jpg294.4 KB · Views: 247
 -
 IMG_8012.jpg288.8 KB · Views: 269
 -
 IMG_8014.jpg235.3 KB · Views: 251
 -
 IMG_8192.jpg323.7 KB · Views: 253
 -
 IMG_8193.jpg224.6 KB · Views: 248
 -
 IMG_8196.jpg328.8 KB · Views: 238
 -
 IMG_8197.jpg242.7 KB · Views: 251
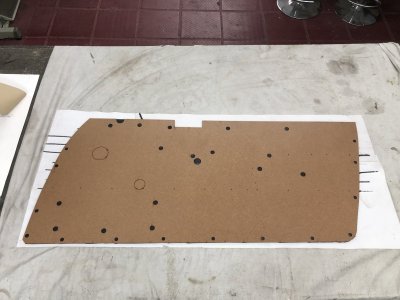
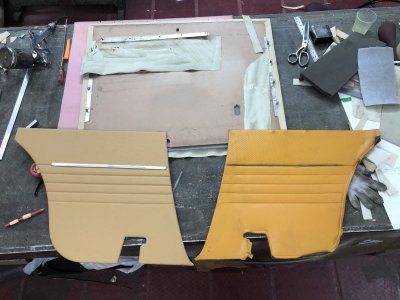
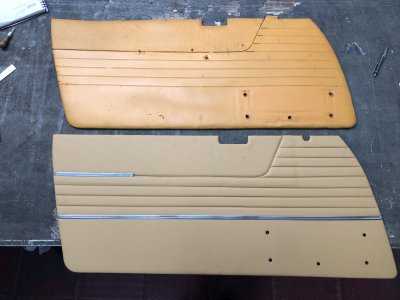
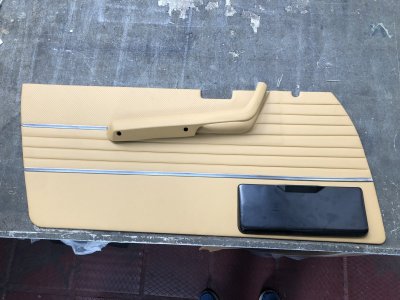
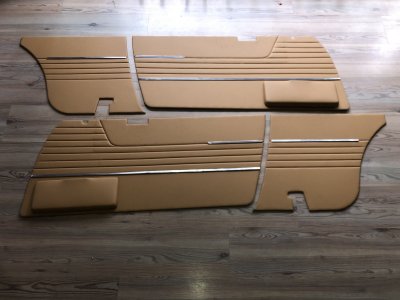
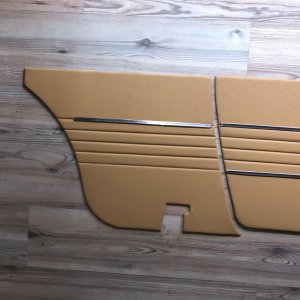
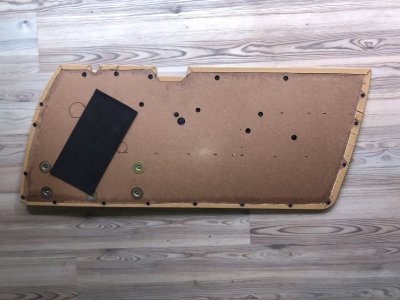
Door and Rear panels - Reproduction
Attachments
-
 9BE97ABA-3E1D-447C-A724-740CCA6ACCF7.jpeg430.8 KB · Views: 290
 -
 5BC5E0F9-AFC8-49E4-BA17-5732436A81EC.jpeg517.3 KB · Views: 234
 -
 653942AC-55BB-4842-9FF4-4F81594260AB.jpeg237.8 KB · Views: 237
 -
 B82BA2C1-F888-47A7-83D3-9FD9A59114B9.jpeg281.7 KB · Views: 216
 -
 80FFDB54-CEBC-4B34-B8B6-DF8511A0479E.jpeg296.3 KB · Views: 231
 -
 D05E60B4-DAF5-4673-A180-DF8B36EFB593.jpeg327.8 KB · Views: 236
 -
 9C525403-84FF-45BD-AF75-BBC6EF3BCAF0.jpeg225 KB · Views: 248
 -
 907531B4-FAD2-44A9-BB78-3DE0CF481E33.jpeg245 KB · Views: 236
 -
 87CE5C83-2FAA-43E2-9CEE-2A71D2C75AA5.jpeg378.3 KB · Views: 250
 -
 03155486-8ACB-4E1E-964E-A829887816DB.jpeg288 KB · Views: 222
 -
 A877ED4A-49E8-454C-9CC7-3A3356BF0BA5.jpeg285.1 KB · Views: 245
tdgray
Well-Known Member
Really nice. Fantastic job

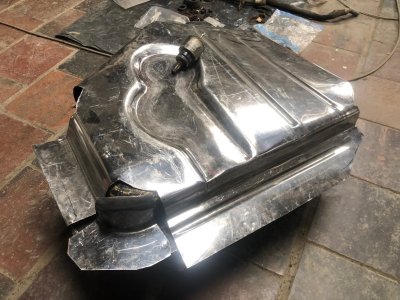
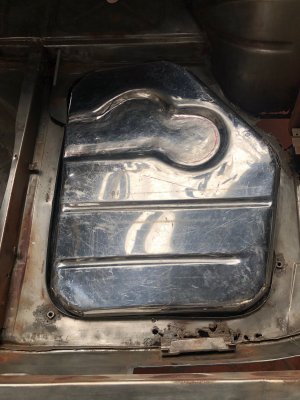
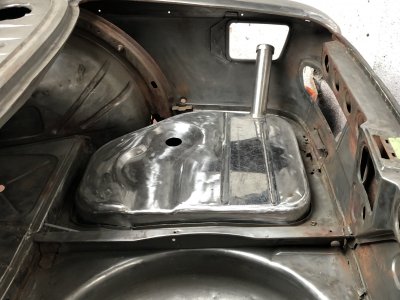
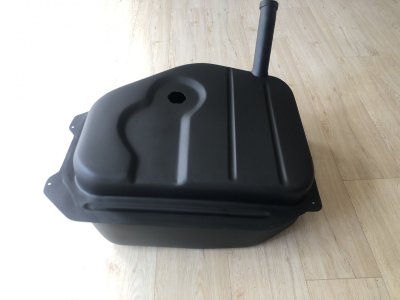
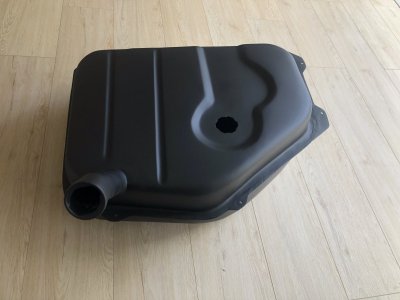
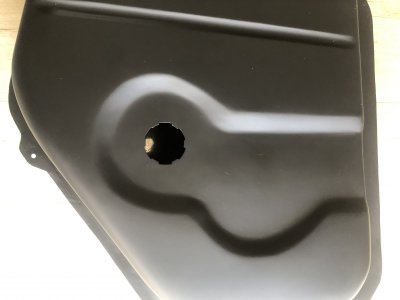
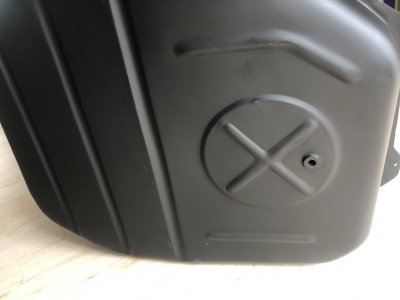
Stainless Steel Fuel Tank. Handmade Reproduction
Attachments
-
 IMG_0094.jpg360.9 KB · Views: 241
 -
 IMG_0364.jpg336.2 KB · Views: 232
 -
 ABFADC14-6302-4CDC-B746-C3D6EEBE1B4F.jpeg265.8 KB · Views: 209
 -
 39388F9F-B4A2-40EF-AA85-66FE7C9F7FBA.jpeg174.3 KB · Views: 207
 -
 0C8CA931-9FBD-4E89-A1BF-D291E73FDBC0.jpeg160.2 KB · Views: 204
 -
 85184F01-0FDA-4F5F-B913-ADE0A0C579A0.jpeg148.6 KB · Views: 192
 -
 C85EDB81-A617-4FF0-B3D1-DADFFC796CF8.jpeg202.2 KB · Views: 205
 -
 D4B8B3B9-D402-41A5-85EE-2B1C32C01836.jpeg131.8 KB · Views: 201
 -
 B3F98E63-5A12-4135-8BA6-54D626B7BF1C.jpeg125.4 KB · Views: 216
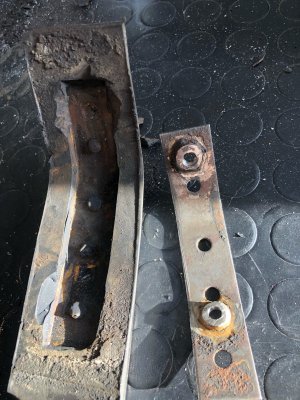
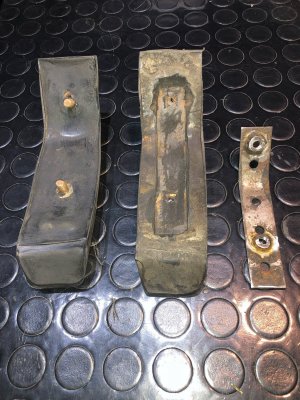
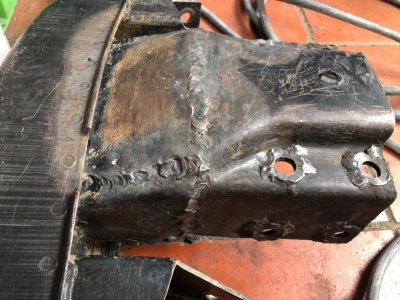
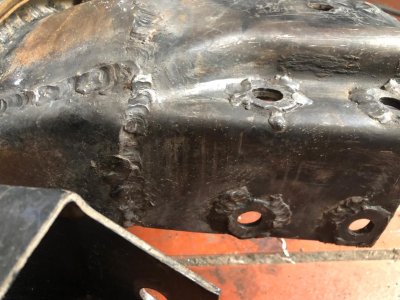
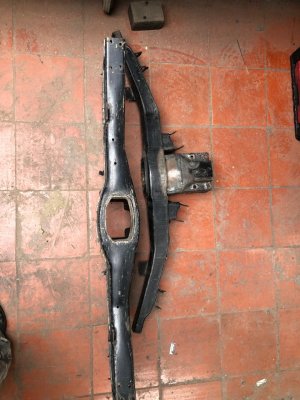
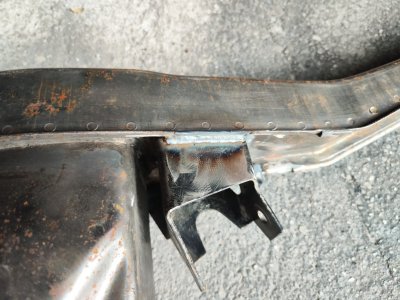
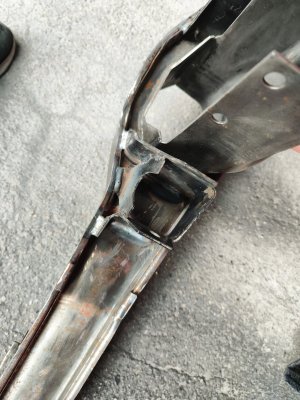
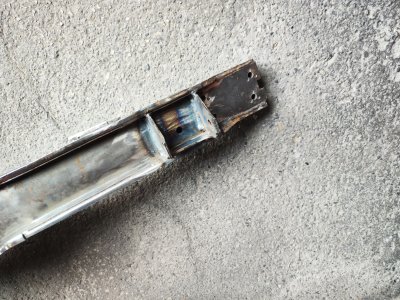
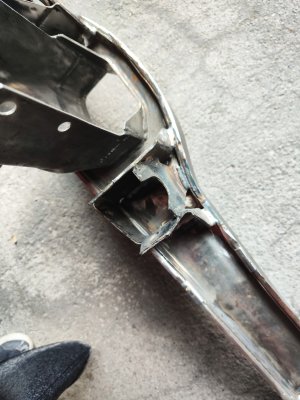
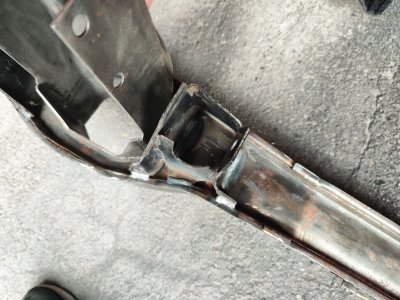
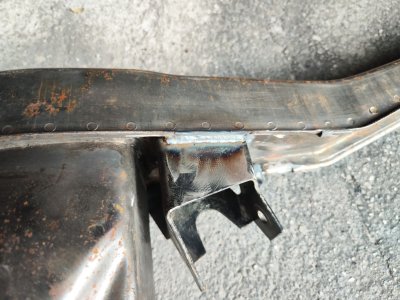
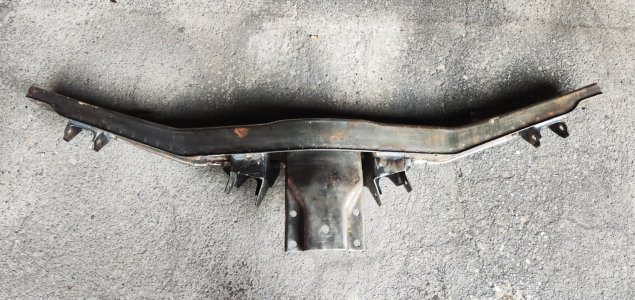
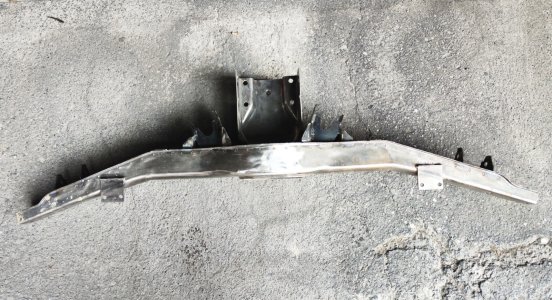
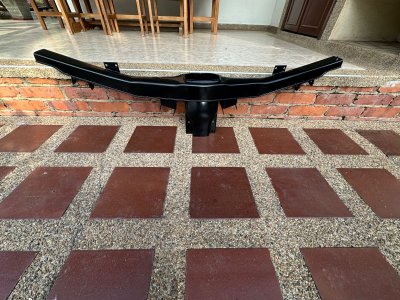
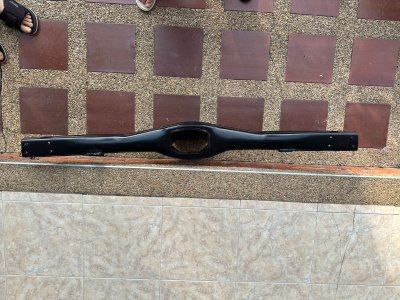
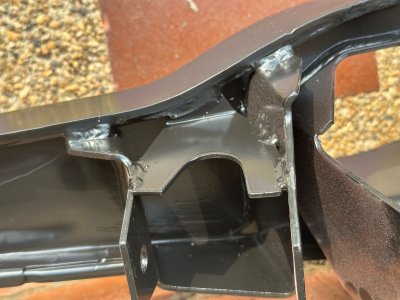
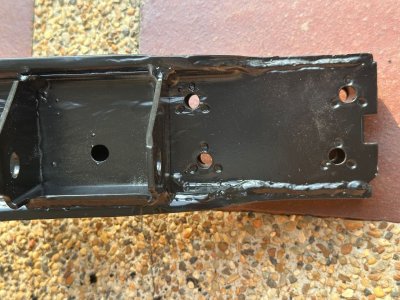
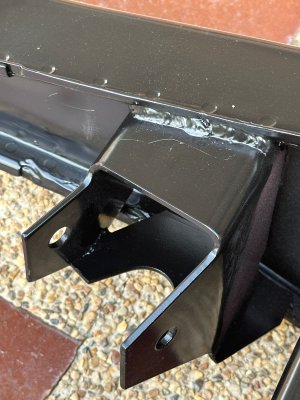
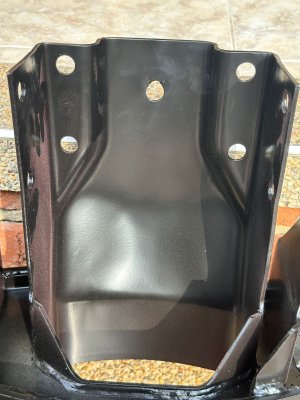
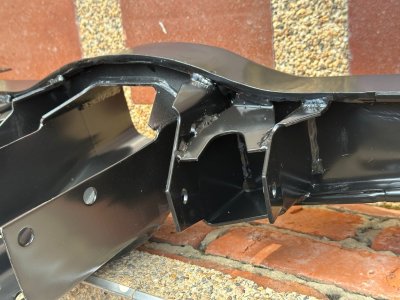
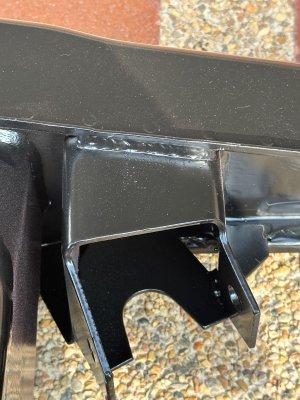
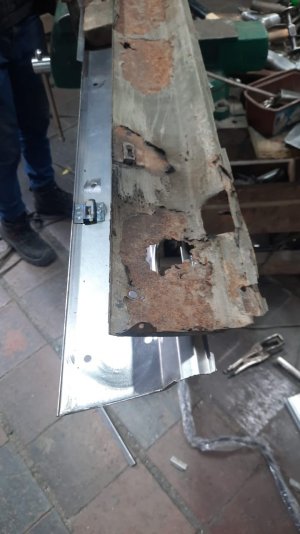
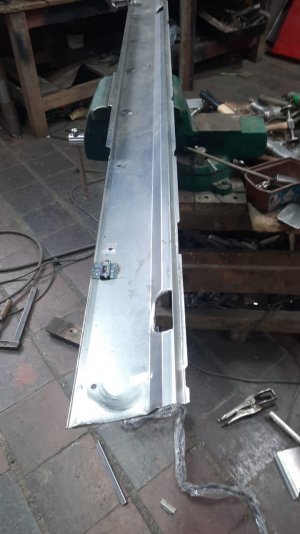
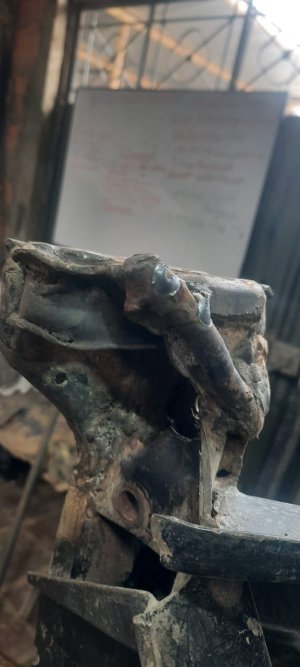
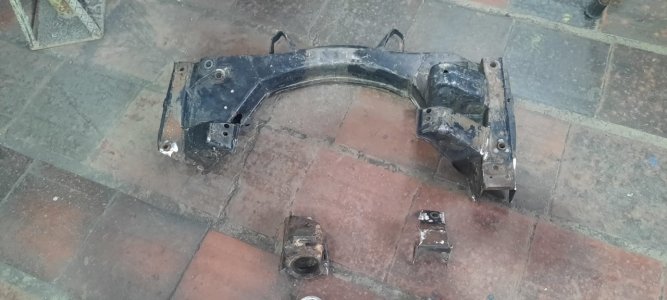
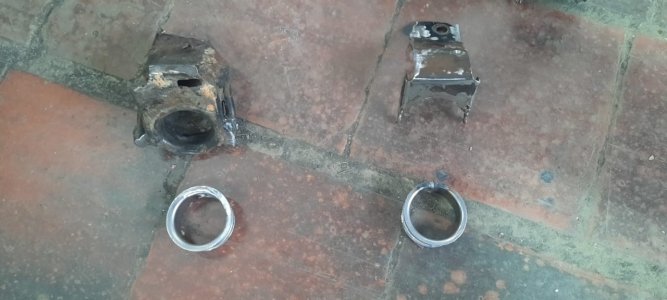
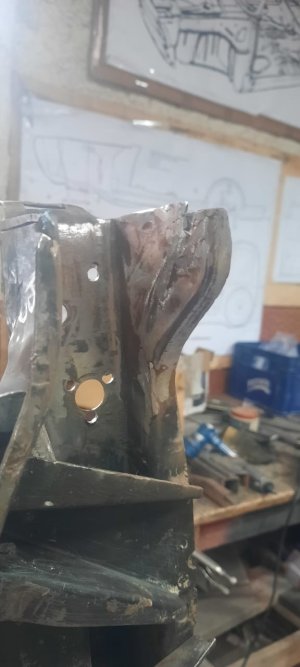
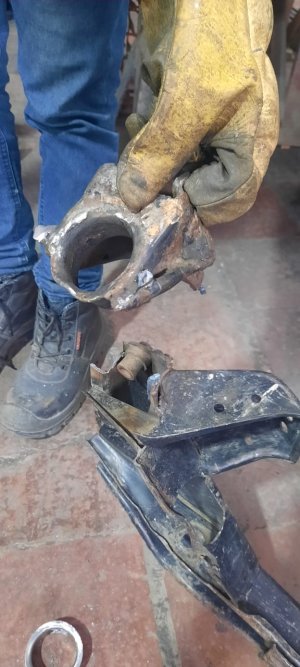
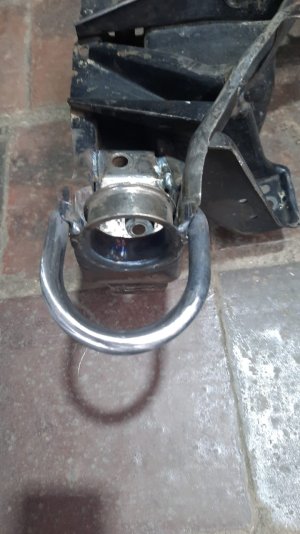
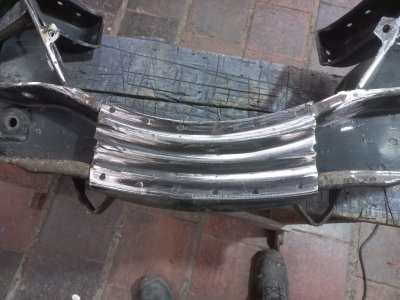
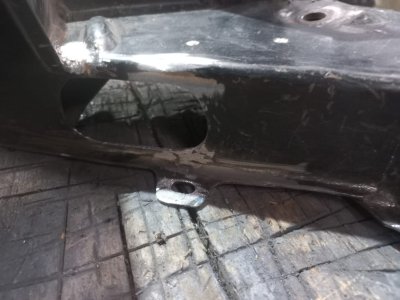
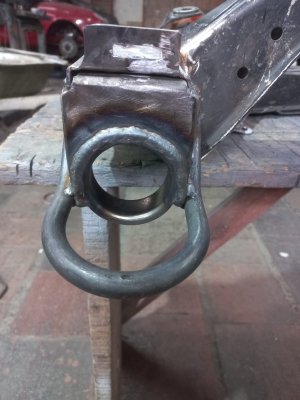
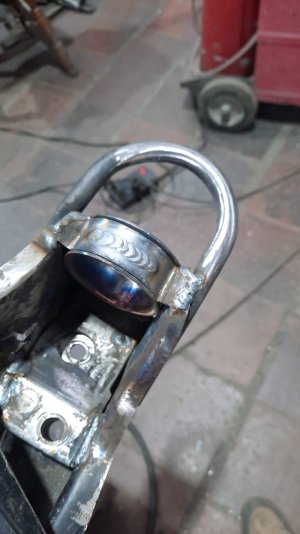
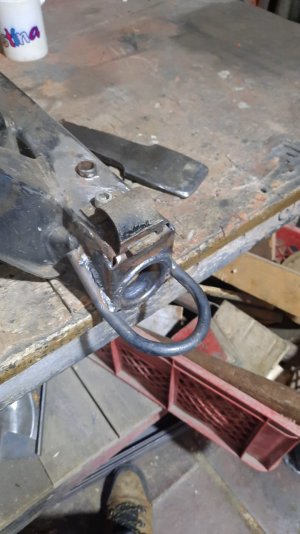
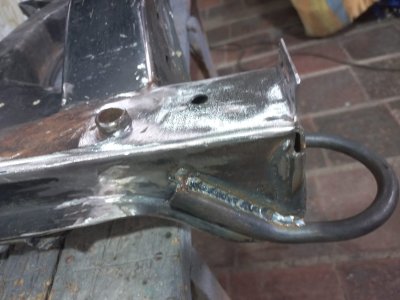
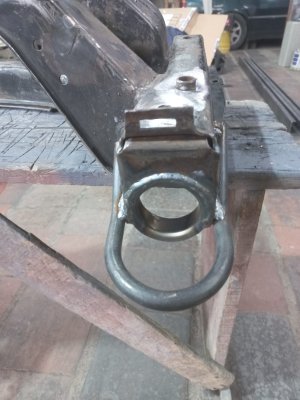
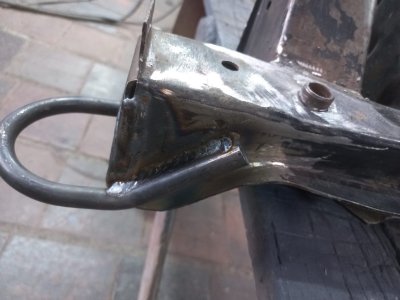
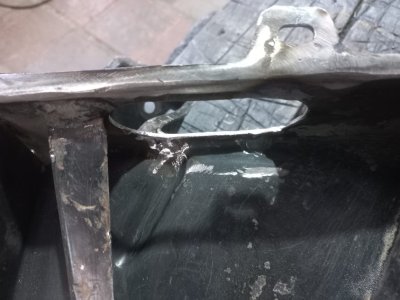
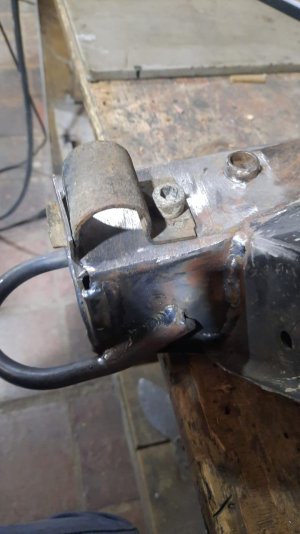
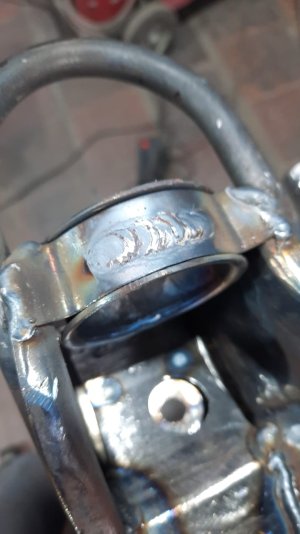
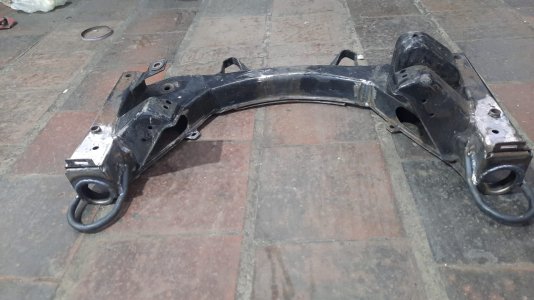
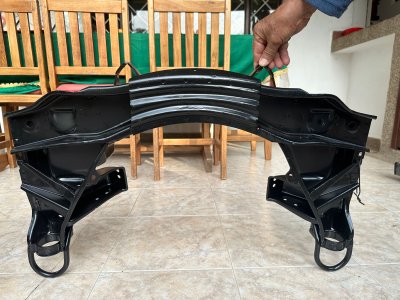
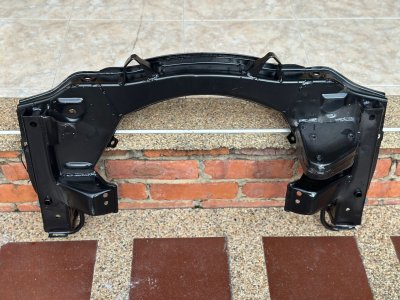
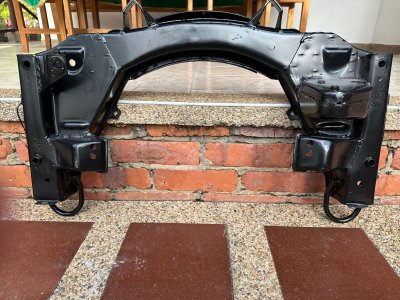
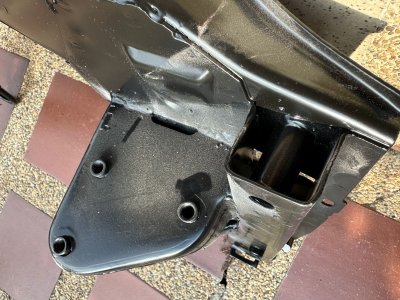
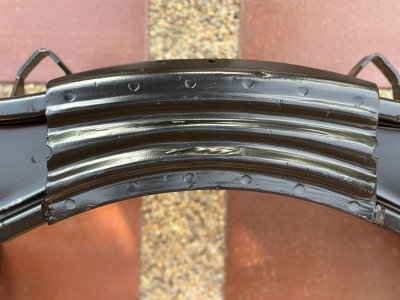
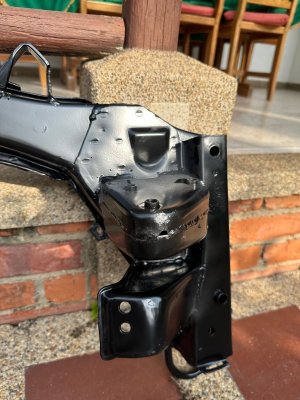
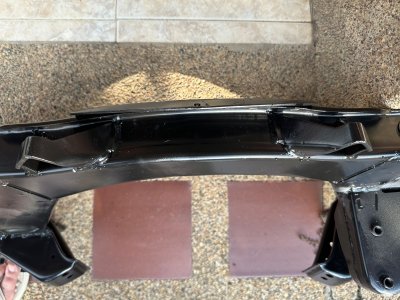
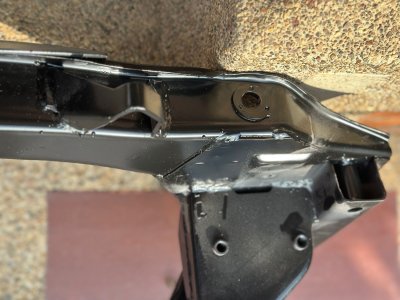
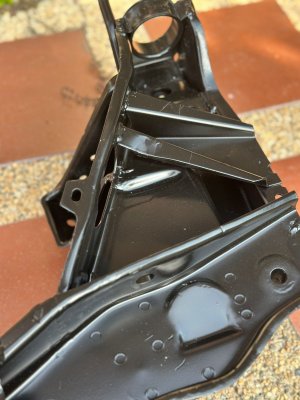
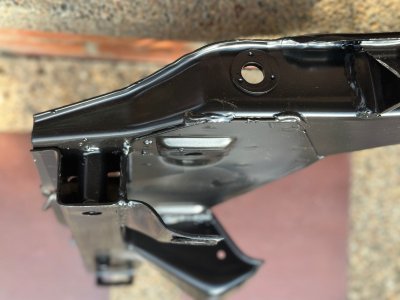
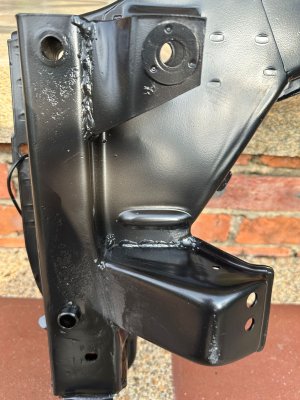
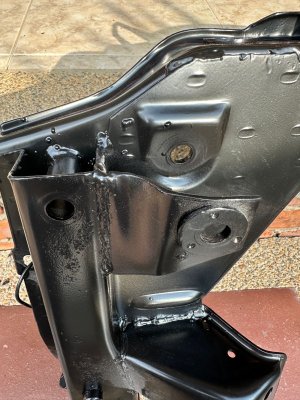
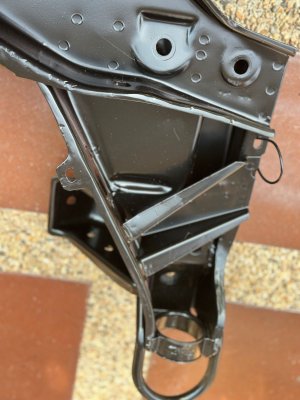
Rear axel frame conversion
From E3 to E9.
Mine E9 rear axle frame had a horrible damage and worst repair, so I took an E3 frame and had the mounts replaced, which is the only difference between both.
From E3 to E9.
Mine E9 rear axle frame had a horrible damage and worst repair, so I took an E3 frame and had the mounts replaced, which is the only difference between both.
Attachments
-
 78b6e2bb-a3ed-4827-ad61-43cbe1b1ab84.jpeg245.9 KB · Views: 201
 -
 21b2ab8a-0f0a-4780-8698-3dcda88cd8e6.jpeg201.7 KB · Views: 181
 -
 b9228259-41dc-4778-9b58-fb7913407e10.jpeg230.3 KB · Views: 181
 -
 6c9ef3dc-c4be-421d-98ea-b53787b8456a.jpeg152.2 KB · Views: 198
 -
 30b7a889-e504-4e4a-9754-8abc44dc583f.jpeg436.9 KB · Views: 184
 -
 5c86ce57-f766-4163-b59c-b507e9eb8fe6.jpeg517.7 KB · Views: 188
 -
 7bd3f721-6716-479b-be77-332856f67c9d.jpeg303.3 KB · Views: 206
 -
 d820909a-4efb-4d2e-98e2-e50c3e4534b3.jpeg301.7 KB · Views: 204
 -
 Rear frame 01.jpeg934.6 KB · Views: 63
 -
 Rear frame 2.jpeg466 KB · Views: 59
 -
 Rear frame 3.jpeg545.1 KB · Views: 60
 -
 Rear frame 9.jpeg551.3 KB · Views: 54
 -
 Rear frame 10.jpeg704.6 KB · Views: 65
 -
 Rear frame 11.jpeg821.8 KB · Views: 65
 -
 Rear frame 21.jpeg510.6 KB · Views: 62
 -
 Rear frame 22.jpeg440.8 KB · Views: 53
 -
 Rear frame 23.jpeg500.3 KB · Views: 60
 -
 Rear frame 25.jpeg360.7 KB · Views: 55
 -
 Rear frame 26.jpeg487.2 KB · Views: 71
 -
 Rear frame 27.jpeg251.3 KB · Views: 58
 -
 Rear frame 30.jpeg271.8 KB · Views: 51
 -
 Rear frame 31.jpeg416.7 KB · Views: 54
 -
 Rear frame 32.jpeg273.9 KB · Views: 57
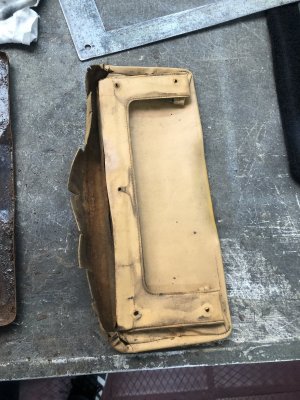
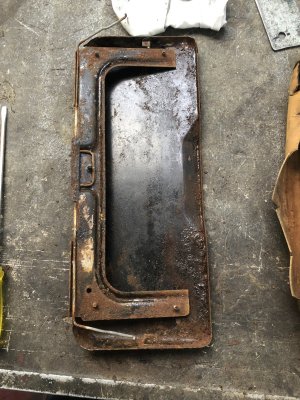
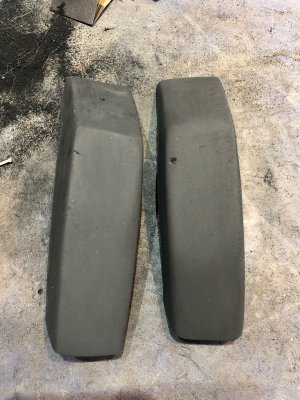
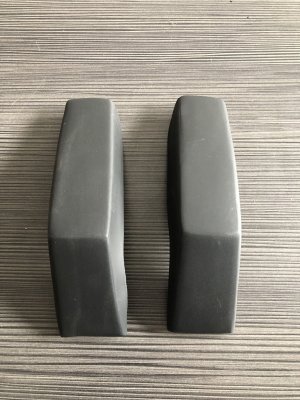
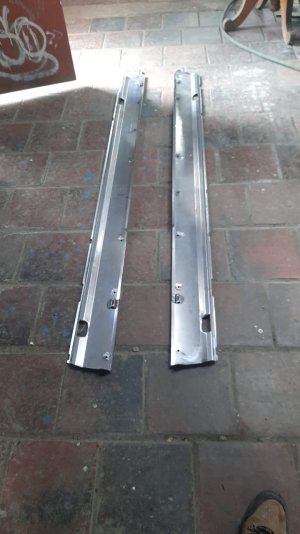
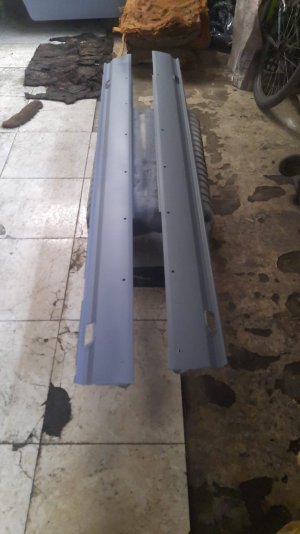
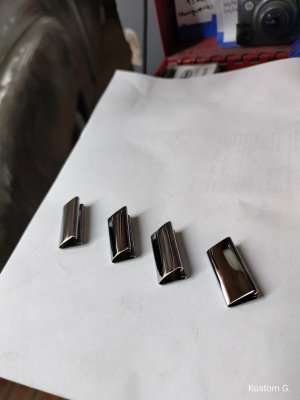
Sill cover steel reproduction set
Attachments
-
 ccd6c950-cbd2-4ed0-aba1-042508cd9105.jpeg113.3 KB · Views: 176
 -
 3276bf35-74cd-49d3-a13f-4295ad5bd779.jpeg118 KB · Views: 178
 -
 116e0296-9e0a-4d2b-bff9-bcb07a58d2a9.jpeg112.8 KB · Views: 160
 -
 c8478e90-a05d-45e9-a254-168561802183.jpeg106.5 KB · Views: 187
 -
 7d60ecb5-c702-4748-9480-b4e9d502c9a7.jpeg99.5 KB · Views: 174
@alprada70 ; if you're considering to make these sill cover as reproduction, here's a consideration:
I think the metal bracket that you spotwelded on the back are not used by anyone installing the covers. They are intended to hold a snapfit metal clip that snaps into the front and rear fenders. Thereby scraping the paint in the worst place possible for an E9; just next to the wheels.

I think that you can just leave those things off.
Question to the gruppe to check my assumption - Did anyone use the metal snapfit clips in these positions?
I think the metal bracket that you spotwelded on the back are not used by anyone installing the covers. They are intended to hold a snapfit metal clip that snaps into the front and rear fenders. Thereby scraping the paint in the worst place possible for an E9; just next to the wheels.
I think that you can just leave those things off.
Question to the gruppe to check my assumption - Did anyone use the metal snapfit clips in these positions?
I've never actually seen them installed. My car didn't have them installed. We reproduced them exactly like the originals. Thanks for the tip !!!
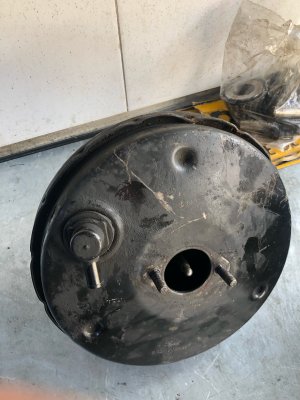
Hey @alprada70 ; how did you manage to split the casing of the Booster? Did you just 'unfold' the depressions that were pushed into the outer shell? How did you do that; just hit an old screwdriver in between them?Booster Restoration
Mine is terribly rusted on the outside, so I'd like to freshen it up as well. You method looks very thorough, as i like it, and would allow for a derust & rezinc before painting it again.
Uli from our German forum posted these pics showing the installation:


Source: E9-forum.de, Uli "Maschalab"
Without these screws being installed the rubber strip cannot be fixed firmly.
Only possible for somebody with very small fingers!
Thomas
Source: E9-forum.de, Uli "Maschalab"
Without these screws being installed the rubber strip cannot be fixed firmly.
Only possible for somebody with very small fingers!
Thomas
Last edited:
But you should put a rubber seal under the washer inside that M5 screw.
Breiti
Breiti
To open it I unfolded the depressions a little, but to close it again I made a tool so I could turn it. The tool screws onto the booster bolts.Hey @alprada70 ; how did you manage to split the casing of the Booster? Did you just 'unfold' the depressions that were pushed into the outer shell? How did you do that; just hit an old screwdriver in between them?
Mine is terribly rusted on the outside, so I'd like to freshen it up as well. You method looks very thorough, as i like it, and would allow for a derust & rezinc before painting it again.
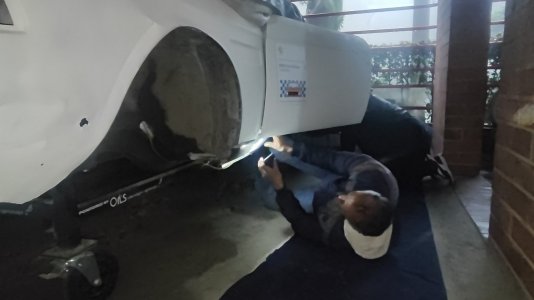
I see, so it's purpose is to pull the top, visible side of the sill trim nicely close to the body. Iuntill I saw your pics i was always wondering where the corresponding hole would be, as i always looked at the Walloth&Neesh repair panels - but they turn out not to have the holes.Uli from our German forum posted these pics showing the installation:View attachment 195152View attachment 195153View attachment 195154
Source: E9-forum.de, Uli "Maschalab"
Without these screws being installed the rubber strip cannot be fixed firmly.
Only possible for somebody with very small fingers!
Thomas
Seeing your pictures made me check an NOS part i have:
It indeed does have the hole at the bottom, in the middle of the width:
Last edited:
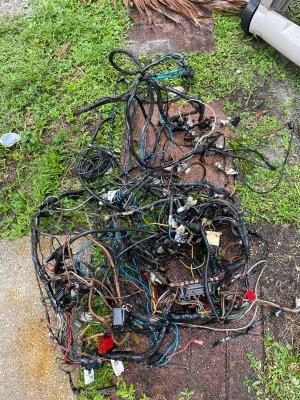
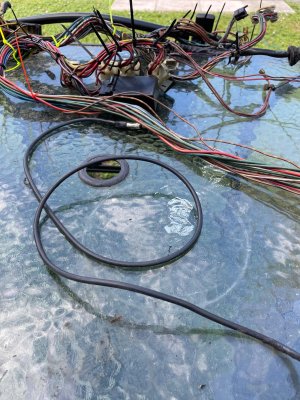
Wow, a year without any updates...
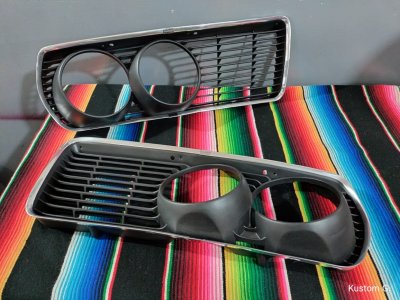
I've spent a lot of time restoring the electrical wiring, but I've made progress on many things: I reproduced the mud covers in aluminum, I'm developing the radio base , I restored the aluminum trim of the front seats, and I restored the front grilles and the sill trims...
Let's get started!
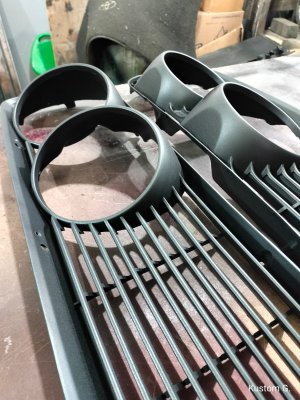
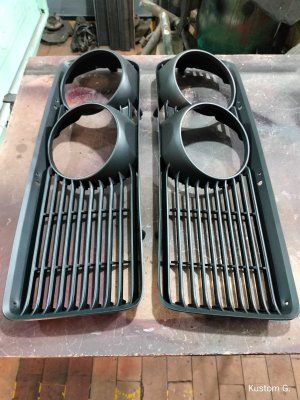
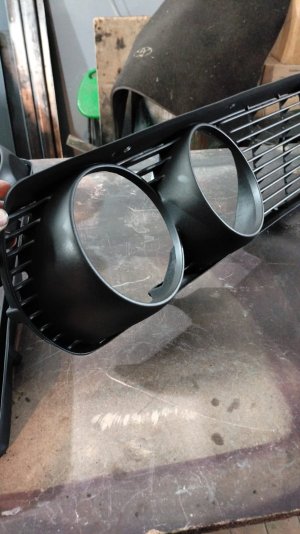
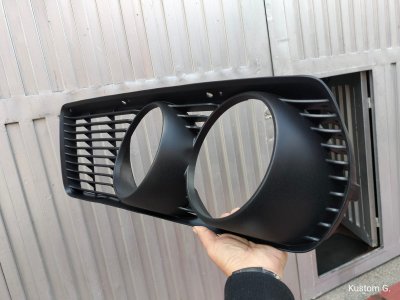
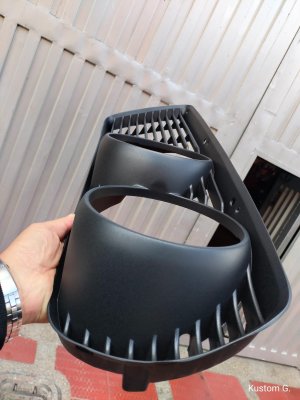
Front Headlight grills Restoration
I've spent a lot of time restoring the electrical wiring, but I've made progress on many things: I reproduced the mud covers in aluminum, I'm developing the radio base , I restored the aluminum trim of the front seats, and I restored the front grilles and the sill trims...
Let's get started!
Front Headlight grills Restoration
Attachments
-
 Headlight grill 106.jpeg235.2 KB · Views: 57
 -
 Headlight grill 107.jpeg228.2 KB · Views: 64
 -
 Headlight grill 108.jpeg140.1 KB · Views: 62
 -
 Headlight grill 111.jpeg144.1 KB · Views: 52
 -
 Headlight grill 110.jpeg127.7 KB · Views: 58
 -
 Headlight grill 118.jpeg93 KB · Views: 64
 -
 Headlight grill 119.jpeg81.9 KB · Views: 62
 -
 Headlight grill 121.jpeg162.1 KB · Views: 65
Front frame restoration
Attachments
-
 Front frame 101.jpeg65.5 KB · Views: 64
 -
 Front frame 102.jpeg176.7 KB · Views: 61
 -
 Front frame 104.jpeg151.7 KB · Views: 58
 -
 Front frame 105.jpeg55.5 KB · Views: 64
 -
 Front frame 107.jpeg98.9 KB · Views: 62
 -
 Front frame 111.jpeg94.7 KB · Views: 64
 -
 Front frame 112.jpeg306.3 KB · Views: 65
 -
 Front frame 113.jpeg84.1 KB · Views: 52
 -
 Front frame 115.jpeg98.8 KB · Views: 53
 -
 Front frame 116.jpeg74.8 KB · Views: 66
 -
 Front frame 118.jpeg93.9 KB · Views: 56
 -
 Front frame 121.jpeg90.9 KB · Views: 62
 -
 Front frame 122.jpeg99.5 KB · Views: 56
 -
 Front frame 123.jpeg195.6 KB · Views: 69
 -
 Front frame 126.jpeg216.7 KB · Views: 66
 -
 Front frame 127.jpeg77 KB · Views: 71
 -
 Front frame 128.jpeg69.2 KB · Views: 57
 -
 Front frame 129.jpeg105.5 KB · Views: 58
 -
 Front frame 133.jpeg305 KB · Views: 62
 -
 Front frame 135.jpeg305.2 KB · Views: 62
 -
 Front frame 136.jpeg449 KB · Views: 60
 -
 Front frame 137.jpeg659.3 KB · Views: 57
 -
 Front frame 138.jpeg352.8 KB · Views: 58
 -
 Front frame 139.jpeg250.4 KB · Views: 65
 -
 Front frame 140.jpeg483.3 KB · Views: 68
 -
 Front frame 141.jpeg349.3 KB · Views: 59
 -
 Front frame 142.jpeg188.6 KB · Views: 52
 -
 Front frame 143.jpeg265.4 KB · Views: 56
 -
 Front frame 144.jpeg278.8 KB · Views: 65
 -
 Front frame 145.jpeg347.9 KB · Views: 59
 -
 Front frame 146.jpeg179.5 KB · Views: 73

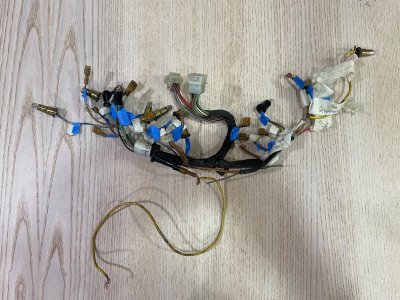

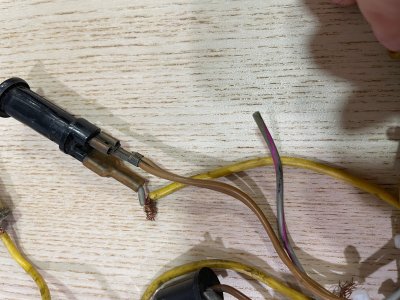
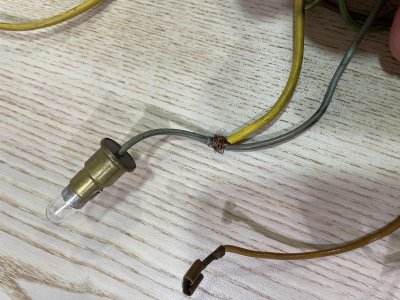
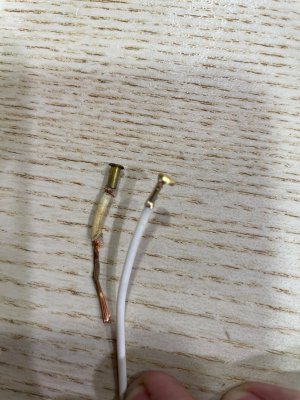
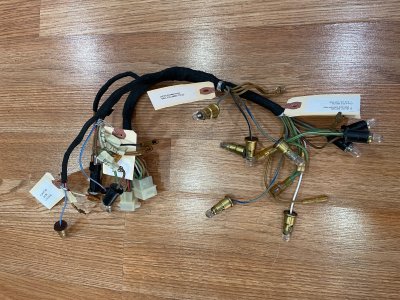
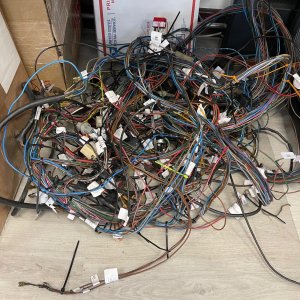
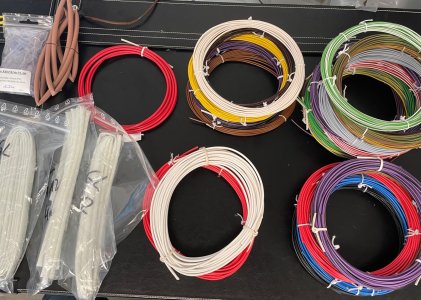
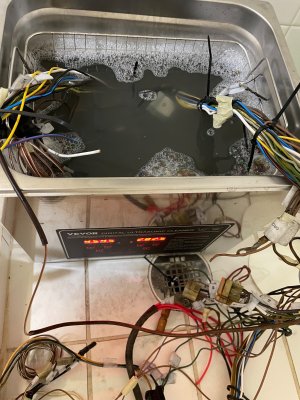
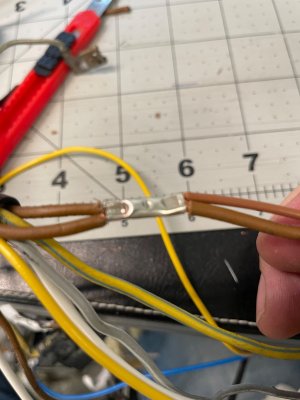
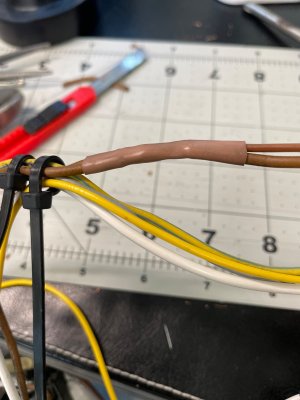
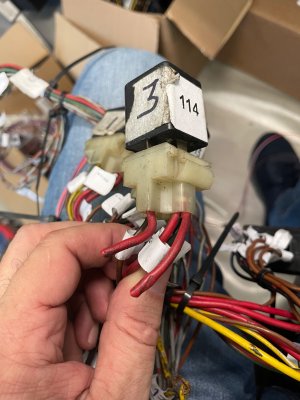
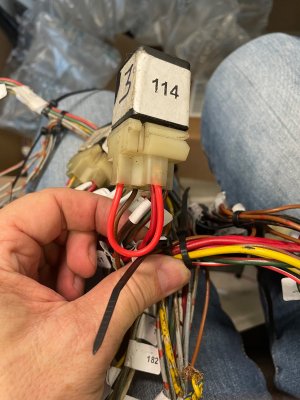
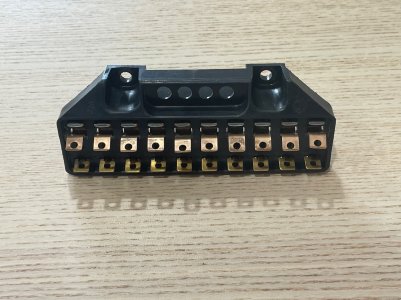
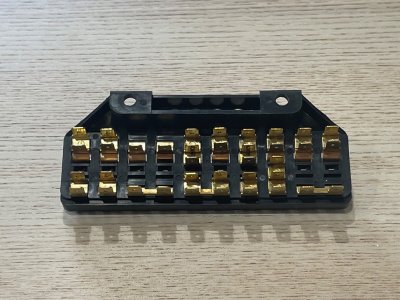
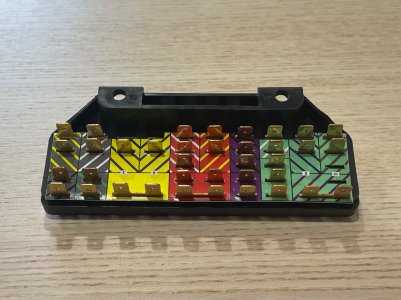
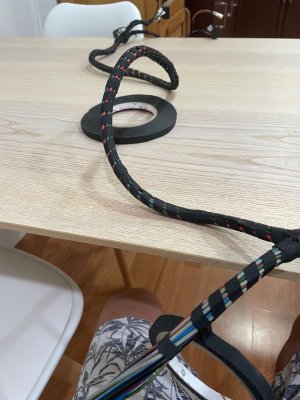
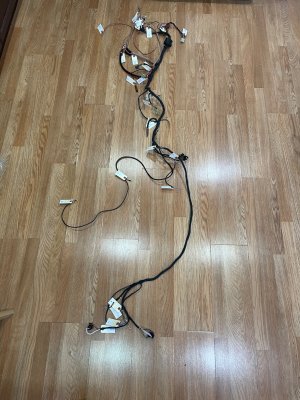
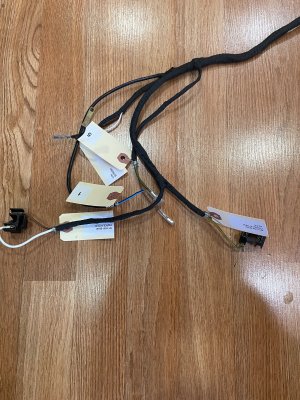
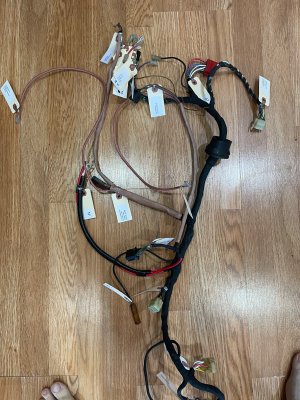
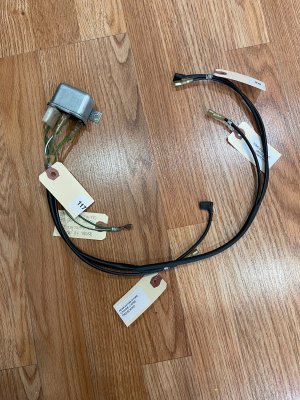
Electric Harness
Suppliers:
kabelknecht.de
-Automotive cable 0,75-1,0 - 1,5 -2,5 4,0 mm
-Silicone glass tube
-Insulate PVC Conectors
-Conectors
Davie's Volvo page- prancingmoose.com
-Conectors
-Terminals
digikey.com
Terminals
Ebay
Tape Coraplast 9 mm
Tools
Terminals
Insulators
Heat Shrinkable tubings
Suppliers:
kabelknecht.de
-Automotive cable 0,75-1,0 - 1,5 -2,5 4,0 mm
-Silicone glass tube
-Insulate PVC Conectors
-Conectors
Davie's Volvo page- prancingmoose.com
-Conectors
-Terminals
digikey.com
Terminals
Ebay
Tape Coraplast 9 mm
Tools
Terminals
Insulators
Heat Shrinkable tubings
Attachments
-
 IMG_1034.jpeg1.4 MB · Views: 68
 -
 IMG_1072.jpeg822.1 KB · Views: 68
 -
 IMG_1087.jpeg1.1 MB · Views: 66
 -
 IMG_2419.jpeg721.4 KB · Views: 68
 -
 IMG_2534.jpeg677 KB · Views: 62
 -
 IMG_2549.jpeg439.1 KB · Views: 69
 -
 IMG_2550.jpeg403.7 KB · Views: 63
 -
 IMG_2725.jpeg528.5 KB · Views: 68
 -
 IMG_2727.jpeg550 KB · Views: 71
 -
 IMG_2977.jpeg582.1 KB · Views: 77
 -
 IMG_2976.jpeg527.4 KB · Views: 72
 -
 IMG_2978.jpeg524.4 KB · Views: 68
 -
 IMG_3181.jpeg546.5 KB · Views: 64
 -
 IMG_3892.jpeg876.5 KB · Views: 72
 -
 IMG_3893.jpeg962.9 KB · Views: 75
 -
 IMG_3894.jpeg957.5 KB · Views: 74
 -
 IMG_3898.jpeg677.6 KB · Views: 67
 -
 IMG_3900.jpeg627.6 KB · Views: 72
 -
 IMG_3901.jpeg1 MB · Views: 82
Last edited: