Control arm bushing replacement-HELP something not right

Be careful with the OCAP control arms...the bushings were installed in reverse in two different sets I ordered. No worry, I ended up taking the second defective pair to a shop with a press and reversed the reversed bushings (cost me a bottle of single-malt) but got it right.
 
UPDATE: Walluth vs BMW OEM Lower Control Arm bushings. I purchased the E12 control arms and pressed out the inner bushings, same as above.

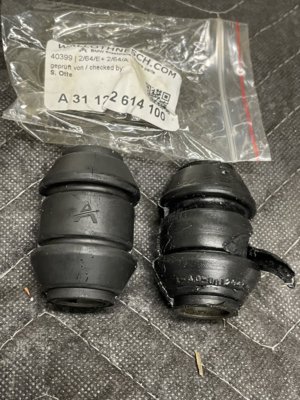
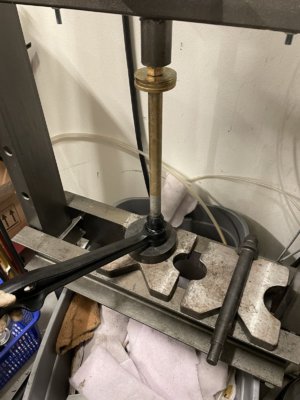
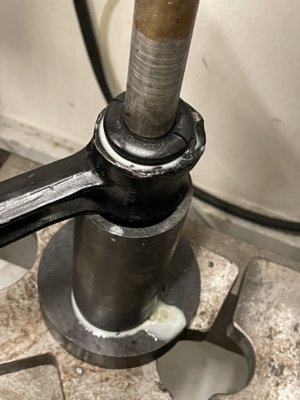
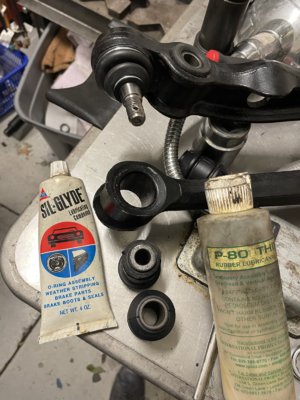
We first tried pressing in the E9 inner BMW bushings first. If you try and rush it you will destroy your bushings. @jjs2800cs in his above 2013 post is spot on on his note no. 3 " to press, release, press, release several times as the rubber slide and squeezed into the bore". Patience is critical. Even then, the slightest misalignment and the bushing cocks to the side and the rubber gets cut when pressing. The BMW OEM bushing is on the right. On the left is the W&N bushing that is clearly from a different mold tooling set. The W&N set is slightly easier to press in. You must have a bearing press with lots of tubes and base plates. See attached. Patience is putting a light load on it using a mandrel that will go deep into the bore of the bushing and not allow the bushing to cock to the side. Then press it in about 30% of the way. We then let our sit overnight in the press. This allowed the rubber OD to 'creep' into the bore. Then press it in further and allow it to set again. This method worked great with the W&N bushings and the exposed ends where finally equidistant in the arm. We also experimented with these two rubber lubes. P80 is my all time favorite.
 

Attachments

  • IMG_8781 (1).jpg
    IMG_8781 (1).jpg
    454.4 KB · Views: 129
  • IMG_8776.jpg
    IMG_8776.jpg
    358.5 KB · Views: 126
  • IMG_8780.jpg
    IMG_8780.jpg
    263.4 KB · Views: 130
  • IMG_8775.jpg
    IMG_8775.jpg
    363.3 KB · Views: 137
Back
Top