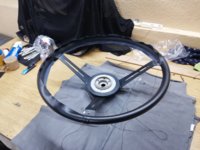
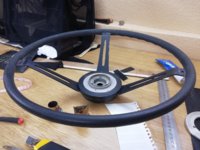
CSI Sport Steering Wheel Restoration

Markos

Well-Known Member
Site Donor
Messages
13,369
Reaction score
7,517
Location
Seattle, WA
Hi Folks,

I’m restoring a CSI wheel for a forum member. I figured I would document how to break these down.

This wheel had a cover on it. Removing it showed the leather that needs to be redone. The wheel is en route to eastern europe for a high quality recover. (edited so folks know I'm not recovering myself - I wish I was that good!) When it gets back I will hit it with a light coat of satin black paint and reassemble. While it is gone I will be making a mold of the horn pad as well as the plastic body. Both of those are in poor shape on my second CSI wheel.

4C5EE644-2B5C-40C2-B926-E2D0F1C0E4A6.jpeg


Remove the horn pad, it pops off by sticking a small rod through the access hole seen at 7PM. Also note the three screws holding down the spring loaded horn plate.
DA2997AF-A1BC-4019-893F-62E9903EC5DF.jpeg


But first, unscrew the horn terminal.
43A7F156-CA0F-48FD-858F-5B774D3D3A28.jpeg


A view of the backside of the horn plate with springs. These are special screws.
651428FE-F3FE-409A-AB30-5156CAB60758.jpeg


Next, remove the plastic body from the wheel hub.
FA3D2106-339A-44E4-8232-82FDE49F6730.jpeg


Removed:
CCC0549A-2FA0-42A4-9D13-5FFD86019D45.jpeg


Time to remove the horn ring:
284F3BC0-B834-4C70-A1BF-65E1D10DACCF.jpeg


Removed.
42B59316-1E3B-490A-8044-4DC77B2DA94B.jpeg


Lastly, the chrome spoke ends. These are real metal and on the way to the chrome shop with some other small bits:
148BF127-2E8D-4997-968D-385F8DB2312A.jpeg


More to come next month!
 
Last edited:
Some updates: (edit: Just to clarify - I am not doing the leather myself)


Looking rough under the old leather:
IMG_20180627_172854.JPG


All cleaned up:
IMG_20180627_173859.JPG


The tools:
IMG-06f4cab521412632224691851785eecb-V.JPG


Leather Cut:
IMG_3872.JPG


The stitch. For those that don’t know this wheel, he is replicating the original stitch.
IMG_3873.JPG


IMG_3874.JPG


IMG_3875.JPG


One third done:
IMG_3876.JPG

@Stan
 

Attachments

  • IMG_3877.JPG
    IMG_3877.JPG
    241.2 KB · Views: 561
  • IMG_20180627_173936.JPG
    IMG_20180627_173936.JPG
    303.8 KB · Views: 535
Last edited:
Hi Marcos. Looks amazing. Do you do or know where I can have the wood on a bus wheel restored?
Keep up the good work.
Harry
 
Hi Marcos. Looks amazing. Do you do or know where I can have the wood on a bus wheel restored?
Keep up the good work.
Harry

I'm not sure Harry. You could try sending it to Bela. The "wood" is actually paper thin veneer. I have one myself that needs some attention but I don't intend to fully restore the wood. Lightly sand, fill the cracks and reclear. @Stan redid his wood wheel a few years ago. Perhaps he can chime in.
 
Kyle 184.jpg
IMG_3008.JPG
Hi Marcos. Looks amazing. Do you do or know where I can have the wood on a bus wheel restored?
Keep up the good work.
Harry
I restored one painstakingly over about a year. Fortunately I had another wheel to use in the meantime. I picked off the loose veneer with an exacto knife and use the sanding drum on the Dremel tool to get the rest off. After that I sprayed it with a rattle can epoxy called Spray MAX 2K - High Gloss 368-006
 
Last edited:
Im restoring 3 wood bus wheels now and find it difficult work. Or im too precise. Or I suck at it.
Indeed the veneer is thin. In some places I think it's less then 1mm thick. Like a kids fingernail thickness.

The veneer is cast over a textile and below that is a black solid material, likely a glue

Also one of the wheels actually has play between the steel ring and the wood. The wood is in one piece but it rotates (clockwise and back) over the ring, and also in forward (car) direction.
Poking inside the wood at the openings near the spokes with a steel wire reveals soft sticky glue. It should be strong, not sticky. Something went wrong there.

I'm getting a third wheel over the coming week that's even worse, split all over.
I never thought of Bela22, but it's a good idea.
 
Last edited:
I decided to give the wheel another fresh coat of satin black while I wait and wait for chrome. One would
think that the wheel would be a blue steel from the factory but it was in fact painted.

AE33EBAE-CCB3-4967-A3AC-0AD4AA79D295.jpeg
48E92F4D-CA47-40DE-ABD6-526B539B6D28.jpeg
 
Delays and cost at the chrome shop have me investigating chrome plated vinyl (for the next wheel) I had a hook added to aid in the process. Expensive to print in nickel plated vinyl but only $10 to dip in chrome:

0E76AE8F-4D12-44D2-91B9-053451396880.png
 
Back
Top