My pay back to the forum; here's my approach to rebuilding the heater box from my E9. Not sure how this compares to e3, but let me know and I can possibly merge.
I'll likely chop it in roughly three pieces; removal, disassembly, repair and rebuild. I haven't installed it yet myself, so i can't do any pics of that") .
.
I will add sections in the coming days, depending on how boring my meetings in the office will be....
Cost & time estimation: About 450 euro and 30 hours.
- Re-cored heat exchanger: 231 euro
- Re-zinced parts (done with other parts, so I just take a part of it: ) 30 euro's
- 1 square meter of closed cell EPDM foam 5 mm thick with glue backing: 60 euro's
- blacking fluids to recoat the black steel spring wires of the front air vents: 25 euro for a set, but used only 25% of it: 6 euro.
- a few rivets, rattle can black paint, solvent; glue for textile part inside the air duct: say 10 euro's in total.
time consumption: 30 hours; this includes disassembly, making it all fresh again, drop & pick up of the parts of for fresh zinc and recore, an re-assembly. Oh, and a bunch of photo's in between to insure myself for premature Alzheimer...
This will get you:
1. peace of mind that your core doesn't leak. Especially helpful if you don't want to disassemble half of your dash after finishing that 10 years restoration.
2. A nice and shiny center stack, with air vents that give max air volume output (sometimes blocked by sagging textile inside the air ducts)
3. smooth running fan with no noise from 45 year of gunk /leaves inside etc
Disassembly:
Getting the heater box out from the dash is difficult. It's quite some work, as it requires you to remove some parts surrounding it to give access to the screws holding it place.
If i remember well, you need to get the glovebox out, and the panel under the steering column. Besides that, you need to remove the center console sides. I don't think you can leave any one of those installed. Also you need to disconnect the water hoses from inside the engine compartment.

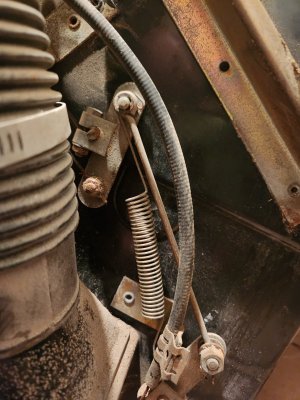
Unscrew bolts from the side of the front panel, they should have 2 left, 2 on right side; see the ratchet position.

The front panel is now hanging by the control wires and its electrical connector. You can see also the rectangular air duct now comes out (bottom right of photo). My heater unit only had 3 screws instead of the 4 needed...

Next step is detaching the unit itself from the firewall. The unit has on either side a large yellow zinced bracket with 4 nuts. (see green lines in image below) Detach those 4 nuts.

You now have it loose.

I'll likely chop it in roughly three pieces; removal, disassembly, repair and rebuild. I haven't installed it yet myself, so i can't do any pics of that
.I will add sections in the coming days, depending on how boring my meetings in the office will be....
Cost & time estimation: About 450 euro and 30 hours.
- Re-cored heat exchanger: 231 euro
- Re-zinced parts (done with other parts, so I just take a part of it: ) 30 euro's
- 1 square meter of closed cell EPDM foam 5 mm thick with glue backing: 60 euro's
- blacking fluids to recoat the black steel spring wires of the front air vents: 25 euro for a set, but used only 25% of it: 6 euro.
- a few rivets, rattle can black paint, solvent; glue for textile part inside the air duct: say 10 euro's in total.
time consumption: 30 hours; this includes disassembly, making it all fresh again, drop & pick up of the parts of for fresh zinc and recore, an re-assembly. Oh, and a bunch of photo's in between to insure myself for premature Alzheimer...
This will get you:
1. peace of mind that your core doesn't leak. Especially helpful if you don't want to disassemble half of your dash after finishing that 10 years restoration.
2. A nice and shiny center stack, with air vents that give max air volume output (sometimes blocked by sagging textile inside the air ducts)
3. smooth running fan with no noise from 45 year of gunk /leaves inside etc
Disassembly:
Getting the heater box out from the dash is difficult. It's quite some work, as it requires you to remove some parts surrounding it to give access to the screws holding it place.
If i remember well, you need to get the glovebox out, and the panel under the steering column. Besides that, you need to remove the center console sides. I don't think you can leave any one of those installed. Also you need to disconnect the water hoses from inside the engine compartment.
Unscrew bolts from the side of the front panel, they should have 2 left, 2 on right side; see the ratchet position.
The front panel is now hanging by the control wires and its electrical connector. You can see also the rectangular air duct now comes out (bottom right of photo). My heater unit only had 3 screws instead of the 4 needed...
Next step is detaching the unit itself from the firewall. The unit has on either side a large yellow zinced bracket with 4 nuts. (see green lines in image below) Detach those 4 nuts.
You now have it loose.
Last edited: