Hi Folks,
A few years ago I mentioned that I would make my own battery cables and post a DIY. I finally found the need to replace the cables so here we are. This isn’t meant for those that are going after a factory look. The cables aren’t that obvious in black but marine terminals won’t look original.
If you buy battery cables from the local auto parts store you will find that they are made from a few thick strands of copper. As a consequence, they are very stiff. The OEM cables use nice wire and the braided negative cable is quite lovely.
The DIY process is quite simple. You use 1/0 flexible welding cable and matching 1/0 copper terminal ends. Other than that, you need some ridicuosly large (and expensive) heat shrink tube. The cable is under $3 a foot and you can buy it in black or red at local welding shops. I chose black for both cables. The terminal ends and heat shrink were purchased at Napa.
Special tools required include heavy duty cable
cutters, which I have and use all the time for cutting romex. You also need a $20 crimper and a BFH (I use a 5lb mini sledge).
I’m going to keep making these for my cars so I will need to add this inenxpensive hydraulic crimper to my wish list:
https://www.amazon.com/dp/B0114QC3OY/ref=asc_df_B0114QC3OY5262336/
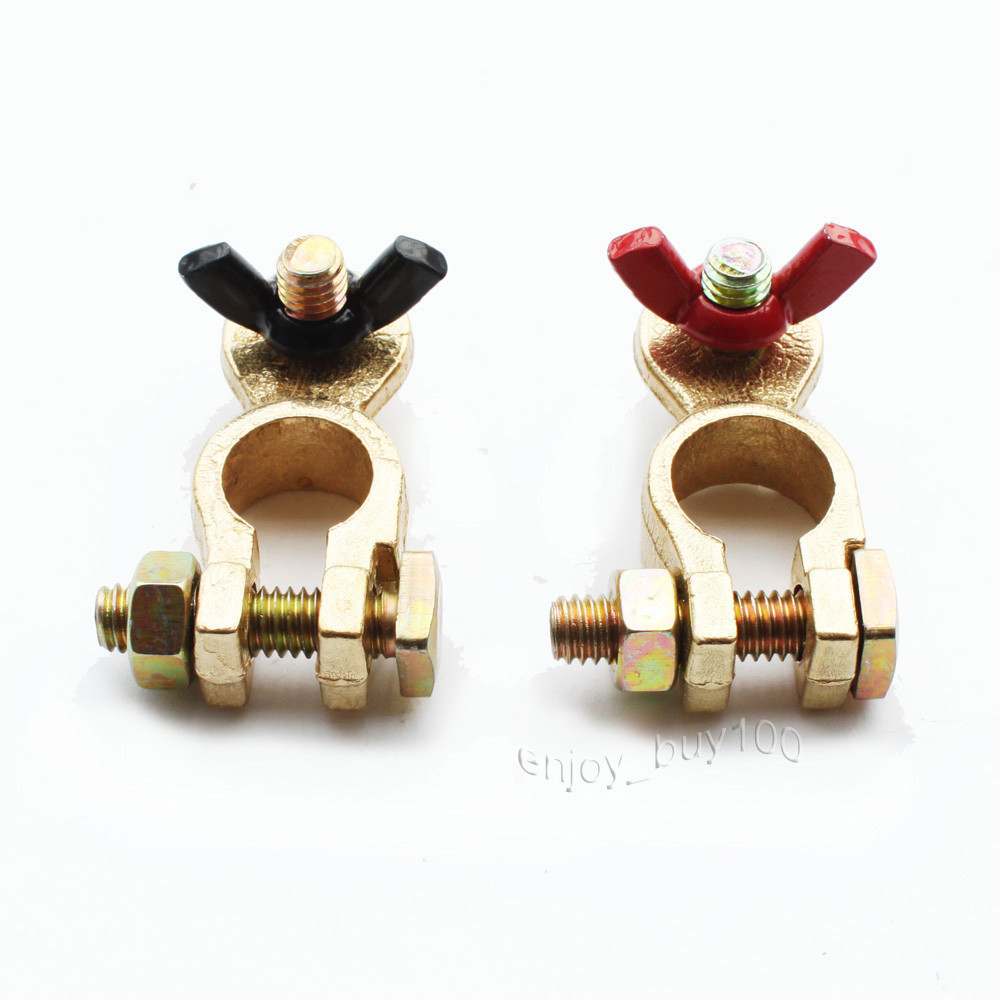
Marine Terminals (ebay) for $7.70
The run from the battery to the starter is about 4’. The negative cable is only a few inches. I used about six inches, but should have gone shorter.
The 1/0 against my original starter cable.
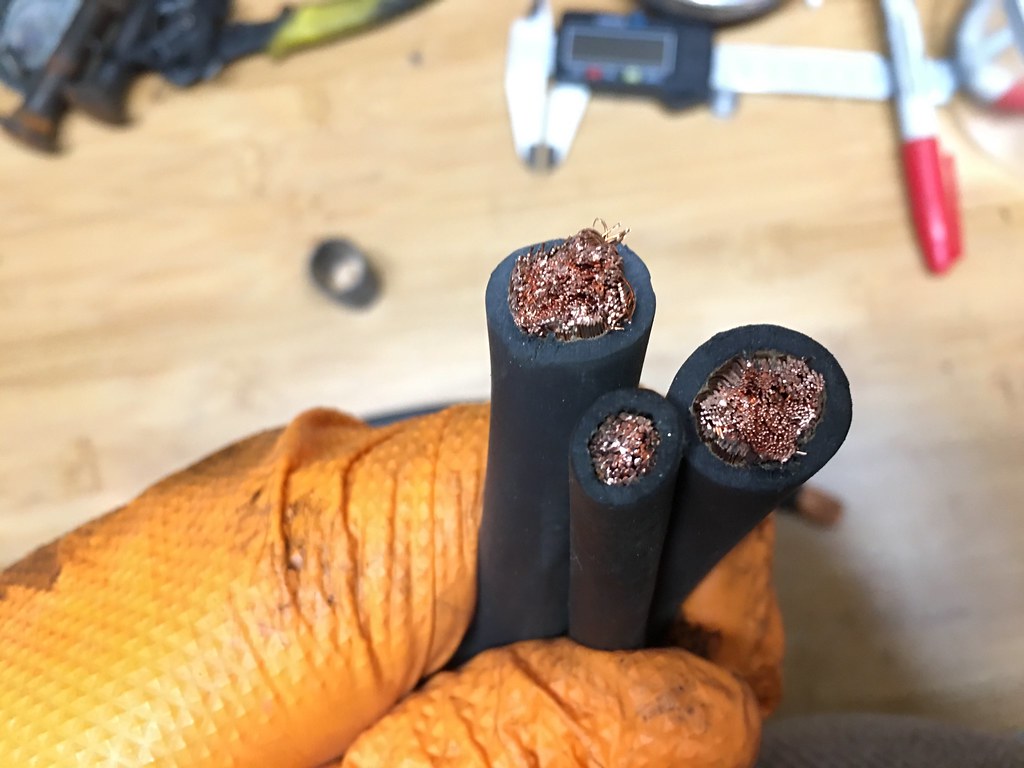
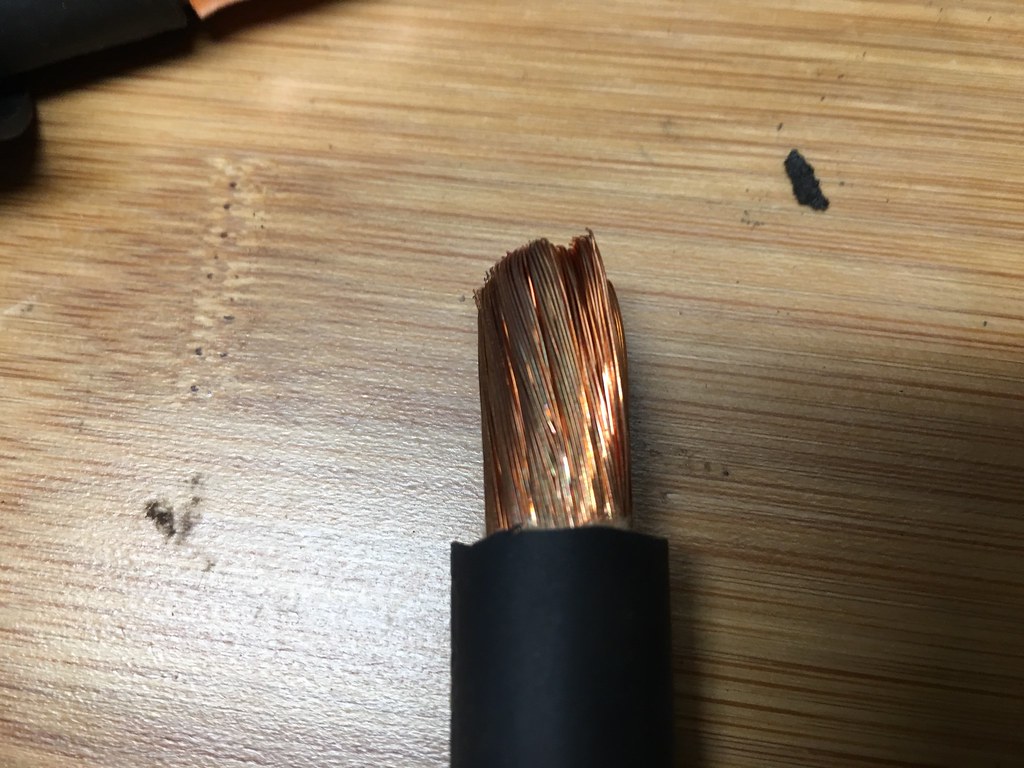
Measure and strip the ends cable ends. Use a utility knife spun around the shielding then pull it off. You don’t need to press the knife in very hard.
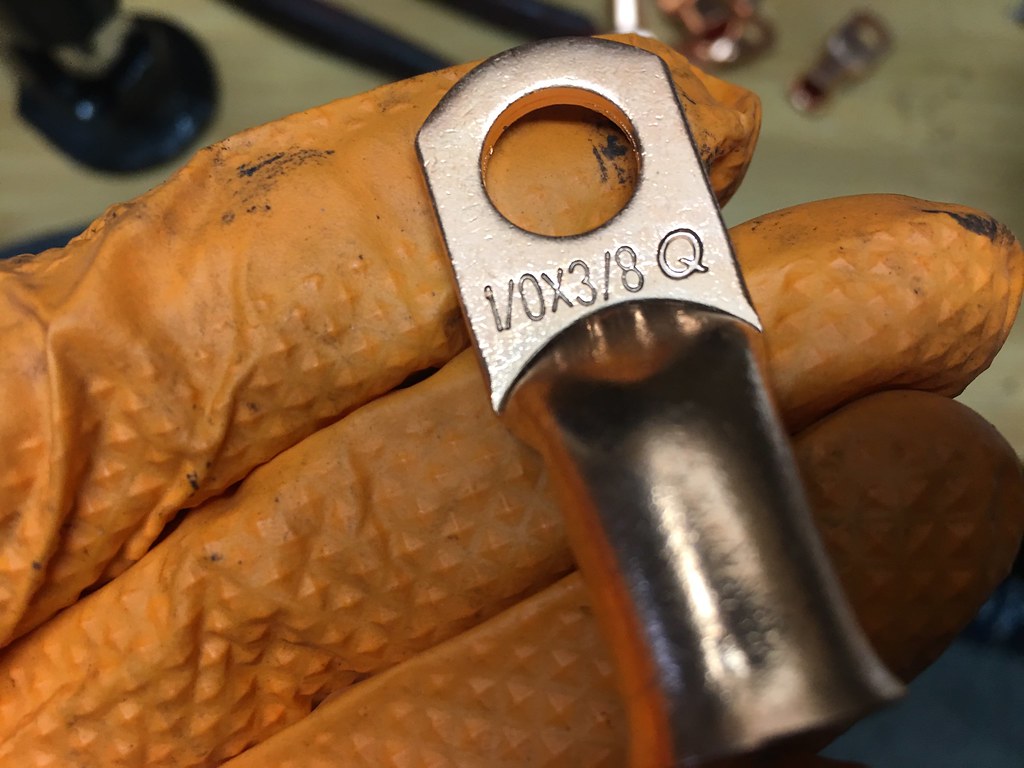
If you aren’t doing this job “on the fly”, try to find some different size terminal holes. The 3/8” holes will work on the starter and the battery terminal but they are a bit large. 1/4” would be better.
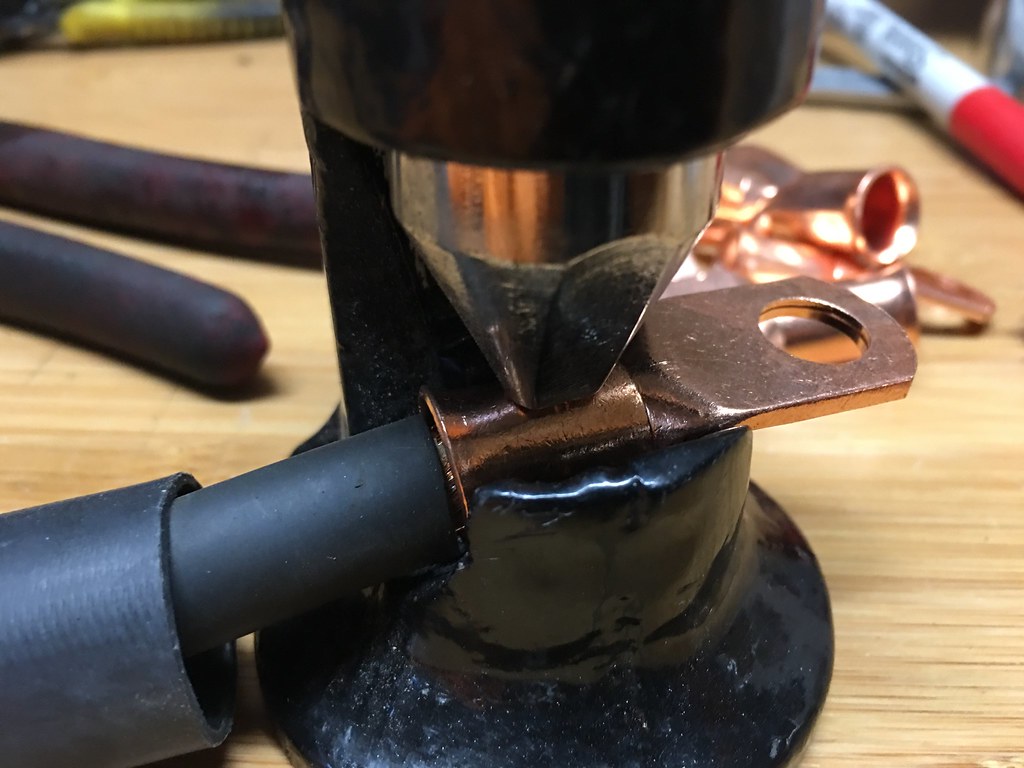
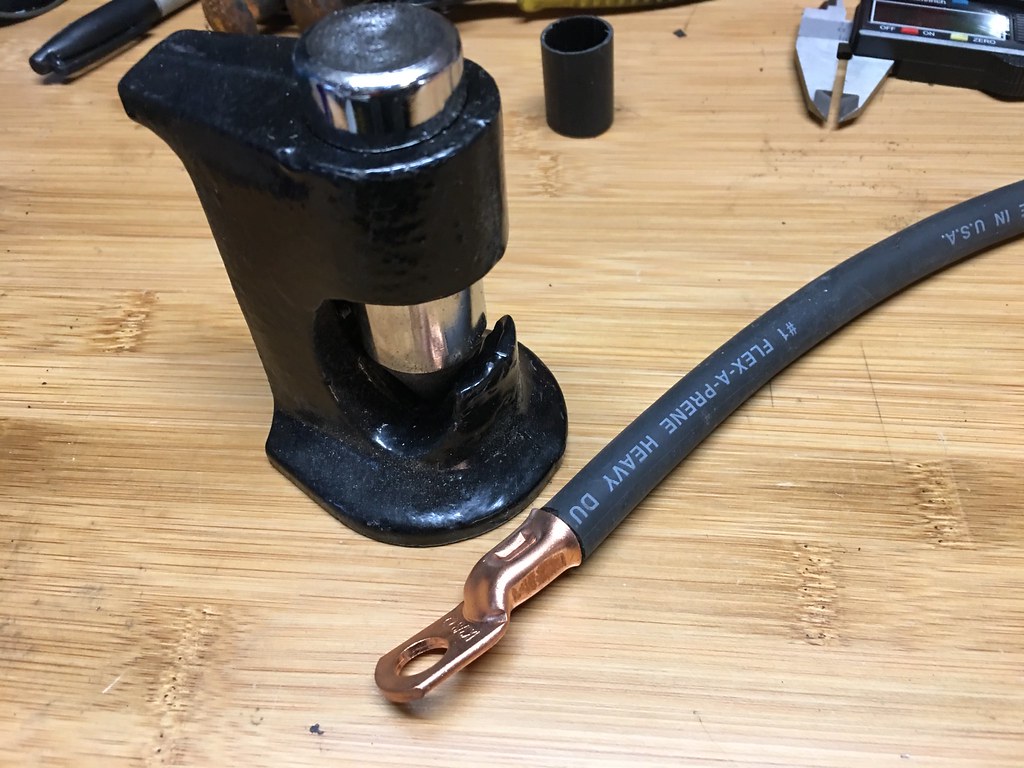
Place the terminal in the crimper, the wire in the terminal and give it a whack with your hammer.
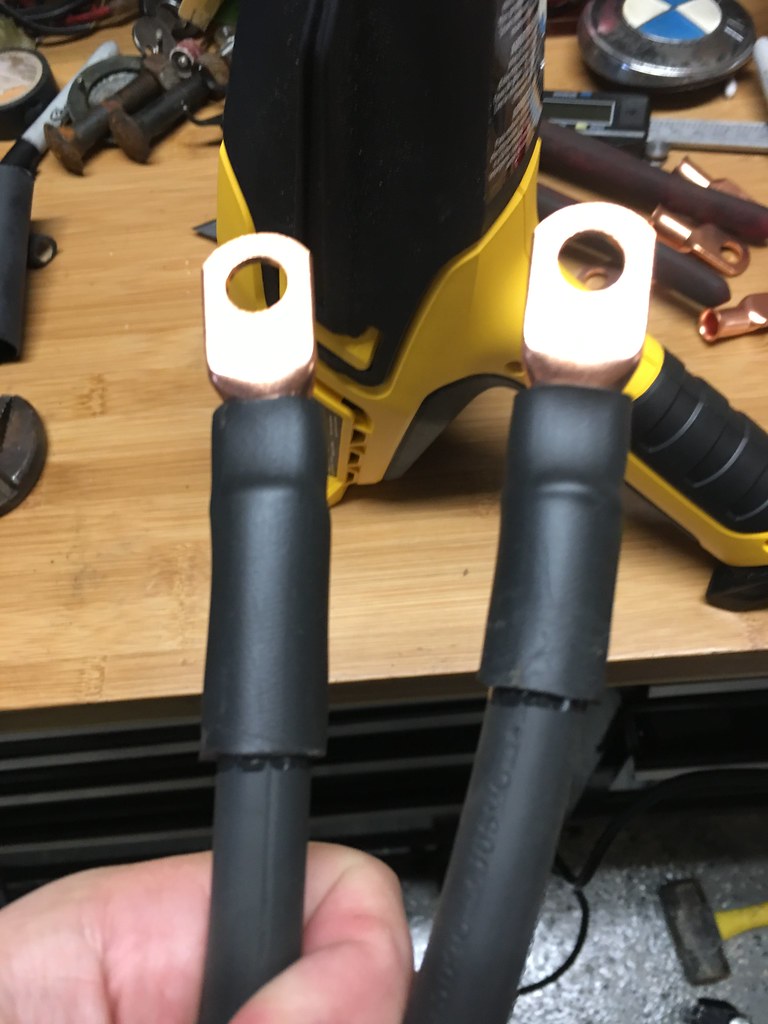
Repeat for each cable:
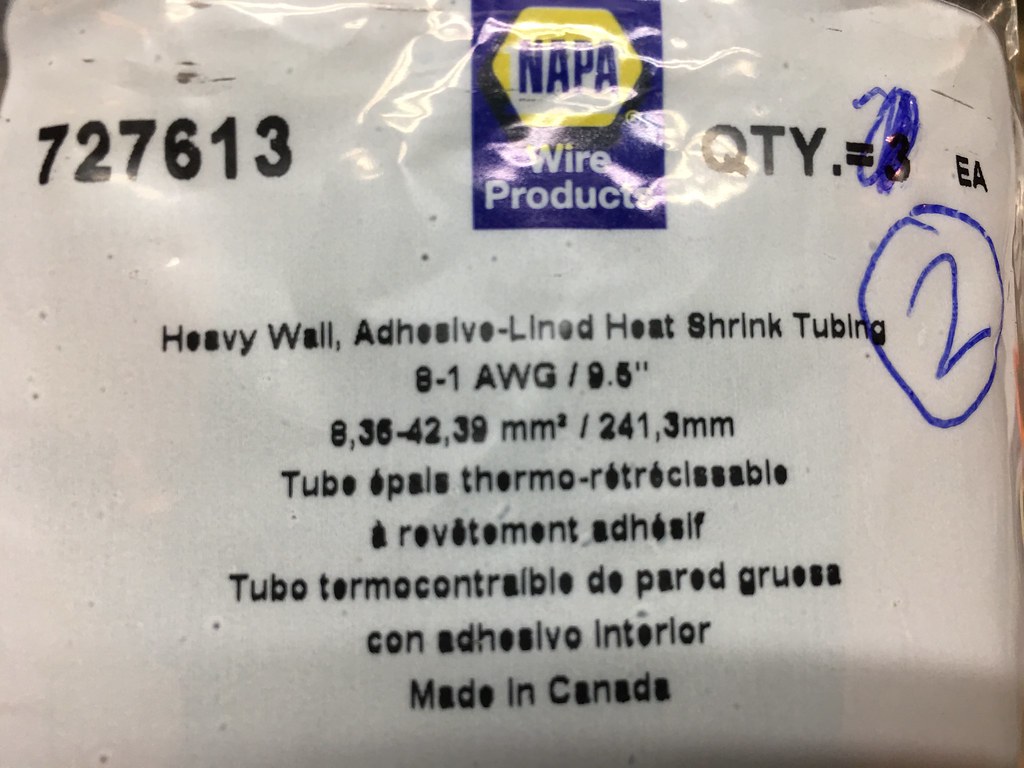
The adhesive lined heat shrink from Napa. You need 1 piece which is about 10”. It costs around $8. The tube is so big that you don’t need to remember to install it on the wire before crimping the ends.
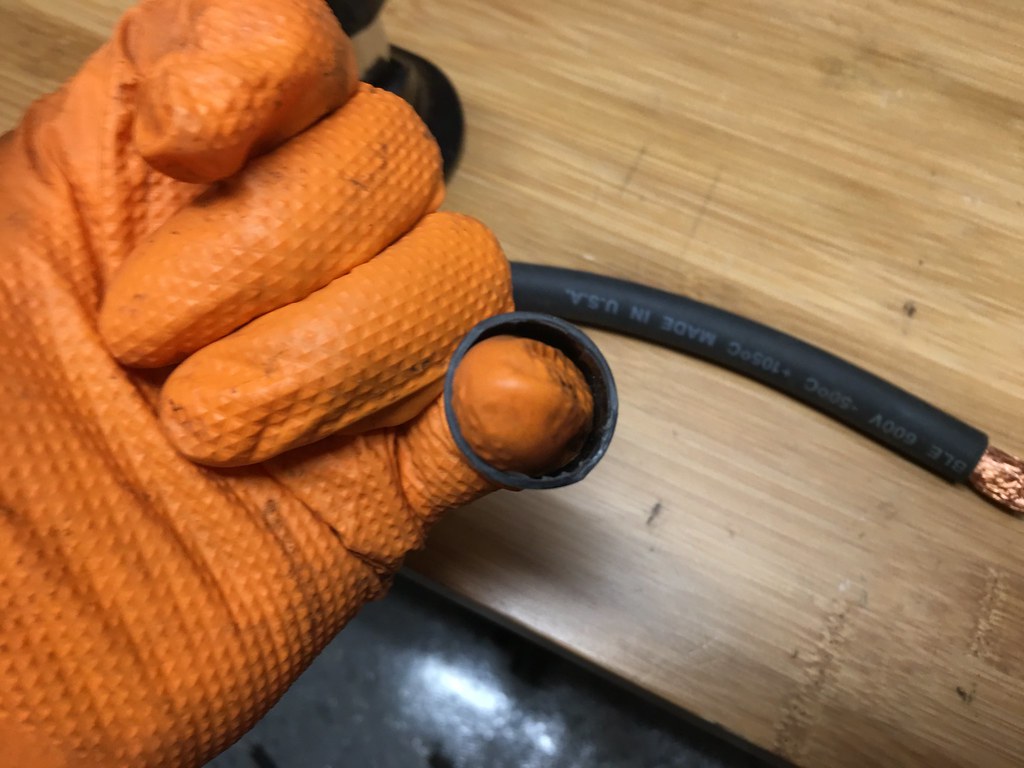
Use a heat gun or a propane torch on the heat shrink.
Install and enjoy!
A few years ago I mentioned that I would make my own battery cables and post a DIY. I finally found the need to replace the cables so here we are. This isn’t meant for those that are going after a factory look. The cables aren’t that obvious in black but marine terminals won’t look original.
If you buy battery cables from the local auto parts store you will find that they are made from a few thick strands of copper. As a consequence, they are very stiff. The OEM cables use nice wire and the braided negative cable is quite lovely.
The DIY process is quite simple. You use 1/0 flexible welding cable and matching 1/0 copper terminal ends. Other than that, you need some ridicuosly large (and expensive) heat shrink tube. The cable is under $3 a foot and you can buy it in black or red at local welding shops. I chose black for both cables. The terminal ends and heat shrink were purchased at Napa.
Special tools required include heavy duty cable
cutters, which I have and use all the time for cutting romex. You also need a $20 crimper and a BFH (I use a 5lb mini sledge).
I’m going to keep making these for my cars so I will need to add this inenxpensive hydraulic crimper to my wish list:
https://www.amazon.com/dp/B0114QC3OY/ref=asc_df_B0114QC3OY5262336/
Marine Terminals (ebay) for $7.70
The run from the battery to the starter is about 4’. The negative cable is only a few inches. I used about six inches, but should have gone shorter.
The 1/0 against my original starter cable.
Measure and strip the ends cable ends. Use a utility knife spun around the shielding then pull it off. You don’t need to press the knife in very hard.
If you aren’t doing this job “on the fly”, try to find some different size terminal holes. The 3/8” holes will work on the starter and the battery terminal but they are a bit large. 1/4” would be better.
Place the terminal in the crimper, the wire in the terminal and give it a whack with your hammer.
Repeat for each cable:
The adhesive lined heat shrink from Napa. You need 1 piece which is about 10”. It costs around $8. The tube is so big that you don’t need to remember to install it on the wire before crimping the ends.
Use a heat gun or a propane torch on the heat shrink.
Install and enjoy!
Last edited: