Ok worked on the crank brace here at work. Really nice having a mill at work.


Finished product. Should work like a charm

Finished product. Should work like a charm
I Appreciate the idea and original pictures BillReal nice work!
Cheers
I've used heat on 36mm nuts on VW rear brake hubs when they wouldn't come off. And the 46mm nuts on VW Bus rear hubs can be incredibly hard to remove if they have been undisturbed for years. i bent a 3/4" drive Indestro breaker bar with a 5' cheater pole before breaking out the Oxy/Acetylene torch to loosen a bus nut.I wonder if a MAP torch would get it hot enough if it came down to it.

")
Not as much of a ping as I’d hoped! I’ve owed the bav for 15 years and there is evedance of a engine rebuild prior to my ownership so maybe that helped.Did it go 'ping' when you broke loose the crankshaft nut; it's kinda musical.
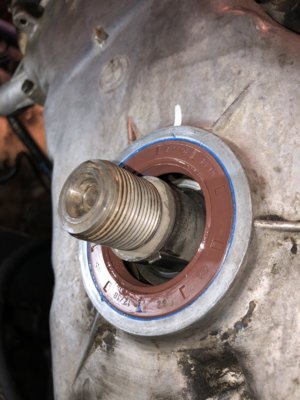
I always apply a thin film of Hylomar blue / some kinda RTV to the outside of seals before installing; lube and additional seal
Cheers
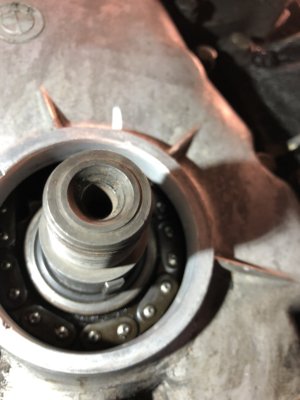
This sounds more like the chain tensioner isn't bled or installed correctly
I never touched the chain tensioner ( i didnt remove the chain cover ) when I replaced the main seal but I'll look around when I take off the pulleys and hubThis sounds more like the chain tensioner isn't bled or installed correctly
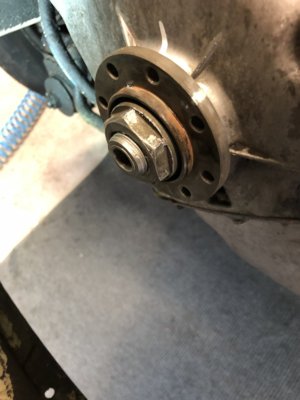
BMW had 3 special tools for holding the M30 crankshaft, with the engine in the car.BMW had 2 special tools for this job, a crank holder that bolted to the front hub and a puller
that would pull the hub after breaking the 36mm nut loose.