Hello - just completed suspension and steering systems refresh. Posting all my parts purchased with part numbers, prices and vendors used in case someone in the future will find this helpful.

Torq Specs (ft/lb)
Control Arm Inner - 125
Control Arm Outter - 33
Center steering link - 43
Inner Tie Rod - 25
Outter Tie Rod - 25
Tie Rod clamping bolts - 10
Tension strut to frame - 45
Tension Strut to control arm - 45
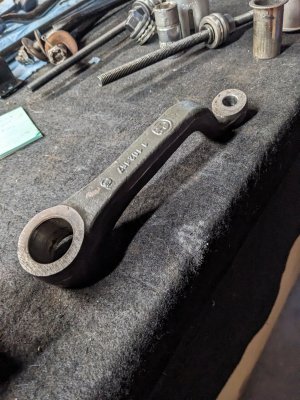
Idler Arm Bolt - 65
I invested in a couple specialty tools, these are a must have if you are going to do this yourself.
* Bushing Press and Pull Kit - $97 Link to tool
* Ball join separator Kit - $45 Link to tool
Tips and Tricks
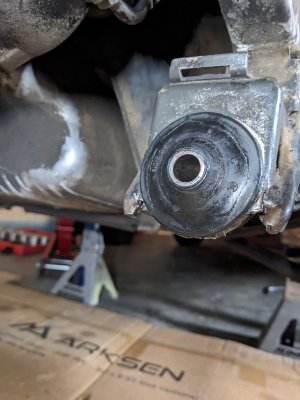
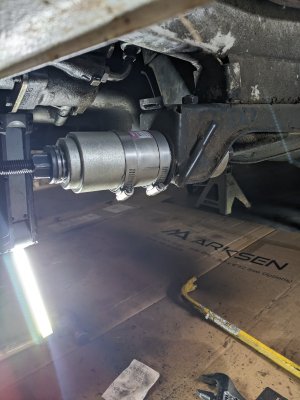
* The large tension strut bushings are difficult. Placed the bushings in the freezer overnight to get them to shrink a bit. Then used a metal pipe coupling (Link to tool) to act sort of like a piston sleeve. Lube it up and the bores on the subframe well with silicon grease. I ratcheted down the hose clamps to compress the bushings by ~25%. Then used the bushing press kit to force it in. Once you get it aligned with the bore, I did one last clamp compression to ensure no binding on the rest of the way in. This worked great. Image of this setup attached.
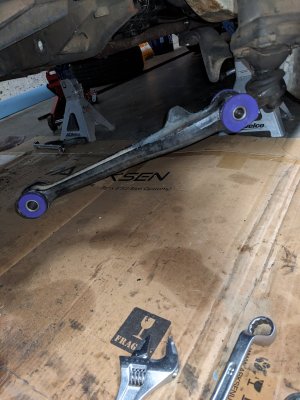
* Initially was planning on going with OE replacement rubber inner and outer control arm bushings, but they were impossible to press into their bores. Absolute crap. Ended up destroying one of each after multiple attempts. Maybe could have used the same method as the tension strut bushings with the compression sleeve, but took the path of least resistance and ordered some Powerflex poly bushings. Easy install.
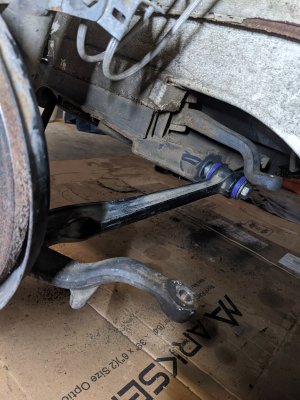
* For the new sway bar end link bushings, I did these last after assembling and torquing everything else. I found there was no way to do this with the car still on jack stands as the control arm, where the end link bolts into, sags too low. Lowered the car to ride height, and assembled everything except the lower most bushing, washer, and nut. Ties a ratchet strap around the top of the bolt, around the control arm, and used a screw driver to twist and compress the assembly enough for the bolt to show through its hole to be able to get the last bush, washer, and nut on. Slackened the ratchet strap and tightened the nut up the rest of the way.
The parts I chose were based on availability at the time, and cost (am trying to restore this car within a reasonable enough budget). I am sure some of you would not approve of one or two of the selections but it all works and the ride and handling quality of the car now is night and day. Off to the alignment shop this week for the finishing touch.
Torq Specs (ft/lb)
Control Arm Inner - 125
Control Arm Outter - 33
Center steering link - 43
Inner Tie Rod - 25
Outter Tie Rod - 25
Tie Rod clamping bolts - 10
Tension strut to frame - 45
Tension Strut to control arm - 45
Idler Arm Bolt - 65
I invested in a couple specialty tools, these are a must have if you are going to do this yourself.
* Bushing Press and Pull Kit - $97 Link to tool
* Ball join separator Kit - $45 Link to tool
Tips and Tricks
* The large tension strut bushings are difficult. Placed the bushings in the freezer overnight to get them to shrink a bit. Then used a metal pipe coupling (Link to tool) to act sort of like a piston sleeve. Lube it up and the bores on the subframe well with silicon grease. I ratcheted down the hose clamps to compress the bushings by ~25%. Then used the bushing press kit to force it in. Once you get it aligned with the bore, I did one last clamp compression to ensure no binding on the rest of the way in. This worked great. Image of this setup attached.
* Initially was planning on going with OE replacement rubber inner and outer control arm bushings, but they were impossible to press into their bores. Absolute crap. Ended up destroying one of each after multiple attempts. Maybe could have used the same method as the tension strut bushings with the compression sleeve, but took the path of least resistance and ordered some Powerflex poly bushings. Easy install.
* For the new sway bar end link bushings, I did these last after assembling and torquing everything else. I found there was no way to do this with the car still on jack stands as the control arm, where the end link bolts into, sags too low. Lowered the car to ride height, and assembled everything except the lower most bushing, washer, and nut. Ties a ratchet strap around the top of the bolt, around the control arm, and used a screw driver to twist and compress the assembly enough for the bolt to show through its hole to be able to get the last bush, washer, and nut on. Slackened the ratchet strap and tightened the nut up the rest of the way.
The parts I chose were based on availability at the time, and cost (am trying to restore this car within a reasonable enough budget). I am sure some of you would not approve of one or two of the selections but it all works and the ride and handling quality of the car now is night and day. Off to the alignment shop this week for the finishing touch.
Attachments
-
 PXL_20251122_230812909.jpg328 KB · Views: 127
 -
 PXL_20251122_030741552.jpg296.8 KB · Views: 118
 -
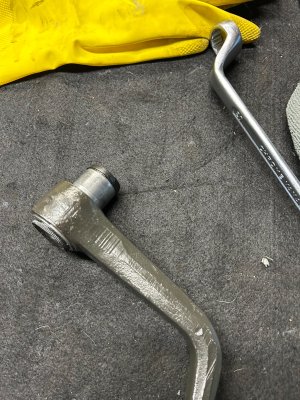 Image.jpeg533 KB · Views: 120
 -
 PXL_20251118_004308152.jpg410.9 KB · Views: 121
 -
 PXL_20251105_212336989 (1).jpg289.1 KB · Views: 138
 -
 PXL_20251105_212321408 (1).jpg232.1 KB · Views: 112
 -
 PXL_20251105_205822520 (1).jpg255.1 KB · Views: 129