Hey There fellow car nuts.
On the topic of hoods/bonnets that do not stay open; this is a topic that is raised a few times each year, so I thought to make an FAQ about it.
This is often due to deformed or broken parts in the system. There are 3 separate issues with the mechanism that leads to failure of the function.
The E3 and E9 are close in design but not identical.
Here are some combined notes, with pictures from various other members.
The hood mechanism failures are due to 3 different reasons, so it doesn't mean that you should replace the whole assembly if it doesn't work properly. Full replacement sets have been available from BMW, but stock ran out around 2015 or so.
Getting it functional again (without simply replacing the whole mechanism) can normally be done by replacing only the failed subcomponent.
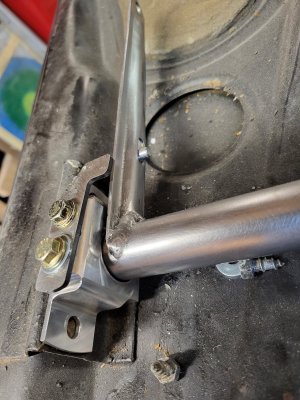
Most commonly the problem is associated with the welds breaking between the thin tube and it's left and right half arm parts. This is easily fixed with a fresh weld, or better: with a new steel tube with it a bit thicker wall section. The original tube is very thin, and therefor prone to break. If you choose something a bit thicker, it's also easier to weld in.
pic of failed part from @Stevehose from this thread: https://e9coupe.com/forum/threads/hood-support.23738/post-175119:

welded up:

Secondly, the small L-brackets used on E9 are flimsy and under-designed. As a result the 'finger' often bend out. Some members have made them themselves in a thicker steel. The E3 is different; stop is integrated.

replacement made by a member @pickman:

Link to thread on replacement parts: https://e9coupe.com/forum/threads/hood-torsion-bar-repair.34893/post-326659
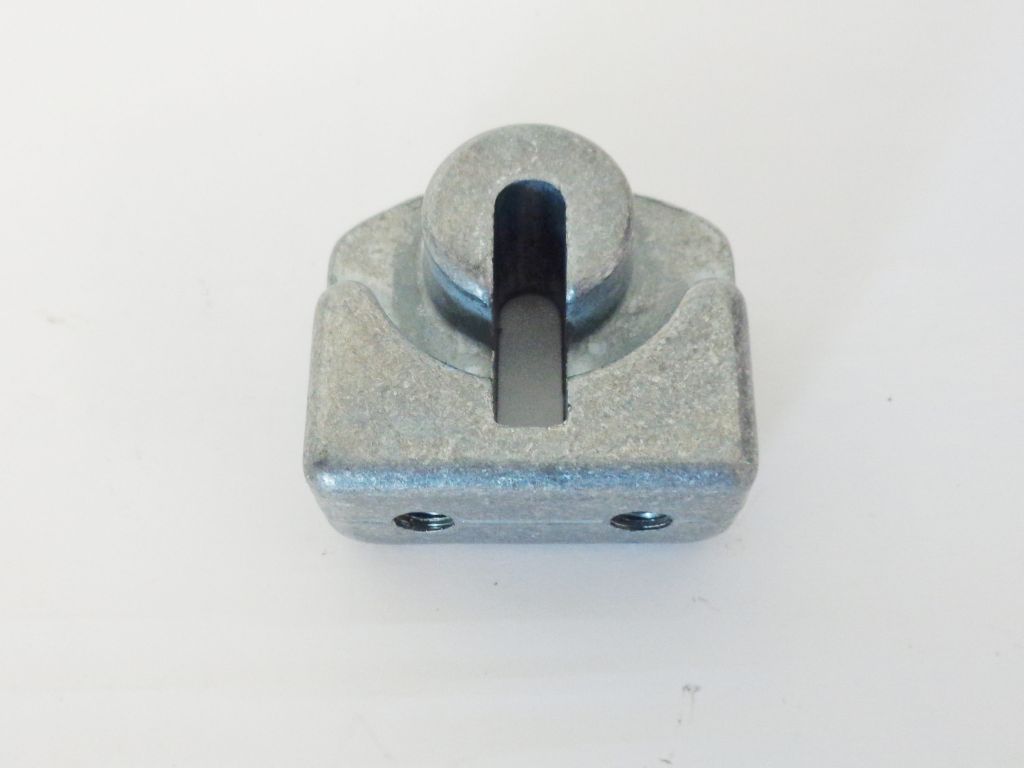
Another failure is this soft metal part that locks one spring end; it deforms fover time as it's made from a soft lead based metal. A nice comparison of the deformation is shown in the pics below with a old and new E3 part next to each other.
E3:
 The e9 part fails in a similar manner:

Replacement parts status (status March 2024)
 www.bts-autoteile.de

Halter an Motorhaube 02, E9
Halter an Motorhaube 2000 CS, C, CA 1600-2, 1600ti, 2002, 2002 ti bis Modell '71 E9 2,5 CS - 3,0 CSi BMW OE 41 61 5 480 146
www.bts-autoteile.de

E9 parts, assembled:

And it's also possible to fix that part yourself, if you're handy & inclined to do so :


 e9coupe.com
On the topic of hoods/bonnets that do not stay open; this is a topic that is raised a few times each year, so I thought to make an FAQ about it.
This is often due to deformed or broken parts in the system. There are 3 separate issues with the mechanism that leads to failure of the function.
The E3 and E9 are close in design but not identical.
Here are some combined notes, with pictures from various other members.
The hood mechanism failures are due to 3 different reasons, so it doesn't mean that you should replace the whole assembly if it doesn't work properly. Full replacement sets have been available from BMW, but stock ran out around 2015 or so.
Getting it functional again (without simply replacing the whole mechanism) can normally be done by replacing only the failed subcomponent.
Most commonly the problem is associated with the welds breaking between the thin tube and it's left and right half arm parts. This is easily fixed with a fresh weld, or better: with a new steel tube with it a bit thicker wall section. The original tube is very thin, and therefor prone to break. If you choose something a bit thicker, it's also easier to weld in.
pic of failed part from @Stevehose from this thread: https://e9coupe.com/forum/threads/hood-support.23738/post-175119:
welded up:
Secondly, the small L-brackets used on E9 are flimsy and under-designed. As a result the 'finger' often bend out. Some members have made them themselves in a thicker steel. The E3 is different; stop is integrated.
replacement made by a member @pickman:
Link to thread on replacement parts: https://e9coupe.com/forum/threads/hood-torsion-bar-repair.34893/post-326659
Another failure is this soft metal part that locks one spring end; it deforms fover time as it's made from a soft lead based metal. A nice comparison of the deformation is shown in the pics below with a old and new E3 part next to each other.
E3:
Replacement parts status (status March 2024)
- The E9 part is available through BTS teile (see below). BMW is sold out.
Halter an Motorhaube 02, E9
Halter an Motorhaube 2000 CS, C, CA 1600-2, 1600ti, 2002, 2002 ti bis Modell '71 E9 2,5 CS - 3,0 CSi BMW OE 41 61 5 480 146
Halter an Motorhaube 02, E9
Halter an Motorhaube 2000 CS, C, CA 1600-2, 1600ti, 2002, 2002 ti bis Modell '71 E9 2,5 CS - 3,0 CSi BMW OE 41 61 5 480 146
www.bts-autoteile.de
- The E3 has been purchased by a member here at a BMW dealer in March 2024 for under 10 usd.
- As an alternative for the E3 part a 2002 part may be used as a replacement: white, top is E3, red, botttom is 2002. Picture from @dang on the 2002 forum.
E9 parts, assembled:
And it's also possible to fix that part yourself, if you're handy & inclined to do so :
Hood torsion spring holder refurbishment
Hello e9 Freunden, Today i made a modification/refurbishment to my hood spring holder. The soft aluminium holder was worn out, resulting in loss of torsion in opening the hood. First I made the opening approximately 2,5 mm lager. In the opening I made a stainless lining. See attached Photos’
Last edited: