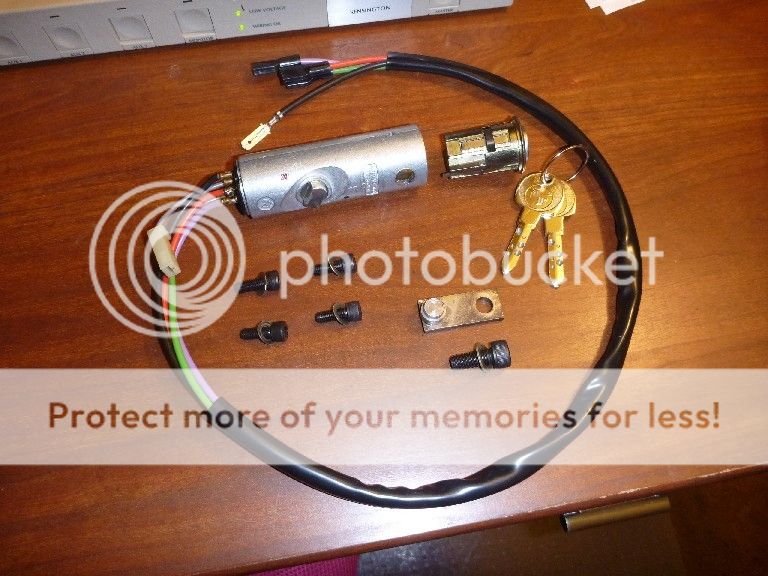
ignition switch (key part) removal

The steering lock

As I said before, kind of a touchy deal as one needs to physically pry or wedge the column down enough to clear the steering column lock, about 1/2 to 1 inch if I recall. I used a large screw driver, steering wheel removed, both switches and stalks removed. You need to get between the column and the upper casting. I say touchy because it makes one nervous about breaking the upper casting. As it turned out, no worries as the piece is quite stout.
 
Well said Pamp- Makes you wonder if you are doing something really crazy and dumb..

And then out it comes!
 
The steering lock

OK...a couple of pics. Been over two years since I tackled this one, yet I throw away nothing
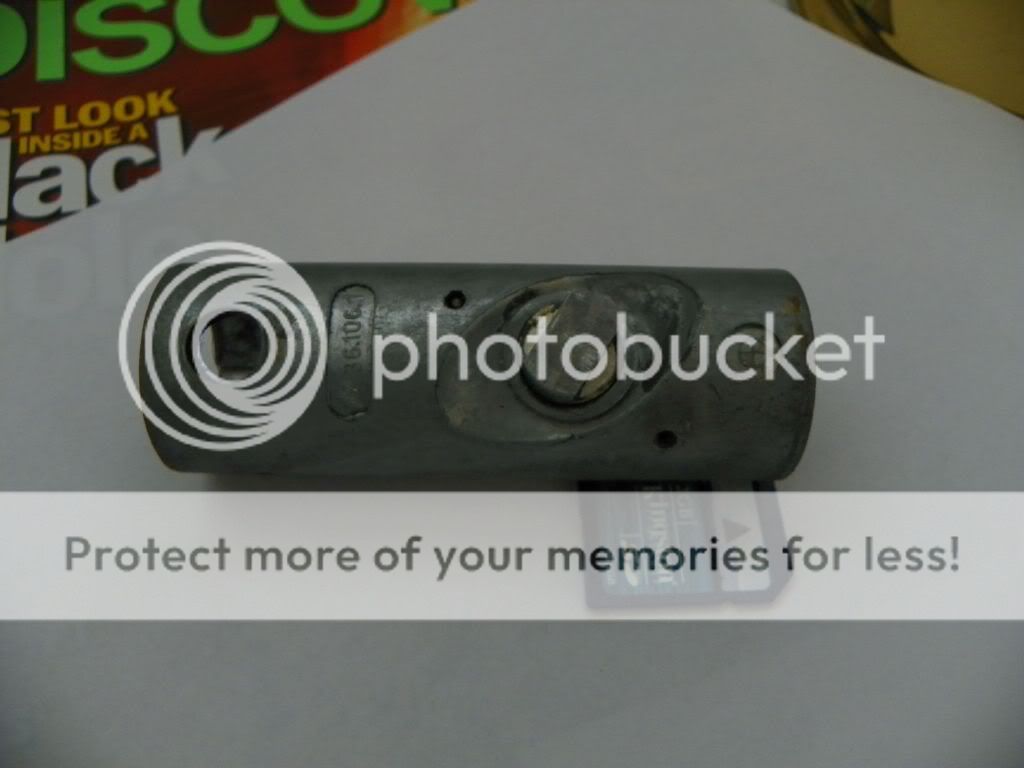
(hoarder syndrome for all things coupe) The following is the goal, the intermediate section and the piece that wears out...
100_0123.jpg

Of note here would be the lock bit that needs to clear from the column. In the following picture you will also note the position of a microswitch that is only on the 1974 and later USA coupes. This arms the "fasten seat belt" module on the dash.
100_0125.jpg

The availability of an intermediate section with this feature is unknown. I replaced mine with a section from an earlier coupe and deleted the switch and secured the wiring for same. No issues.
To Alan...as we both have '74 coupes it seems we have traveled similar paths. Much you have done, as you know, is work I have done prior to you. Please do not hesitate to PM or call 541-520-1641...could have saved you some grief on this one.
To Don...I put the brakes on a EFI upgrade for now. One thing is that the "toothy wheel" I have will not clear the A/C bracket. Sure, I know we can accomplish the same function via the dizzy. I thank you for your advice as always. Just "feet dry" after two months at sea,
a lot to catch up on and the "honey do" list seems endless. Summer vacation priority goes to (in my alleged mind)...motorcycles and fishing (and beer...not necessarily in that order)
 
OK...a couple of pics. Been over two years since I tackled this one, yet I throw away nothing

Makes me wonder how folks tackled these jobs before we had the Internet to share lessons learned.

deQuincey, as you start this ridiculously hard project note that you are in our prayers.
 
Having read through the old Register issues, it was often done this way:

1. Someone writes a letter to Charlie Richardson, the publisher (one of a few) of the CS Register asking him to post his letter on how to do something.

2. Charlie would publish it in the next newsletter which could be a few months later.

3. Someone reads the letter and responds, either by calling the person or writing back to Charlie.

4. Charlie published the answer in the next issue, usually a few months after that.

We live in a light speed era of information, and our cars and sanity benefit from it.


Makes me wonder how folks tackled these jobs before we had the Internet to share lessons learned.

deQuincey, as you start this ridiculously hard project note that you are in our prayers.
 
Last edited:
thanks all

Makes me wonder how folks tackled these jobs before we had the Internet to share lessons learned.

deQuincey, as you start this ridiculously hard project note that you are in our prayers.

thank you for the prayers !

yes i was thinking about exactly the same idea, how to do all this without internet, and without digital cameras to take pics

but you know, the very best and the most important thing is that generous people is around there, people that share their time and skills to help others

that is really nice !

thanks
 
OK...a couple of pics. To Don...I put the brakes on a EFI upgrade for now. One thing is that the "toothy wheel" I have will not clear the A/C bracket. Sure, I know we can accomplish the same function via the dizzy. I thank you for your advice as always. Just "feet dry" after two months at sea,
a lot to catch up on and the "honey do" list seems endless. Summer vacation priority goes to (in my alleged mind)...motorcycles and fishing (and beer...not necessarily in that order)

thanks pamp

really those are helpful pics !

so summarising: i will remove all of the five bolts to remove the lock ignition barrel from the steering column, and to install a new lock

probably i will take my time to do this,...the fear grows endlessly !

regards
 
couple more bolts

dequincy,
in addition to the 5 breakaway bolts, i took out the 2 large bolts that hold up the upper column cover, then could access the other 2 bolts from above that actually hold up the column itself. this drops the column down about an inch or two allowing the ignition lock to slide right out. sounds confusing, but you will see what im talking about when you get in there. good news is, installing the new lock and re-assembly is a breeze :)
 
Did the dirty deed

Replaced the ignition on my '74 3.0 csi. Thought I'd add some pictures to help the next guy...

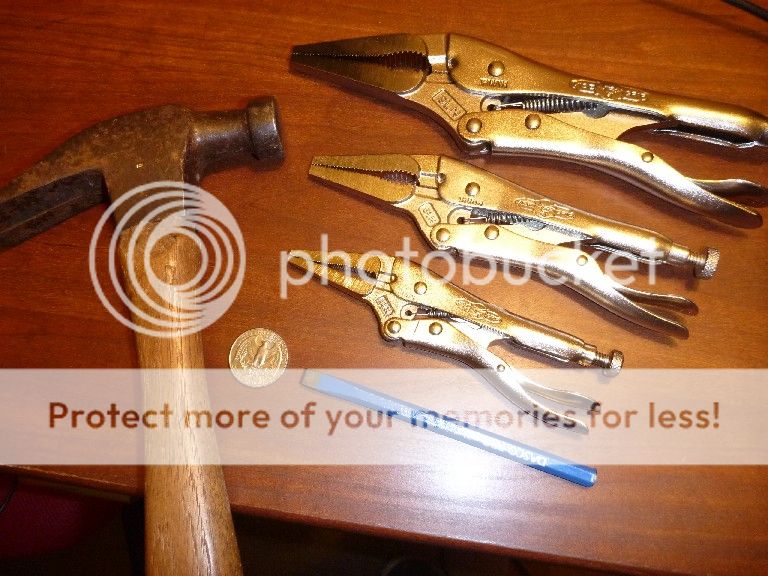
Tools Used:
ToolsUsed.jpg


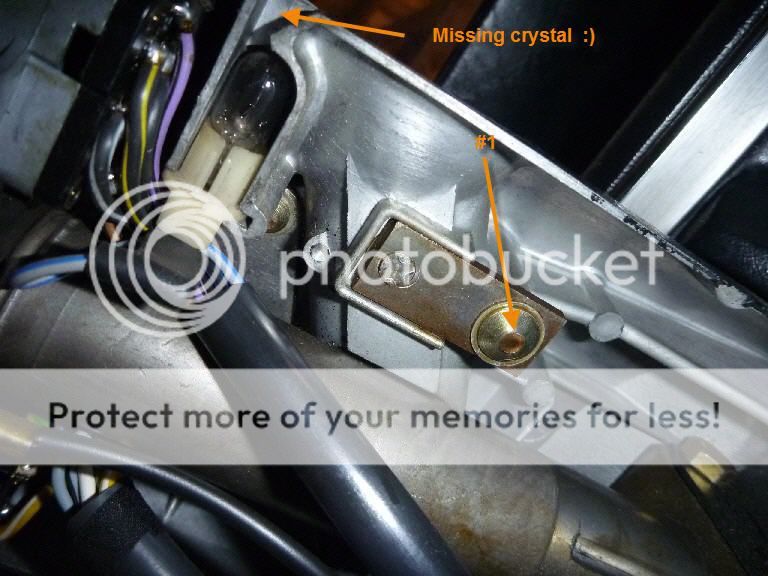
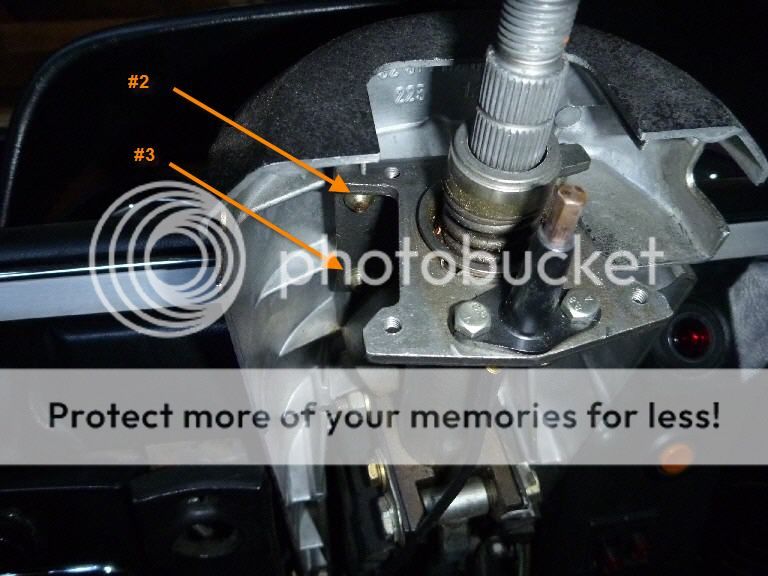
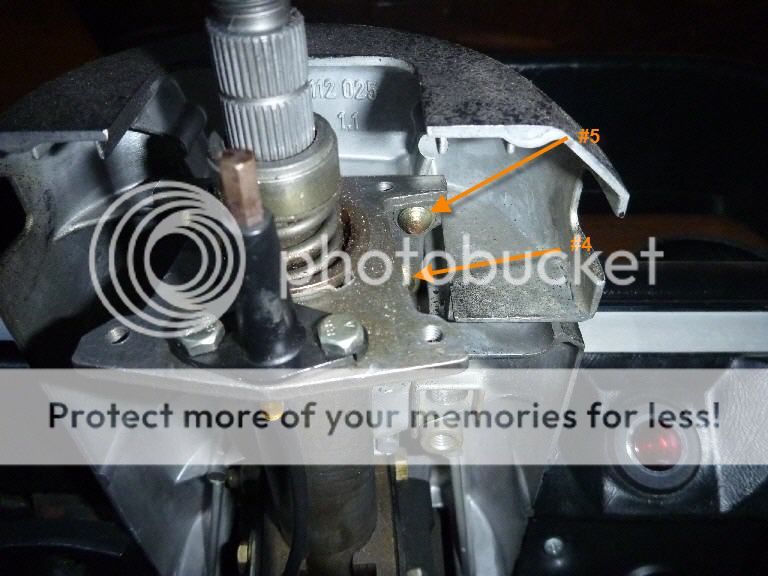
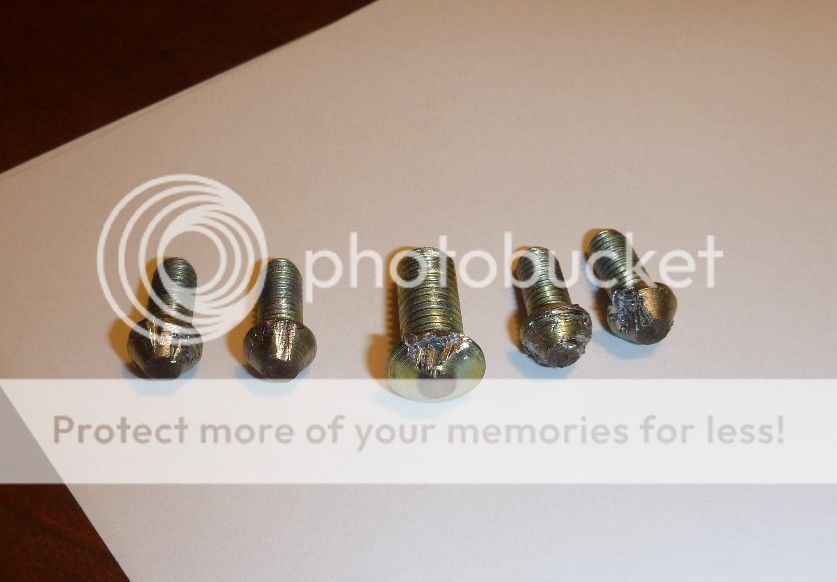
Remove the original fracture bolts with a 1/4" cold chisel:

Bolt1.jpg


Bolt2-3.jpg


Bolt4-5.jpg


Success!

FractureBoltsRemoved.jpg


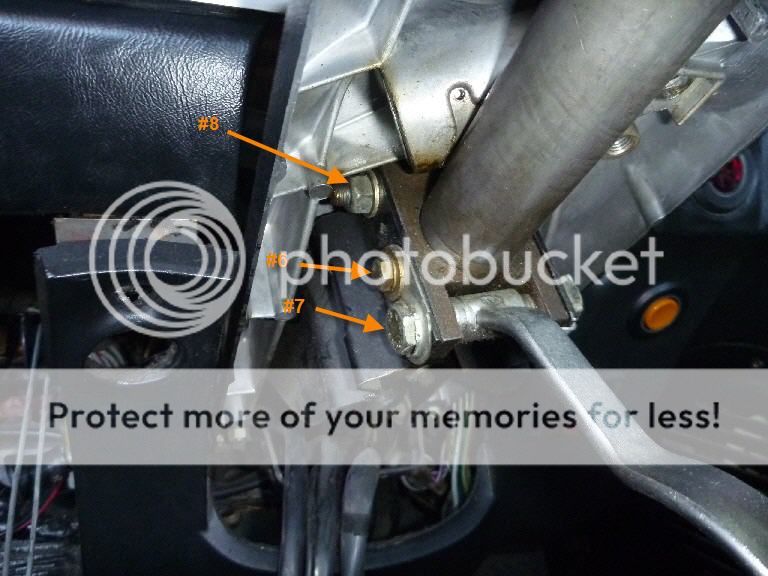
Now loosen up the addtional bolts on the adjustable steering shaft:

Bolt6-7-8.jpg


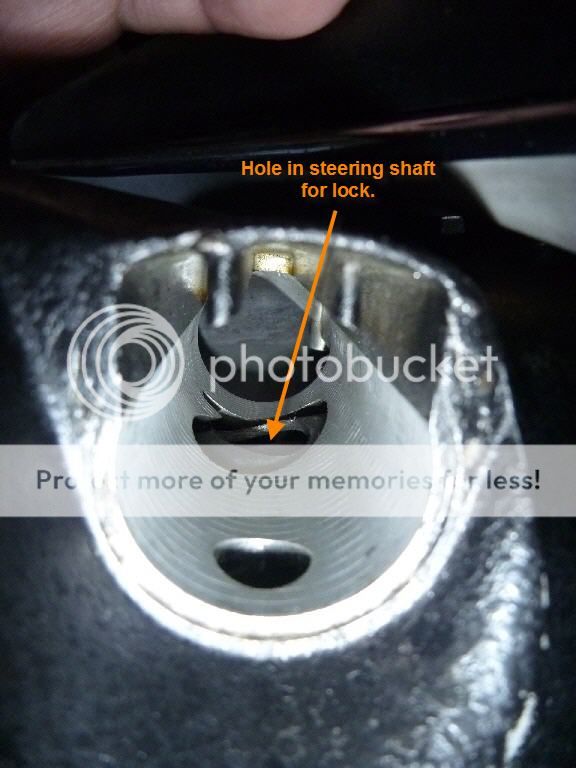
Looking down the ignition switch tunnel:

IgnitionTunnel.jpg


Out with the old and in with the new:

NewIgnition.jpg


Without the help on this thread, I would have never been successful. Thanks guys!

John
 
This is a very old thread, but very useful to me as I had the issue that the 'electronic' part of the key switch has been broken/worn out. See pictures.
So a few questions here, I did some attempts to get the last small broken piece out of the intermediate section but it didn't came out. It's not fixed together right?
So do some more attempts or should I consider the intermediate part as lost?

thumbnail_IMG_2502.jpg


thumbnail_IMG_2503.jpg


In addition to John his way of removing the 'headless' bolts I welded some screws on top of it, because with the chisel the biggest bolt almost broke apart without any movement. With welding it worked fine.

thumbnail_IMG_2489.jpg
thumbnail_IMG_2491.jpg


Another question I have with removing the steering rod, I was wondering if you could clear the up side of it's special bracket to revise or clean at least the bearing?
It goes round in my case, but can be way smoother to my opinion. The bearing shells are also very 'open' if you play with the steering rod, same for the side that is not in the picture but the bearing in the steering column. Anyone experience with this? Or should I clean it with water, pressurized air, spray some oil in it and leave it like that?

Thanks!

thumbnail_IMG_2493.jpg
 

Attachments

  • thumbnail_IMG_2487.jpg
    thumbnail_IMG_2487.jpg
    293.1 KB · Views: 72
Last edited:
Wrt the bearing: mine is not smooth anymore also. It's a non-standard bearing, as it has an additional cylindrical piece and flange to it.
I was not able to locate replacements for this.
Anyone have better luck finding the exact one, or building it perhaps from 2 parts?
 
Wrt the bearing: mine is not smooth anymore also. It's a non-standard bearing, as it has an additional cylindrical piece and flange to it.
I was not able to locate replacements for this.
Anyone have better luck finding the exact one, or building it perhaps from 2 parts?
Thx Erik, that was my first conclusion also.
 
Back
Top