Motor Mounts

TravL350

Well-Known Member
Site Donor
Messages
163
Reaction score
78
Location
Winston-Salem, NC
Hi all,

Is there anything I should disconnect (hoses etc.) before raising up the engine to replace the mounts? Is it safe to jack up the engine with a floor jack and 2x4 under the oil pan? The repair manual of course recommends using a hoist, which I don't have. Any advice would be greatly appreciated as this will be my first time attempting this repair.

Thanks,

Travis
 
Mounts

The right side can be jacked up with a short 2x4 at the bracket to block placed vertically. Pretty easy. Loosen everything first. And you might have to use a pry bar to align the tabs in the mount since things tend to move from optimum.

I would suggest something wider for the left side- 2x6, 2x12, etc. and double it so it doesn't flex in the middle and fits across the pan rails. The left is harder since it's close to alot of other things. In fact, taking the bracket and mount off together for the left might be easier since you won't have to raise it much higher for the top stud. Loosen the top nut and watch the stud.

Good luck.
 
YES!!! Disconnect the throttle linkage from where it connects to the firewall. Disconnect multiple pieces if necessary for peace of mind. Also loosen the rear trans mount.

Raising the engine underneath the sump with a peice of wood should be fine and may avoid the complexity of raising it from the metal mount brackets. There's not much surface area to raise it from the mount brackets. You don't want a wooden support slipping when you're hands are right there loosening the mount. I feel the sump approach is safer and provides more room to work around the mounts.

Finally, have a punch on hand to help align the new mounts to the bracket mounting holes.
 
I don't think the linkages will be an issue, they do not rest against the firewall like in a 2002. The bell crank next to the mount is free to move as well. You aren't raising very much, but keep an eye open, raise a little at a time.
 
Mine bent because I assumed it would rotate up with the engine. The new mounts will be thicker than the old ones--and then the engine needs to be lifted even higher to wedge them into place.
 
Problem

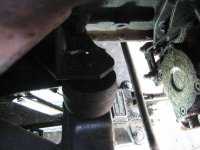
Hey guys, I've hit a wall in the motor mount replacement...literally.

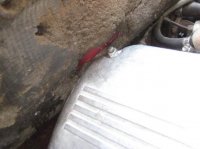
I was able to replace the left side mount without any problem. However, when I have the engine raised almost high enough to remove the right motor mount, the valve cover hits the firewall! Any suggestions?

IMG_3954.jpg

IMG_3949.jpg

-Travis
 
Looks like the motor shifted rearward. There is some play of about 1/2".

Loosen the trans mount and bracket if needed. I can use the exhaust to leverage the motor around. I've also used a big pry bar on the motor mount bracket to shift it around a bit.

Lower it and take the cover off, covering the head with a piece of plastic, towel, etc.

What worked best for me was the wood block. It fits in between the mount and block and gets wedged. The jack is in the optimum position to just raise that side. If the other side is in, tighten the mount down some to shift the motor down on that side and resultant up on the side you're working on. The repair manual describes one side at a time, maybe that's the reason.
 
Finally...

Got it...thanks for the help. I was able to "guide" the engine up and keep it from sliding rearward too much with some wood shims between the valve cover and the firewall. It still took quite a lot of prying but the new mount finally slid in.

Thanks again,
-Travis
 
In case someone wanders into this post looking for a good procedure for changing engine mounts (I did, after checking the factory manual, Haynes & Chilton and doing a web search).

I was surprised how easy this was. I did not suspend from above or lower subframe. This was my procedure:

1. Loosen but do not remove nuts on top and bottom of rubber engine mounts.
2. Use jack under front center subframe to lift car about 3" from resting position (wheels still on ground).
3. Place jack stand under front right bottom lifting tab/eyelet in cast iron block (not oil pan or edge of oil pan. My jack stand tops are flat, some may not work).
4. Lower jack slightly until engine rests just above normal position, slightly clear of rubber mounts.
5. On left side, remove metal engine mount bracket that is bolted to the engine block.
6. Remove left side rubber engine mount and replace with new.
7. Reattach left side engine mount bracket leaving rubber mount nuts slightly loose top and bottom.
8. Repeat steps 5-7 on right side.
9. Raise jack, check rubber mount alignment, remove jack stand, and lower car to normal position.
10. Tighten nuts both top and bottom on rubber mounts.

I found this very easy. No need to support from above with engine cross brace or drop the subframe. No risk to oil pan.
 
Last edited:
So, whilst this topic has been resurrected, has anyone changed to liquid filled motor mounts?

I think the e30 M3 used liquid filled motor mounts, but that engine is much lighter than ours. I'm thinking specifically about whether any six cylinder BMWs used liquid filled motor mounts.
 
Worst thing in the world in my opinion Porsche 944's ran them and we were constantly replacing them as they collapsed easily and a lot of people didn't even know that they had collapsed until they complained that the car felt " rough "

Thanks, Rick
 
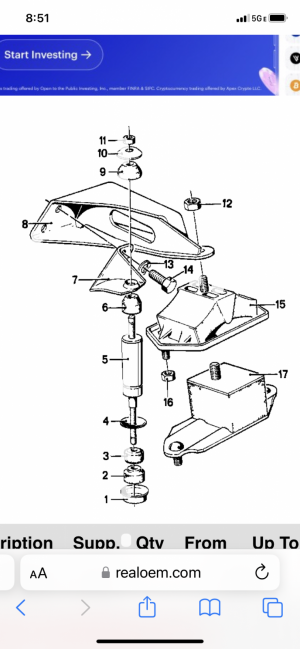
Bmw installed dampers on motor mounts
 

Attachments

  • 9F03455A-575F-4A3A-A5D6-70AC9F49D3E7.png
    9F03455A-575F-4A3A-A5D6-70AC9F49D3E7.png
    639.3 KB · Views: 103
Back
Top