Moulding Attachment Guidance

dspoljaric

Active Member
Site Donor
Messages
51
Reaction score
14
Location
Seattle, WA
Hello all:

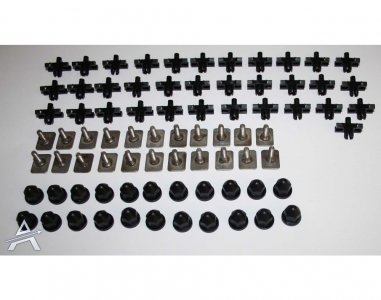
on my 1972 e3, I am replacing some of the moulding with new replacements. I have also purchased new clips (51131804205). Other than pinching the existing clips from behind to release the tensions, are there any other tricks to removing the existing clips? Some of the clips do not have access from behind and so I am assuming one must "snap" them off? Also, the new moulding simply "snaps" to the new clips, correct?

Thank you
 

bavbob

Well-Known Member
Site Donor
Messages
3,375
Reaction score
1,588
Location
Boston, Ma
Which moldings? Based on part number, must be rocker panel moldings. There should be a screw and plastic nut at each wheel well, all else are the clips you bought.
 

dspoljaric

Active Member
Site Donor
Messages
51
Reaction score
14
Location
Seattle, WA
Fair question! Not the rocker panel moulding, but rather the moulding that follow the fender-door-door-fender line:

51131817599
51131817601
51131817603
51131817605
 

bavbob

Well-Known Member
Site Donor
Messages
3,375
Reaction score
1,588
Location
Boston, Ma
Beltline trim..............mostly those clips you show, cannot recall exact locations but each piece does have a small screw and nut similar to the E9. Dick S probably knows, I did my trim 12 years ago, his should be fresh in his mind.

Be aware that the E3 trim snaps into those but most find that the clip is so flush that the trim often pops off. I have placed O rings behind each of mine, this blocks the hole from water and also allows the clip to sit out just enough to catch the trim but not so far that it has a gap with the car.
 

Dick Steinkamp

Well-Known Member
Site Donor $
Messages
2,462
Reaction score
2,895
Location
Bellingham, WA
Rob, you give me too much credit. Not only can't I remember what I did a 2 years ago, I can't even remember what I had for breakfast o_O .

Actually on my car, the previous owner had removed the trim and welded up the holes in the body :(. I didn't want to try to find where the holes were and to redrill them through weld but I did want the belt line trim on the car. I glued it on...like aftermarket belt line trim was done in the 70s and 80s. It worked fine and continues fine 2 years later. If given the choice, I wish the PO had left the holes.

As Rob said, each piece has (at least) 2 threaded fasteners that get nuts on the inside of the panel. On the ends for sure but I think there was at least one other on the long front and rear trim pieces. I also seem to remember that if you slide the fastener along the track that you can find a spot where they can be more easily removed.

Hopefully there is an E3 owner here that can help more. @billpatterson ?
 

HB Chris

Well-Known Member
Site Donor $$
Messages
19,418
Reaction score
8,759
Location
Huntington Beach, CA
I have removed the belt trim from a parts car and there are indeed a bolt and nut at each end with snaps in the middle sections.
 

dspoljaric

Active Member
Site Donor
Messages
51
Reaction score
14
Location
Seattle, WA
Thank you all for your inputs. Any recommendations on which tool to use to pop the plastic snaps off without damaging the panels?
 

Christoph

Well-Known Member
Messages
226
Reaction score
338
Location
Germany
Here is what a friend wrote in the tiny German E3-Forum, translated from German.
Bolts from front to rear:
Front wing - first two holes, otherwise the moulding does not stick to the bend, and 6th hole, approx. where the front wheel ends.
Doors - first & last hole, each.
Rear wing - 3rd hole, approx. where the wheel housing ends and you can still reach from the boot, and the last three holes around the bend at the rear.
In sum 11 bolts per side.

The remaining holes get the plastic snaps.

Note: This applies for the regular 3 litre models (nine piece set). The 2500 and the Bavaria have the eight piece set with the shorter mouldings on the rear wings. These go without the hole directly beneath the bootlid opening so two bolts each for the rear bends should be enough.
 

billpatterson

Well-Known Member
Site Donor
Messages
512
Reaction score
240
Location
Edmonton, Alberta, Canada
Rob, you give me too much credit. Not only can't I remember what I did a 2 years ago, I can't even remember what I had for breakfast o_O .

Actually on my car, the previous owner had removed the trim and welded up the holes in the body :(. I didn't want to try to find where the holes were and to redrill them through weld but I did want the belt line trim on the car. I glued it on...like aftermarket belt line trim was done in the 70s and 80s. It worked fine and continues fine 2 years later. If given the choice, I wish the PO had left the holes.

As Rob said, each piece has (at least) 2 threaded fasteners that get nuts on the inside of the panel. On the ends for sure but I think there was at least one other on the long front and rear trim pieces. I also seem to remember that if you slide the fastener along the track that you can find a spot where they can be more easily removed.

Hopefully there is an E3 owner here that can help more. @billpatterson ?

Hi there,

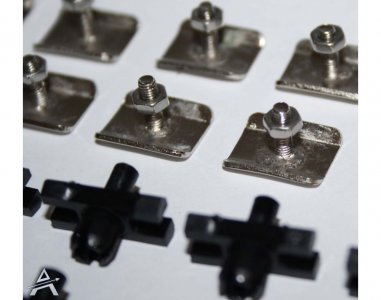
I tried to use the origianl plastic snap clip for the beltline trim. I found he tolerances are very tight and 50 years makes them hard to impossible to use. I switched them out for the T-bolt and plastic nut that are used on the ends of each trim piece. I believe you can get away with fewer T-bolts than the origianl plastic clip; 2 on either end plus 3-4 more for the middle attachments. Careful; there are few choices of T-bolt that are for smaller trim; ensure you order the larger ones.

Cheers,
Bill

For E3,
51131400008.jpeg
For E10 for example,

51131400001_1.jpeg
 

bavbob

Well-Known Member
Site Donor
Messages
3,375
Reaction score
1,588
Location
Boston, Ma
Support the backside if you use those clips as gentle knocking in the plastic plunger thing to seat the clip can actually dent the car.
 
Top