new-old instrument panel renewal

deQuincey

Quousque tandem...?
Site Donor
Messages
9,095
Reaction score
2,940
Location
BIO @ 43°15'46.5"N 2°56'03.7"W
hi

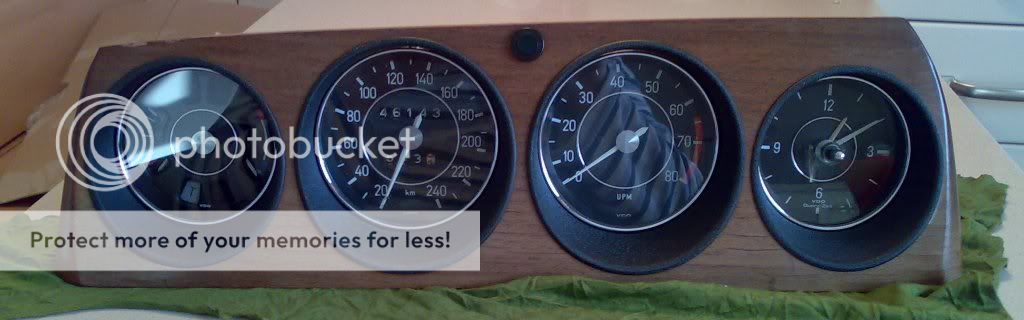
my instrument panel was not in good condition, not only aesthetics, but also some of the instruments were not working properly, i.e. the clock was kaputt (showing always 10:10, as if it was in the jewelery window), the temp gauge was untrustworthy, and the speedo reads always the real speed x 0,78888888 (not really good news for the photo-radars, you might be ticketed without realising that your speed was inapropriate, not to mention that you might have an accident while calculating the real speed, cause your male brain will be occupied doing the calculation, not realising that a stop sign is down there whilist "the big truck" is approaching the road cross)

so, to make a long story short it seems that "santa" has dropped a parcel in his flight back to the north pole, and: (sound of trumpets please) :


261220101570.jpg

yeah, an old brand new intrument panel with all the clocks, dated 1974, ready for inspection and renewal

261220101572.jpg


261220101574.jpg


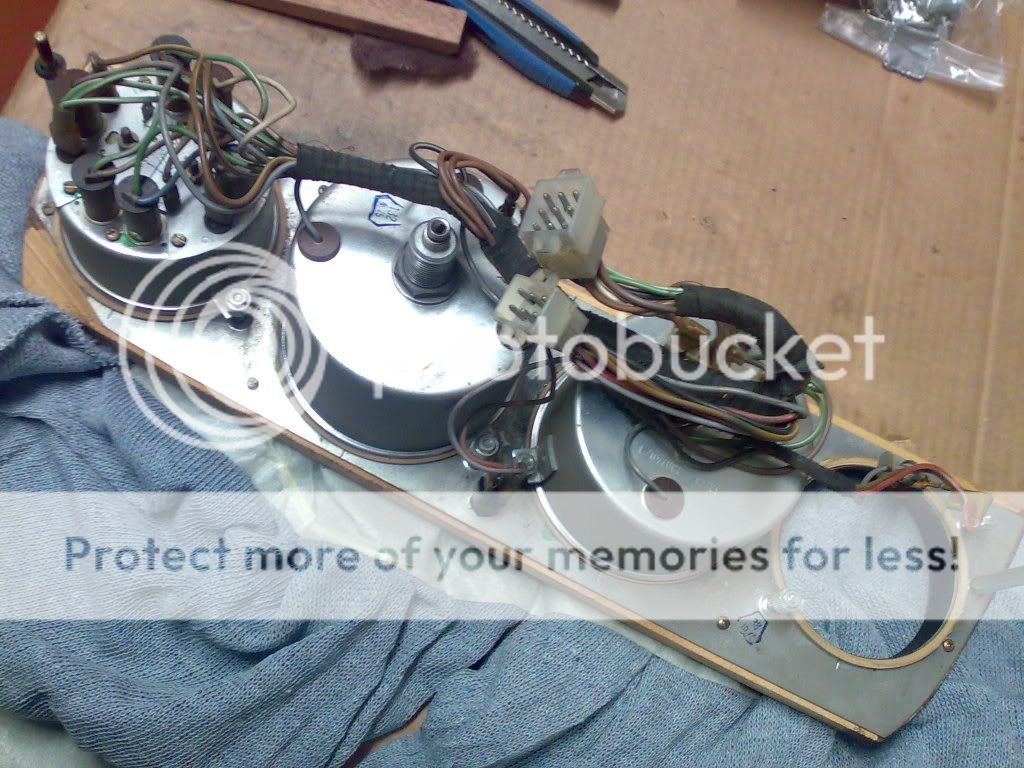
after undoing the screws, use a pocket knife to remove the metal plate
261220101578.jpg


261220101579.jpg

i have to renew the wood "plaque", but that implies also the renewal of all the wood in the car, and that is too much for the moment, so i will just glue some of the loose corners and polish it carefully

261220101580.jpg

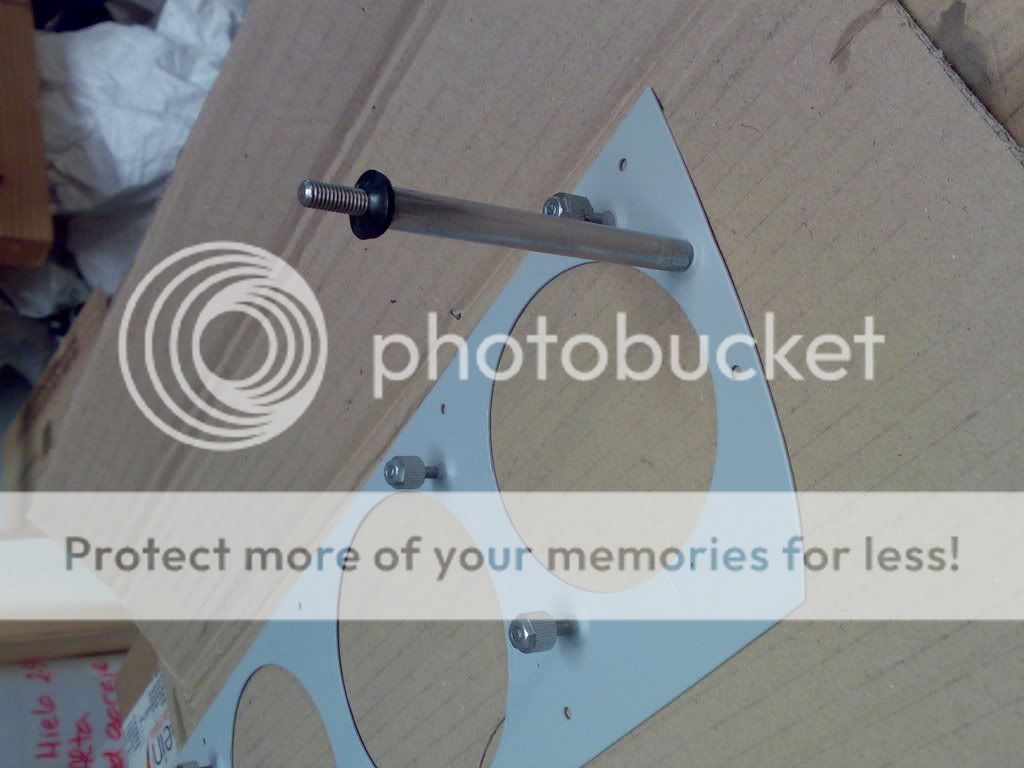
sand paper and rust converter

261220101582.jpg


261220101583.jpg


261220101584.jpg


261220101586.jpg

rust converter again


261220101589.jpg


it will continue...
 
Excellent write up with photos!!! Please continue with the pictures when you install it in the dashboard. That's on my "to do" list also
 
next step

test clocks, conexions, etc, clean, brush,...

261220101594.jpg


261220101595.jpg


261220101598.jpg


now a small problem, the info-clock was dirty inside, but to open it was almost impossible and certainly impossible to close it in a good way, so i thought of dissasembling one of the gauges (the two screws were very tough cause thread seal is present, so perpendicular screwdriver and strong push against the screw and turn anticlockwise, and, that´s it !)
then, through that open hole, a soft stick wrapped in a paper tisue (wet with alcohol) is introduced and the glass is turned resembling an old vinyl disc with its needle, but in this case what we have is a "cleaning needle"


261220101600.jpg

three or more times for a good finishing

261220101604.jpg

here you can see a peculiar view of the temp gauge in which 40, 65, 115 and 120 ºC figures can be seen (when assembled in the car you can not see them)

261220101603.jpg


i will be back with more ...
 
Last edited:
Excellent write up with photos!!! Please continue with the pictures when you install it in the dashboard. That's on my "to do" list also

PLEASE DO NOT MENTION THE "to do" LIST !!!!!!!
AARRRGHHHHHHHHHHHHHHHHHHHHHHH !!!!!!!!!!!!!!!!!!!
:-D:mrgreen::-D:mrgreen::-D:mrgreen::-D:mrgreen::-D
 
Hej deQuincey!

A few questions.

1, The green light in upper middle of the console? automatic gear something?

2, Why do you think the wood "veneer detach"? for example my car was stored for over 28 years in the worst climate ever for a car (cold garage in northern Europa) but still it looks like brand new all over. Due to glue?

The metal didn't like the climate by the way.... :-(

Nice photos! I think BTW I accomplished earlier(some years ago) how to repair the RPM gauge for a specific fault on this forum.
 
a few answers

hello stefan, please find answers in bold letters

A few questions.

1, The green light in upper middle of the console? automatic gear something?
you have to assume that this new instrument panel is a complete strange to me, so i have the same question, but someone said that the green lamp was there to tell the front fog-lights were on, hey,.... can anyone confirm this ?

2, Why do you think the wood "veneer detach"? for example my car was stored for over 28 years in the worst climate ever for a car (cold garage in northern Europa) but still it looks like brand new all over. Due to glue?
i can not speak about what was the history of this part,... but in the case of my own car´s wood, i assume that it was living in the south of spain, and the sun did it over 32 years or more, together with a slight decoloration of the original tone of the wood

The metal didn't like the climate by the way.... :-(

Nice photos! I think BTW I accomplished earlier(some years ago) how to repair the RPM gauge for a specific fault on this forum.
i would appreciate a link to your repair post

by the way, what does BTW mean ?


best regards
 
one step beyond

repair of losen fragments of wood with glue and pressure
261220101609.jpg


repaint of the black cilynders, only one shot, to avoid losing the pattern
271220101611-1.jpg


271220101613.jpg


detail

271220101612-1.jpg

also painting the sheet metal to avoid corrosion
271220101615.jpg


useful tool for making gaskets
271220101614.jpg


271220101618.jpg


261220101610.jpg


271220101622-1.jpg


271220101621.jpg


assembly of the black cilinder covers in the cleaned wood panel
271220101625.jpg

final aspect, yeah there are some cracks, but: this never meant to be a
new car, but a classic car!:-D
271220101631.jpg


reassemble the temp gauge device, using special glue for threads of the 2 tiny screws
281220101632.jpg


incidentally here you can see the aspect of the clean glass (inside cleaning process with alcohol 96º)
291220101633.jpg

ok, it is not perfect (not for concourse :mrgreen:), but in the next pic you can remember the previos status, and taking that into account, ... it is not that bad, isn´t it ?
261220101604.jpg

a final detail, the gaskets between clocks and sheet metal were damaged in the dissassembly process, due to the age the old gaskets remained sticked to the metal so i had to cut them off with a knife, so new ones had to be made, here the useful tool for it, perfect geometry !
291220101639.jpg

old ones up in the following picture, new ones in the bottom
291220101640.jpg

assembly pending, ...see you later !
 
Last edited:
Well done!

Nicely documented, I've saved this thread in "favorites" so I can refer back to it when I do the same job

Thanks!!
 
Back
Top