Of Alternators and Brackets...

bimmerboy73

Well-Known Member
Messages
489
Reaction score
8
Location
C0ckeysville, md
My alternator recently conked out on me so i was going to go ahead and replace it with the 80amp variety from an 85 635 csi. I've browsed the forum and am fairly square on what needs to be done and how to go about it. Question is, i know the bracket to mount the alt is slightly different and so you have to use the e24 bracket to install it, but were their a couple of variations? The shop owner has a couple of m30's laying around the shop and said i am welcomed to take whatever mounting hardware i need from them. However, there are 2 different types from what i can tell. Referencing Maximillian, it would seem as though this one is correct:

Bracket2.jpg


The only difference i can see is the hole cut into the top of it but figured i'd ask just in case.

The other bracket that i saw was this one:

Bracket1.jpg


Never seen it before and it seems a little on the flimsy side. Any clue what engine this came off of? It had a tarp covering it up so i couldnt get a good look at it to ID it.

As always, thanks in advance...

Richard
 

jhjacobs

Well-Known Member
Messages
906
Reaction score
17
Location
Oak Ridge, TN
I tried to get some photos of my 80amp setup but I can't get the camera in a position that will work with the alternator installed.

The tensioner arm that I have is much thicker than the ones in your photos, it is probably an older design. Also, both of the arms in your photos have a tooth mechanism that allows the alternator to be tensioned by turning the toothed bolt; however, the first photo you put up does not appear to have the correct toothed tensioner bolt. I don't think any of this matters as long as you can tighten the tensioner bolt. The main pivot point keeps the alternator secure and aligned and the tensioner arm simply needa to be stronger than the belt.

As a word of caution, the pulley bolt on my 80amp alternator protrudes out quite a bit and on my original alternator it was recessed so that it was flush with the pulley wheel. After installing the new alternator I found that the reason was that the centerline of the alternator was right in the path of the power steering belt and the pulley bolt would rub. Fortunately, after purchasing 4 different sized belts, I found one belt (1 inch bigger than original) that would let me swing the alternator up far enough to clear the power steering belt. It left me almost at the end of the tensioning span and it is still very close to the power steering belt. I inspect the power steering belt often to make sure there are no signs of rubbing.

I suspect that you might be able to find a tensioner arm from a completely different type of car that would work. You could probably even buy a universal arm and redrill / cut is short as needed:

http://www.jegs.com/p/Proform/Proform-Alternator-Brackets/744224/10002/-1 - at $8 it might be worth trying

http://www.amazon.com/dp/B000CMD7JM...=ATVPDKIKX0DER&tag=yahoo-auto-20&linkCode=asn

http://www.alternatorparts.com/Alternator_brackets_2.htm

http://www.waltstractors.com/acatal..._Conversion-Alternator_Mounting_Brackets.html
 

x_atlas0

Well-Known Member
Messages
1,799
Reaction score
141
Location
Clarkston, MI
Mine looks very different. The primary connection at the top is a large, thick bracket, directly connected to the motor. The lower piece is the part that slides. Unfortunately, this also makes it very difficult to tighten a loose belt, as I have to use a prybar and tighten things up from beneath the car. When I upgraded to a higher-output alternator, the bolt connecting the alt to the large bracket is smaller, so I had to get a new bolt. Also, the voltage regulator is internal; don't forget to bypass your current one.
 

jhjacobs

Well-Known Member
Messages
906
Reaction score
17
Location
Oak Ridge, TN
The primary connection at the top is a large, thick bracket, directly connected to the motor.

I forgot to mention that. Mine also pivots from the top motor mounted bolt and the tensioner arm is on the bottom. Tensioning is a PITA but I can manage it from the top with some creativity.

Because I was preoccupied with the pulley nut issue, I don't remember the bolt sizes being different but they probably were. I keep a decent supply of metric bolts around so I probably just put in a new one.

With the internal regulator there are only two wires plus a ground strap that need to be connected. These are the big red power cable and the idiot light (I think this is the blue wire from the old harness). I pulled out the regulator can and managed to get the idiot light connector out of the plastic shell. I left the rest of the harness intact but disconnected / tied down.
 

x_atlas0

Well-Known Member
Messages
1,799
Reaction score
141
Location
Clarkston, MI
For the idiot light, I jumped the connector that goes into the back of the alt. Making a small cable that jumped the two horizontally co-linear pins removed the regulator from the charging loop while retaining idiot light functionality. Makes it a snap to go back to original, too. Most of the printed manuals tell you to do this when you are testing alternator functionality.
 

jhjacobs

Well-Known Member
Messages
906
Reaction score
17
Location
Oak Ridge, TN
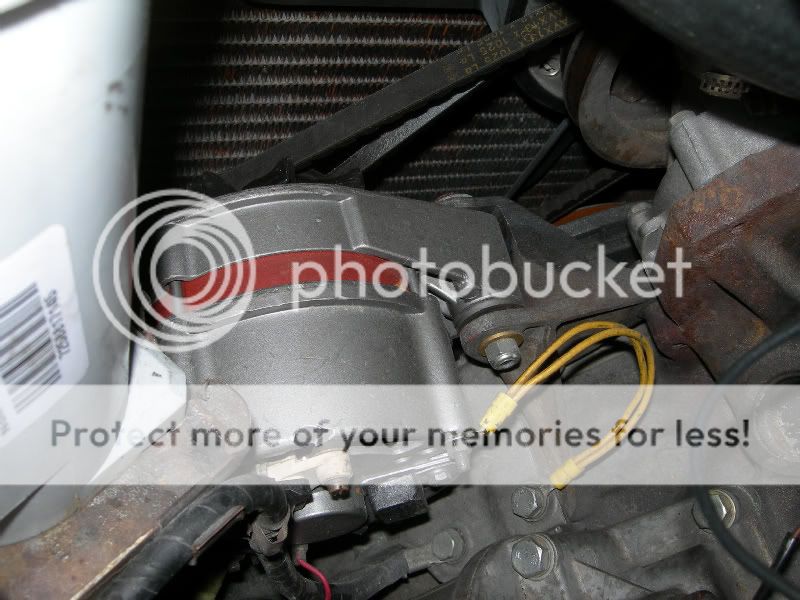
In response to youR PM, here are some photos of my pivot point / engine mount. My 80amp alternator bolted right in; I made a new 2x12 gauge ground strap because the original was failing.

Even my engine is rusting. :cry:

From the it looks like my idiot light wire is red; I must have made a splice connector like x_atlas suggested.

DSCN2130.jpg

DSCN2129.jpg
 
Top