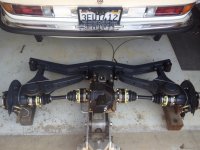
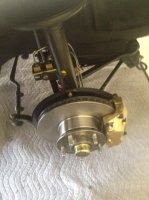
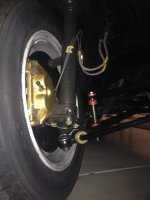
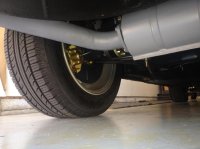
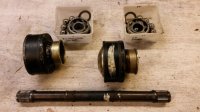
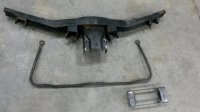
Phase 2 completed at 11:00 AM today!

dascoupeguy

Well-Known Member
Messages
272
Reaction score
0
Location
Central California
After a month of crawling under the beast, scraped knuckles, sore knees and back, and numerous bouts of swearing and gnashing of teeth, phase two has just been completed.

This phase consisted of removing the complete front and rear suspension, new rear axle bearings, rebuilding half shafts and CV joints, new front lower control arms, replacing all rubber bushings front and rear, repainting all suspension metal, new front strut mounts, and all brackets and nuts and bolts replated, and new brake rotors and pads.

Car rides as a new coupe would! Very happy! Will shoot a few more pics of the completed project shortly.
 

Attachments

  • photo_234.jpg
    photo_234.jpg
    93.4 KB · Views: 258
  • photo_145.jpg
    photo_145.jpg
    91.9 KB · Views: 237
  • photo_356.jpg
    photo_356.jpg
    93.7 KB · Views: 234
Very nice, I did the same (not to your level of detail) and it is a beotch (especially the rear bearings) but very satisfying in the end.
 
That is hopefully inspiring the whole forum to eventually treat the undersides of their Coupes that way. I hope to see more photos..
 
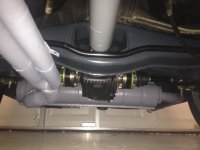
Phase 2 more pics

A couple more underside pics (sorry, I don't not have a lift...!)
 

Attachments

  • new1.jpg
    new1.jpg
    87.4 KB · Views: 182
  • new2.jpg
    new2.jpg
    93.9 KB · Views: 165
  • new3.jpg
    new3.jpg
    87.2 KB · Views: 169
Last edited:
Very nice! Does the "S" in the diff to identify limited slip? Did you re-create the "S"?

IIRC, this has been discussed before but, did your undercarriage come from the factory in that green/gray color, like 2002's? Mine is black and it a '73 (Euro). What year is yours?
 
After a month of crawling under the beast, scraped knuckles, sore knees and back, and numerous bouts of swearing and gnashing of teeth, phase two has just been completed.

This phase consisted of removing the complete front and rear suspension, new rear axle bearings, rebuilding half shafts and CV joints, new front lower control arms, replacing all rubber bushings front and rear, repainting all suspension metal, new front strut mounts, and all brackets and nuts and bolts replated, and new brake rotors and pads.

Car rides as a new coupe would! Very happy! Will shoot a few more pics of the completed project shortly.

how difficult was to remove and reassemble the complete front and rear systems ?
you mentioned you had no lift ?
so a good garage jack and that was all ?
please explain a bit
thanks
 
After a month of crawling under the beast, scraped knuckles, sore knees and back, and numerous bouts of swearing and gnashing of teeth, phase two has just been completed.

This phase consisted of removing the complete front and rear suspension, new rear axle bearings, rebuilding half shafts and CV joints, new front lower control arms, replacing all rubber bushings front and rear, repainting all suspension metal, new front strut mounts, and all brackets and nuts and bolts replated, and new brake rotors and pads.

Car rides as a new coupe would! Very happy! Will shoot a few more pics of the completed project shortly.
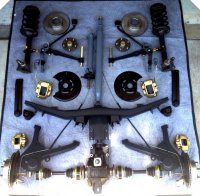
Hi, I made that work on rear side and now I am preparing for de front side subframe.
Do you sanded and painted by powder? Do you take off the engine?
 
Original colour for rear subframe parts was black

Luis,

I recently redid my rear subframe. When i took of the old parts and cleaned them, the original colour (black) appeared, and i'm think it had even the factory paint marks (to check that the bolts were torqued correctly) still there. See pics. The white paint was on the diff to subframe bolts, the half shafts, and the CV joints itself.


My car is a May 1973 3.0 CSA delivered to Switserland acc the BMW archives.

regards,
 

Attachments

  • 20141213_221829-01.jpg
    20141213_221829-01.jpg
    79.1 KB · Views: 139
  • 20150109_160153.jpg
    20150109_160153.jpg
    91.8 KB · Views: 131
This is another case of non-standardization. I was visiting Vintage Sports and Racing where 2 CSLs are being restored. Both had subframe parts in both the green/grey and black. Oddly, one CSL has the grey/green on the rear subframe and black on the front parts; the other CSL, the opposite!
 
My rear subframe is the dark green version.

DeQ I did mine without a lift, remove the rocker covers and support the car on jack stands underneath the original rear jack points (I used wooden blocks that the square metal section could dig into a little and rest up against the outside metal lip seen below). A check of metal integrity here is in order before using these points. Front is supported under the frame rails as usual.

IMG-20130825-00043.jpg


This allows access to the 2 big bolts and brackets that hold up the forward section of the frame (there is a big bushing under there that should be replaced-seen below bottom left). I then used a transmisson jack on wheels to lower the whole unit onto the jack once everything else was unbolted. The emergency brake cables must be disconnected at the lever then pulled out through their tunnels in the body as you wheel the subframe out and away. Pretty straightforward.

Once it's off, access to the half-shafts, bearings, trailing arm bushings, etc is much easier.

IMG-20130825-00055.jpg


how difficult was to remove and reassemble the complete front and rear systems ?
you mentioned you had no lift ?
so a good garage jack and that was all ?
please explain a bit
thanks
 
how difficult was to remove and reassemble the complete front and rear systems ?
you mentioned you had no lift ?
so a good garage jack and that was all ?
please explain a bit
thanks

Steve pretty much took my thunder. It is pretty straightforward. Just be prepared to deal with any tension on the springs.
 
Back
Top