Michael,
I almost forgot to say, so I edited to put it first: I would do the cavity waxing
after the paint, but
immediately after, when all of the cavities are easy to access. Even if Oldenzaal just buys one spray can and does only the rocker sections, that would be a plus, as everything else can easily be done after the assembly (but before Lokaris).
Since you have the opportunity now, you might want to ask for POR-15 epoxy primer underneath as an additional anti-corrosion layer. (Others with more experience with the product could chime in here.) Since they are starting from scratch, I would also want an etching primer layer under the standard primer, and I would specify Spies-Hecker, Glasurit, or minimum PPG paint for the color and clear coat. (I say this because my Turkis paint is beautiful, but very delicate. I sprayed my MBZ years ago myself with Spies-Hecker 2K acrylic color and clear coat, and it is tough as nails. PPG epoxy for the trunk and underside; again very tough paint.)
I used Bilt Hamber Dynax 50 in all of the cavities, and wherever I have folded metal coming together.
https://www.bilthamber.com/dynax-s50
I bought both the aerosol cans and the 5-liter jerry can - that jerry can is a lot of cavity protection! I have done all three of my oldtimers and still have plenty left over. It's too bad they don't make a 1-liter version.
The aerosol cans are great for snaking the spray lance into cavities like the A-pillar, the front fenders, the trailing arms, etc. I bought extra lances so I could link them together to get as deep as needed anywhere on the car.
I used the liquid to paint into the bottoms of my doors so water will not collect in the folded seam at the bottom. Same in the space under the rear windows, the wheel well, around the gas tank, etc. You can run the lance down the length of the frame rails to make sure water doesn't collect there, as they are open-ended facing forward.
An advantage over the Mike Sanders wax treatment is that it does not need to be heated for application, has better creeping properties, and better chemical anti-corrosion properties.
Another corrosion proofing oil that I've recommended highly on the forum is Owatöl oil. (Like Penetrol in the US.)
https://www.owatrolusa.com/product/owatrol-oil/
https://owatrol-international.com/en/all-our-products/7936-owatrol-oil.html
It comes in aerosol cans and 1-liter cans.
This stuff is terrific for rust-proofing exposed metal parts, visible areas where you don't want to use Bilt Hamber (because it's black). It has great creeping properties, and it dries rock hard to a light honey color (on light surfaces, I doubt you would see it on black).
It's also really good to treat any aluminum engine parts that you are not powder-coating. You paint or spray it on, wait a few minutes, and wipe it off, and it really protects the aluminum from dulling oxidation.
Caution: I used the spray initially, and it's great as it really creeps. But like I said, it dries hard, so protect your body panel surfaces if you're spraying it to avoid any mist settling on your paintwork (ask me how I know

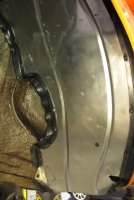
). The liquid is terrific. I painted the interior of my wheel wells before I mounted my Lokari inner fenders.
As you can see, there's a little honey color where I laid down several coats, but I can tell you that it's a bullet-proof water protection, and has lasted for several years now on my MBZ and Tii, as cars I've owned for longer.
It's great to paint around the inside of the folds at the edge of the engine hood and trunk lid. It creeps right into that fold to keep water from collecting or condensing there.
Something else I did, as I continually found that little cavity in front of the A-pillar collecting dirt and gravel. This is just from a few drives. Lots of agriculture in Switzerland, so tractors are always leaving dirt trails in the roads.
So before I installed the Lokaris, I used some thick closed-cell foam left over from my sound-deadening insulation jobs to make some pads to fill those holes so rocks and gravel just bounce off. I have those cavities painted with Owatröl, creases are filled with Dyanax 50, and the bottom is gooped up with melted Vaseline, so I think I can rest easy!
For the record, I also used this foam to close off those large rectangular access holes high up in the wheel well in front of the A-pillars.
And don't forget to ensure that you have those two simple little rubber gaskets in front of the A-pillar in the engine bay. They keep all of that stuff from getting sucked into the cavity behind your front fenders.
I cannot recall the E9-er (Keshav?) to give credit to for these little gems, but if your car doesn't have them, you should go back and read Dan Mooney's "Pandora's Box" thread again...https://www.e9coupe.com/forum/threads/i-just-couldnt-stop-myself-opening-pandoras-box.27901/page-4#post-217063...

www.e9coupe.com
If you have any doubt about the advisability of waxing cavities or using Lokaris, read through Dan Mooney's thread, and consider he's a guy with a high-end car restoration shop, and even
he didn't imagine what he would find after years of ownership!
I was recently investigating why my headlamp stalk was so close to the rim of my recently installed Petri 380mm steering wheel. I had initially thought it was because I was using a 2002 hub, rather than an E9 hub, although the 6mm difference between the two didn't explain how close my headlamp...

www.e9coupe.com
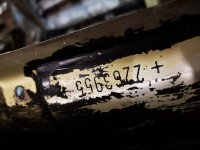 7C8A9F27-20D7-427E-8F58-6AF8F0639976.jpeg108.6 KB · Views: 221
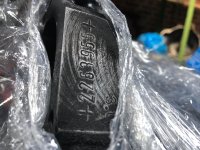 73B49201-7FD9-4813-8324-010177EB58B2.jpeg253.4 KB · Views: 213
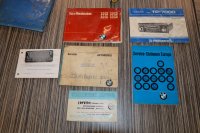 E1B04513-0824-4F3C-9E3A-4F4367BA937B.jpeg382.8 KB · Views: 232
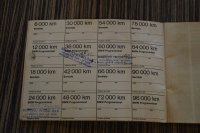 1D235088-83C2-4CDC-9DDB-6D1327159328.jpeg239.7 KB · Views: 229
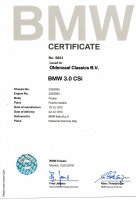 8AB59441-CA36-4A54-BB4E-A3DA8198DC4D.jpeg140 KB · Views: 210

