Hi guys
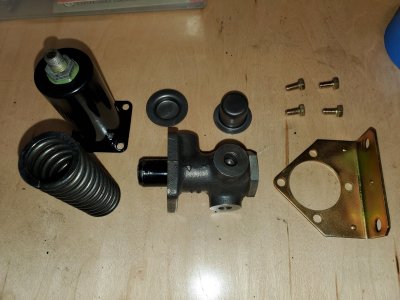
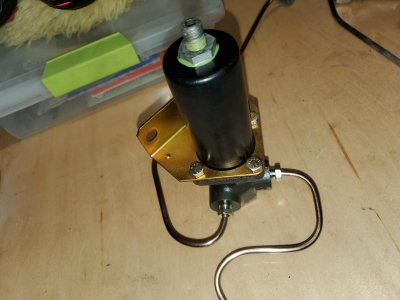
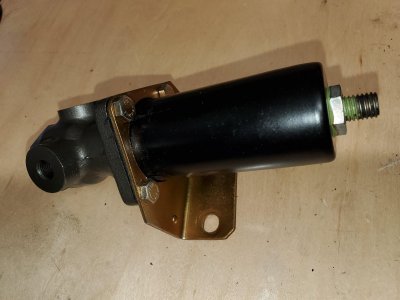
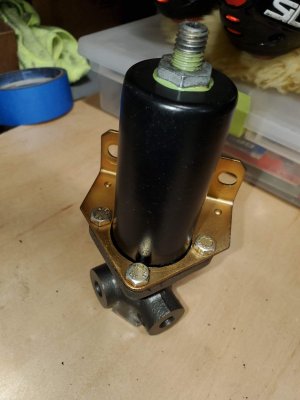
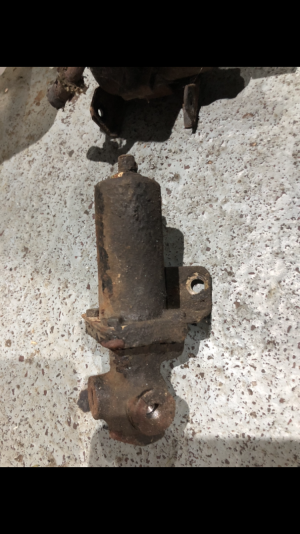
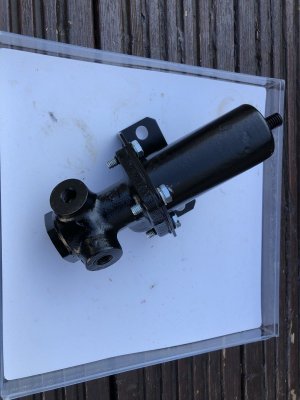
I just rebuilt my rear brake pressure regulator valve.
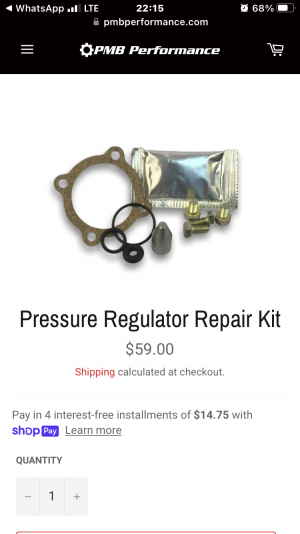
I used a pmb kit that is meant for an early Porsche.
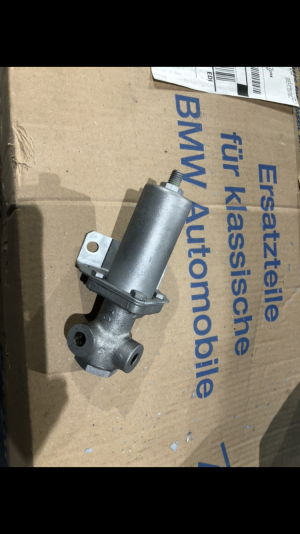
Anyway I took mine off and cleaned it and glass bead blasted it before I took it apart.
It was easier to keep the blast media out that way .
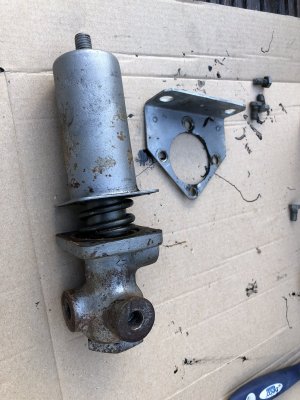
It is spring loaded so I put it in a hydraulic press so that I could hold it while I removed the 4 m6 screws holding it together.
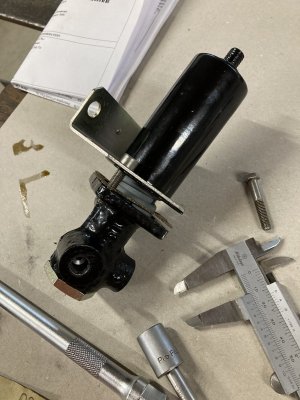
Once I had the screws out , I slowly released the hydraulic press to let the spring pressure off.
It separated by about 20 mm then the spring was free.
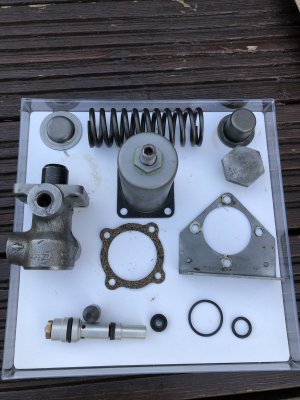
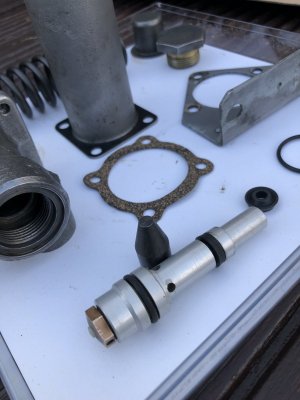
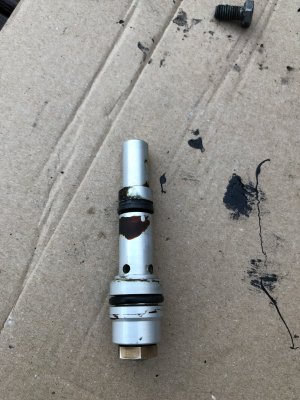
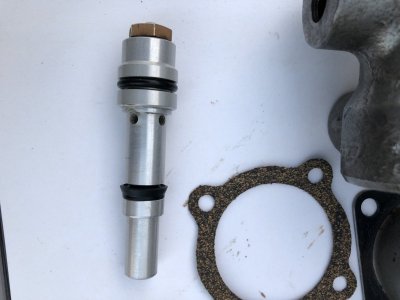
I took all of the internals out and cleaned them.
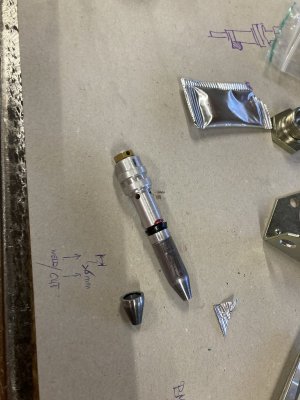
There is a type of sliding piston which has 2 seals on it , 1 o-ring and 1 radial seal.
They need replacing, the o-ring is easy.
The radial seal is difficult to do.
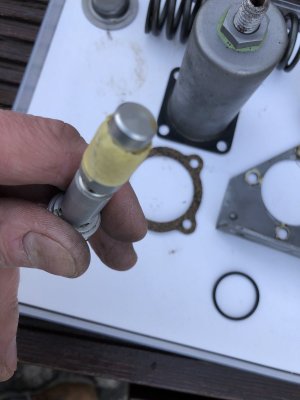
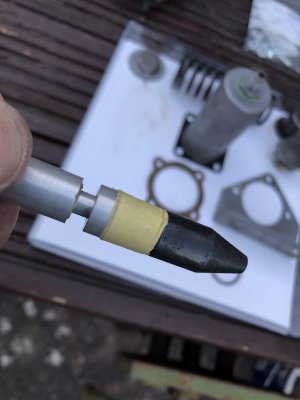
The kit comes with a tapered tool which you put onto the end of your piston , then you have to push the new seal up the taper and onto the shaft until it pops into its groove.
I used hot water to make the seal softer and I used lubricant to help also.
It was not easy !!!
Note the tapered tool in the Porsche kit was too short for the Bmw part which left a reduced diameter with a step ahead of it on the shaft , a kind of “ trough “so I made up the difference by wrapping masking tape around and around the shaft until it was the same diameter as the tool and the shaft , I didn’t want the seal to fall into the “ trough “.
Once that was done I was able to slide the seal up the the taper , over the masking tape and on into its groove on the shaft.
Then when all of the seals and o-rings are replaced, and greased up , you use the 4 new screws to put it back together. The screws are longer than the originals so they are long enough to pull the spring down so you don’t need to use a press.
I hope that might be of some help, if others are planning on rebuilding theirs.
")
I just rebuilt my rear brake pressure regulator valve.
I used a pmb kit that is meant for an early Porsche.
Anyway I took mine off and cleaned it and glass bead blasted it before I took it apart.
It was easier to keep the blast media out that way .
It is spring loaded so I put it in a hydraulic press so that I could hold it while I removed the 4 m6 screws holding it together.
Once I had the screws out , I slowly released the hydraulic press to let the spring pressure off.
It separated by about 20 mm then the spring was free.
I took all of the internals out and cleaned them.
There is a type of sliding piston which has 2 seals on it , 1 o-ring and 1 radial seal.
They need replacing, the o-ring is easy.
The radial seal is difficult to do.
The kit comes with a tapered tool which you put onto the end of your piston , then you have to push the new seal up the taper and onto the shaft until it pops into its groove.
I used hot water to make the seal softer and I used lubricant to help also.
It was not easy !!!
Note the tapered tool in the Porsche kit was too short for the Bmw part which left a reduced diameter with a step ahead of it on the shaft , a kind of “ trough “so I made up the difference by wrapping masking tape around and around the shaft until it was the same diameter as the tool and the shaft , I didn’t want the seal to fall into the “ trough “.
Once that was done I was able to slide the seal up the the taper , over the masking tape and on into its groove on the shaft.
Then when all of the seals and o-rings are replaced, and greased up , you use the 4 new screws to put it back together. The screws are longer than the originals so they are long enough to pull the spring down so you don’t need to use a press.
I hope that might be of some help, if others are planning on rebuilding theirs.
Attachments
-
 9D2A2E62-1CFB-47BB-A0A6-CC39120109CE.png585.5 KB · Views: 397
 -
 182C5C8E-DEF0-407C-800E-A34EFF03948F.png3.4 MB · Views: 425
 -
 B0B7355A-D561-4793-9D7F-C4F04B47BF33.png2.8 MB · Views: 407
 -
 5E61C697-1CAC-4DE5-86EB-D8BABB9AAAA0.jpeg366.4 KB · Views: 330
 -
 975BB701-654C-463D-85F5-1805BDBC7A30.jpeg324.8 KB · Views: 363
 -
 85ED4AF9-DDDB-4931-B799-C899D1808437.jpeg196.6 KB · Views: 352
 -
 A2482E84-F213-4021-B2C2-CE4ECEE33830.jpeg381.2 KB · Views: 349
 -
 8AB9DCC8-41D1-46BC-99CB-660678AAE72D.jpeg168.6 KB · Views: 342
 -
 E5D361A3-98E0-4639-8968-19B5C3CEF578.jpeg164.7 KB · Views: 359
 -
 3CDC96CF-2B55-4B98-9CAD-AEDEEFFEDEA5.jpeg179 KB · Views: 376
 -
 7188DD6C-C961-4229-92DE-5FCC3D31512C.jpeg240.2 KB · Views: 367
Last edited: