Rear seat horsehair.

SJFry

Member
Messages
21
Reaction score
6
Location
San Jose, CA
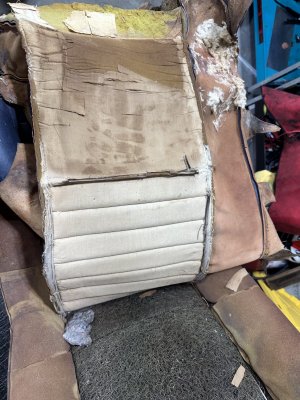
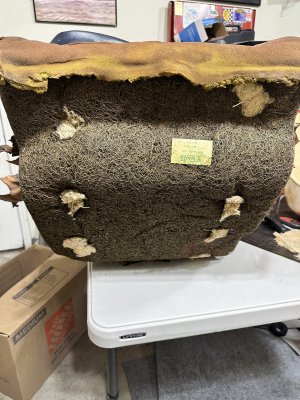
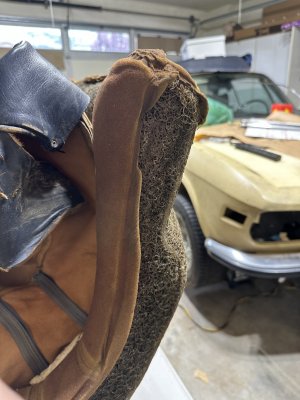
I've finished rebuilding and reupholstering my rear seats and armrests. Now have the old horsehair and vinyl patterns available if anyone can use them. Free.

From a 1973 3.0CS. The horsehair still holds its shape, but it is crispy and has a lovely aroma. I don't know if they hold any value, but I feel funny just dumping them.

Pick up only, although I could be talked into delivery if it's not too far. I'm in San Jose, CA.

Will be tackling the front seats next.

Thanks,
Keith
 

eriknetherlands

Moderator
Site Donor
Messages
2,775
Reaction score
2,008
Location
Netherlands, Eindhoven area
Great that you offer them up. I'm not in need, but I am interested in your learnings on your work - did you do it yourself? What did you encounter as challenges?
I'm still strung between doing it myself (well installing a kit) and just outsourcing the whole job.
 

Ohmess

I wanna DRIVE!
Site Donor $
Messages
4,896
Reaction score
2,721
Location
Aiken, SC
Great that you offer them up. I'm not in need, but I am interested in your learnings on your work - did you do it yourself? What did you encounter as challenges?
I'm still strung between doing it myself (well installing a kit) and just outsourcing the whole job.
Eric - one of the keys to this is hand strength. Even with the right tools and knowing the tricks, stretching new leather requires very strong hands.
 

bmw2800cs

Well-Known Member
Site Donor $
Site Donor $$
Messages
1,148
Reaction score
496
Location
San Jose, California
Hey SJFry - I'm in San Jose, Willow Glen. It would be great to see your project. I may be at the Los Gatos Neue Klause and Coffee this Saturday.
 

SJFry

Member
Messages
21
Reaction score
6
Location
San Jose, CA
I did do the work myself - a leather kit from GAHH (they had a good discount at the time). I'm sure the local upholstery shops would have done a great job, but the quotes for vinyl were on the order of the price I paid for the car. So, I thought I'd give it a try. Never done upholstery before, so it was a learning experience.

The outer arm rests required full rebuilds. The plywood was starting to delaminate and lose strength. Plus, it was a good chance to get in there and clean things up before adding the foam and leather.

Because the seat buckets are highly curved, I spent a lot of time shaping the foam. What I did on the inner bolster wouldn't simply mirror to the outer bolster because the bucket underneath had a slightly different shape. So, I made cardboard patterns at different stations starting at the front of the seat and moving backwards. That gave me a target to work to. Doing that got the shape pretty close to the new leather skins, but I did have to add and remove a bit in spots. That took me a while because, well, I didn't know what I was doing.

It's much more wrinkly than I would like, but my buddy offered his wife's steamer which may help smooth things out (I don't think she knows yet). Still it looks better than the worn our stuff that was there, plus it smells great.

I got the car out yesterday since it's been nice weather here. I think it drives better now with the new upholstery. Funny how that is.

My old horsehair is still available...
30cs_backseat2.jpg
 

rsporsche

Moderator
Site Donor $$
Messages
10,685
Reaction score
3,714
Location
Atlanta, GA
for dimensioned drawings of the rear armrests - check out post #6 in this thread
 

bluecoupe30!

Well-Known Member
Site Donor
Messages
2,148
Reaction score
1,298
Location
Delta, British Columbia, Canada
I did do the work myself - a leather kit from GAHH (they had a good discount at the time). I'm sure the local upholstery shops would have done a great job, but the quotes for vinyl were on the order of the price I paid for the car. So, I thought I'd give it a try. Never done upholstery before, so it was a learning experience.

The outer arm rests required full rebuilds. The plywood was starting to delaminate and lose strength. Plus, it was a good chance to get in there and clean things up before adding the foam and leather.

Because the seat buckets are highly curved, I spent a lot of time shaping the foam. What I did on the inner bolster wouldn't simply mirror to the outer bolster because the bucket underneath had a slightly different shape. So, I made cardboard patterns at different stations starting at the front of the seat and moving backwards. That gave me a target to work to. Doing that got the shape pretty close to the new leather skins, but I did have to add and remove a bit in spots. That took me a while because, well, I didn't know what I was doing.

It's much more wrinkly than I would like, but my buddy offered his wife's steamer which may help smooth things out (I don't think she knows yet). Still it looks better than the worn our stuff that was there, plus it smells great.

I got the car out yesterday since it's been nice weather here. I think it drives better now with the new upholstery. Funny how that is.

My old horsehair is still available...
View attachment 180930
You know, it doesn't not look bad. You were very brave in taking on something so cosmetic, as a project. But I get where you are coming from. This is fussy, fussy work. Special tools, tricks, luck and experience are all required in the right proportions. Last year I looked at my front seat kit for my Austin Healey Sprite Mark 1 (the Bugeye) and thought, OK, I could try this, but as been mentioned, you need strong hands, and a lot of experience. In the end, I enlisted the help of a professional, who still needed 20 hours to get the right look. Mind you there were "deficiencies" in the seat backs and so on, that contributed to the struggle, but to wrestle new upholstery onto old seat pieces, requires experience, patience, time and those special tools help a lot. Your seats look very nice.
 

coupesport

Newish Member
Site Donor $
Messages
169
Reaction score
83
Location
Chicagoland, IL
@SJFry. I've done this also with GAHH kit and just finishing the front seats. I can send you pics and recommendations for foam on the fronts. Send a PM.
You rear seats are looking good. If you put a good leather conditioner on then, I used Gliptone, cover them with clear plastic to keep the moisture in, and place in the sun for 2-3 hours the minor wripples will smooth out. You'll like the results even more.
 

willybali

Active Member
Site Donor
Messages
54
Reaction score
5
Location
Bay Area Ca.
Hi, I’ve just removed one rear seat leather- extremely cracked so easy to remove- only trying to save underneath - what did you do? Redesign mohair mold? Couple pics of the first seat. Did you make different rib padding? My seats are 74 donor seats my old interior was removed without permission :( anyway any advice would be appreciated.
 

Attachments

  • IMG_0097.jpeg
    IMG_0097.jpeg
    489.4 KB · Views: 19
  • IMG_0084.jpeg
    IMG_0084.jpeg
    548.4 KB · Views: 22
  • IMG_0085.jpeg
    IMG_0085.jpeg
    295.6 KB · Views: 21
  • IMG_0092.jpeg
    IMG_0092.jpeg
    378 KB · Views: 22

SJFry

Member
Messages
21
Reaction score
6
Location
San Jose, CA
Coupesport - thanks for the advice on getting the wrinkles out and the warning about the steamer. Will repost my results.

Willibali - I sent you a separate thread on what I did. This is the Parts Forum and didn't feel it was the right place to dive into the details.
 
Top