Sealed the dreaded gravel trap!

Willem Tell

Well-Known Member
Site Donor $
Messages
340
Reaction score
315
Location
Zug, Switzerland
I cannot recall the E9-er (Keshav?) to give credit to for these little gems, but if your car doesn't have them, you should go back and read Dan Mooney's "Pandora's Box" thread again...https://www.e9coupe.com/forum/threads/i-just-couldnt-stop-myself-opening-pandoras-box.27901/page-4#post-217063

66060

This is the opening of Karmann's version of the perfect venturi tube for sucking up sand and gravel and depositing it into your A-pillar cavity:
66057


These required just a bit of snipping to allow the gasket to slide behind the metal at each end:
66058
66059

The engine compartment gasket then slips over the top to make a complete seal.
 

e9john

Well-Known Member
Site Donor
Messages
154
Reaction score
71
Location
Rochdale, UK.
Don't think those rocks got in there due to a lack of that seal, more likely through the rust holes in the bodywork.
 

Willem Tell

Well-Known Member
Site Donor $
Messages
340
Reaction score
315
Location
Zug, Switzerland
It's kind of the "chicken and the egg"... dirt gets trapped and stays moist, rust follows.

Fortunately my car was waxed early in its life, so no rust holes, but for sure dirt and gravel gets trapped in those creases. This is what I could pull out by hand by reaching into the cavity in the wheel well.

66094
66095
 

Keshav

Well-Known Member
Site Donor $$
Messages
2,761
Reaction score
2,773
Location
Germany
That seal is infact very important. All the water that enters thru the chrome grills in the hood gets forced into the cavity where rust builds above the fuse box and on the opposite side too, the glove box. We all look in there to see the extent of corrosion as a tell tale sign of major rust issues. More so in wet climate conditions.
If you don’t have them, get them.
Here’s a know Vendor who has them, not a lot of cash compared to its long term effect.


deQuincey

Quousque tandem...?
Site Donor
Messages
8,371
Reaction score
2,389
Location
BIO - 43°15'46.5"N 2°56'03.7"W
I cannot recall the E9-er (Keshav?) to give credit to for these little gems, but if your car doesn't have them, you should go back and read Dan Mooney's "Pandora's Box" thread again...https://www.e9coupe.com/forum/threads/i-just-couldnt-stop-myself-opening-pandoras-box.27901/page-4#post-217063

View attachment 66060
This is the opening of Karmann's version of the perfect venturi tube for sucking up sand and gravel and depositing it into your A-pillar cavity:
View attachment 66057

These required just a bit of snipping to allow the gasket to slide behind the metal at each end:
View attachment 66058View attachment 66059
The engine compartment gasket then slips over the top to make a complete seal.

i do not think you have a clear idea of what a venturi tube looks like ;-), or maybe youu have been too metaphoric, nevermind
in any case it is an excellent advice to close that opening with the mentioned rubber
thanks
 

Stevehose

Well-Known Member
Site Donor $$
Messages
12,934
Reaction score
5,598
Location
Sarasota, FL
I keep mine out in dry weather to keep ventilation flowing and reduce condensation, if on a road trip I install them in case I encounter rain.
 

Willem Tell

Well-Known Member
Site Donor $
Messages
340
Reaction score
315
Location
Zug, Switzerland
or maybe youu have been too metaphoric
;) I was being (perhaps obscurely) metaphoric... maybe "venturi effect" or vacuum would have been a better word.

I keep mine out in dry weather to keep ventilation flowing and reduce condensation, if on a road trip I install them in case I encounter rain.
That's an interesting idea, and a very good point!
 
Last edited:

starcruiser

Well-Known Member
Messages
174
Reaction score
48
CS Werk offers them as well.


adawil2002

Well-Known Member
Site Donor $$
Messages
5,183
Reaction score
3,045
Location
Brunswick, Maine
I have removed 5 pounds of sand and rocks from that area and the lower fender in 2011. Highly recommend Lokari fender liners, clean behind them once a year.
 

rsporsche

Moderator
Site Donor $$
Messages
10,634
Reaction score
3,671
Location
Atlanta, GA
thanks for answering my question before i was able to ask it Andrew. i have a set of Lokari liners and was going to install them after all of the work is finished
 

Willem Tell

Well-Known Member
Site Donor $
Messages
340
Reaction score
315
Location
Zug, Switzerland
I am preparing to do mine tomorrow. I was just inspecting, cleaning today in preparation, and it occurs to me that the forward edge may mount differently than on my '02.

@Andrew, Do you have a picture of how the leading edge mounts against the forward edge of the front panel?
 

deQuincey

Quousque tandem...?
Site Donor
Messages
8,371
Reaction score
2,389
Location
BIO - 43°15'46.5"N 2°56'03.7"W
thanks for answering my question before i was able to ask it Andrew. i have a set of Lokari liners and was going to install them after all of the work is finished

here are more pics,


Willem Tell

Well-Known Member
Site Donor $
Messages
340
Reaction score
315
Location
Zug, Switzerland
Mission accomplished, Lokaris installed!
It's amazing how Karmann designed so many crevasses to catch debris. I clear this pocket all the time. I might have driven 200 km since I last checked it.
I shot those areas full of wax in the interior areas and liquefied petroleum jelly in these visible areas when I first got the car.
IMG_3253.JPGIMG_3255.JPG

I saw the treatment that deQuincey and I believe Andrew used, but I didn't want to use something that would cover the color or be sticky or waxy in texture (my Tii underside is covered in Dinitrol, and it's just miserable to work around). I have a whole gallon of really good rust preventative from Bilt Hamber, but I reserve that for the cavities. I painted all of the surfaces with Owatrol Öl, like Penetrol in the States. It penetrates and dries into a really tough, hard, water-repelling surface.
I had pre-treated the Lokaris with Owatrol months ago in anticipation of this project.
My camera doesn't like when I use the blue LED shop light, so the color spectrum is off. But you can see that it's nice and glossy. This will become hard and dry to the touch. I covered all the surfaces, including the struts, springs, and hardware.
DSC00426.JPG
DSC00427.JPG
DSC00428.JPG


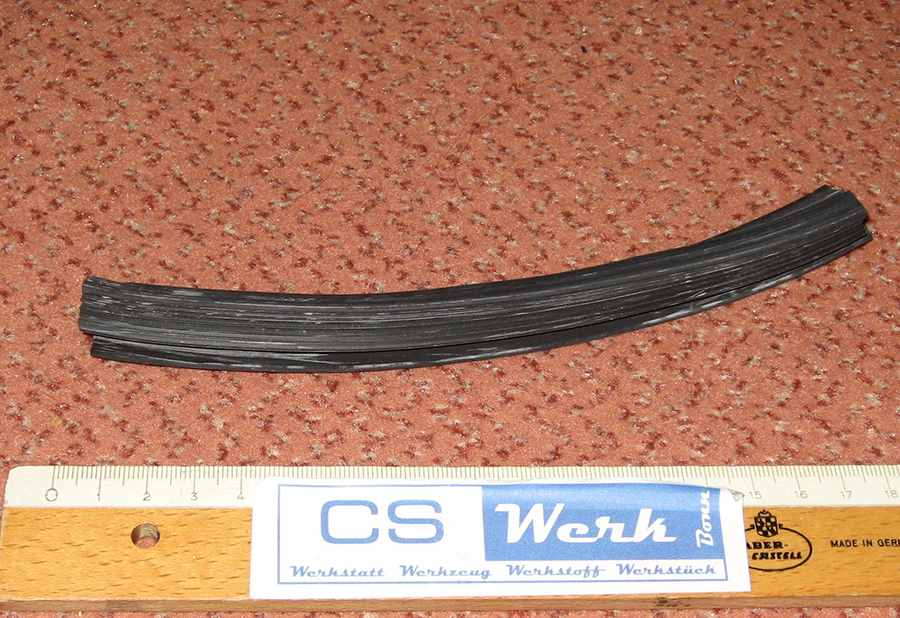
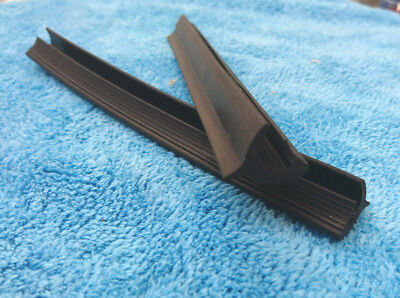
Before I covered over the wells, I thought about that cavity filling up with gravel all the time. There is a gap behind the Lokari that could still allow gravel and water to travel up into that cavity. I cut a couple of 30mm closed-cell foam and put them in those spaces to prevent gravel and dirt from collecting there. Some of you might think I'm creating a moisture trap, but I have these areas coveed in wax, petroleum jelly, and Owatrol. And the foam does not seal the areas, just fills the gap where the gravel collects.
DSC00433.JPG


The driver's side went pretty smoothly, the passenger side was a little more troublesome. I don't know if maybe the wheel well is shaped slightly differently, or the Lokari is cut slightly differently, but it was harder to get the same or even similar position at the front edge.

DSC00446.JPG
DSC00444.JPG

DSC00445.JPG

The passenger side fitted slightly differently, but ended up pretty good.
DSC00450.JPG
DSC00449.JPG

DSC00448.JPG


You can see from these photos that I followed Andrews(?) lead and pulled all of the staples and replaced them with rivets. Man! That is a couple of days of hand-breaking work. Those staples are tough, and don't give up their position without a fight!

I decided early on that I would not spray the Lokaris with rubberized paint, as I had done that for the Lokaris on my Tii. I found that grass and dirt tends to stick to the rubberized paint, making it harder to clean.

The end result was good, and I am much more confident about the wheel wells being protected.

DSC00451.JPG
DSC00452.JPG
DSC00453.JPG
 
Last edited:
Top