Some new pictures from my restoration project

johanaxelson

Well-Known Member
Messages
638
Reaction score
135
Location
Swedish, working in Panama
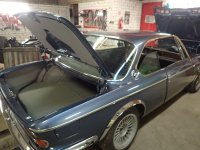
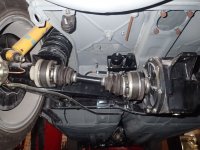
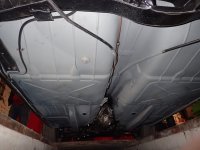
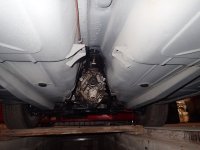
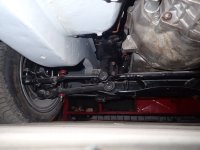
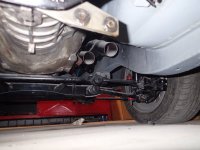
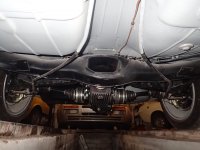
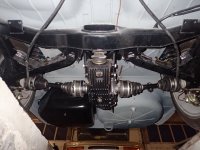
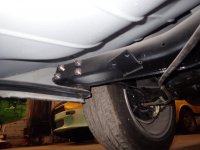
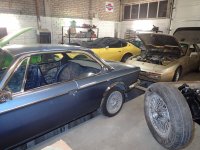
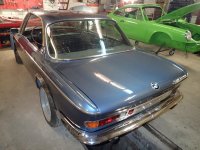
It's been a while and I have been off working abroad and the garage busy so work has been slow but now it is starting again and I paid the car a quick visit.

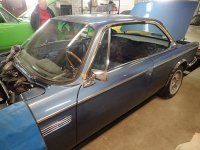
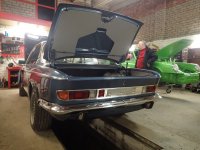
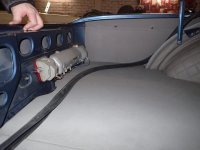
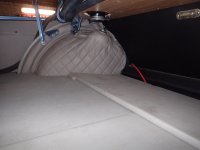
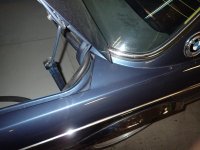
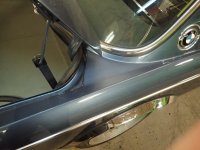
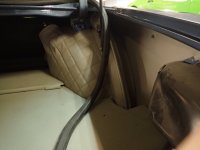
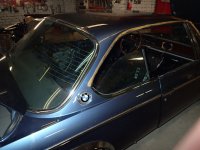
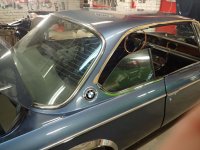
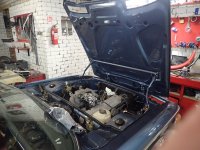
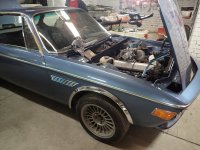
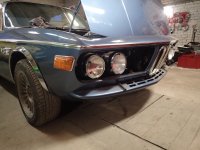
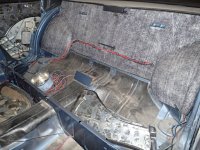
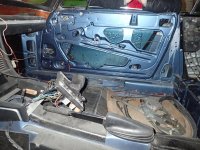
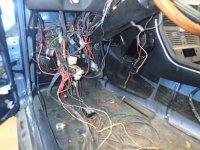
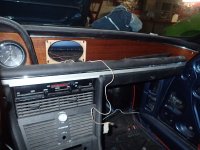
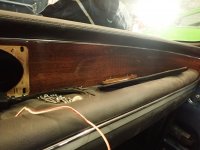
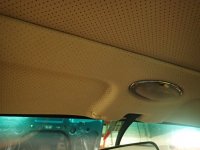
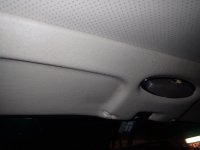
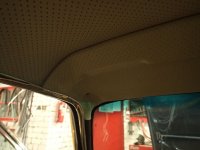
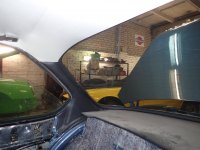
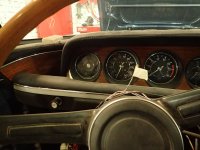
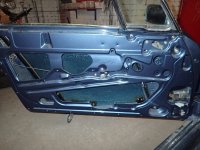
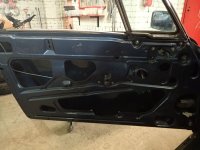
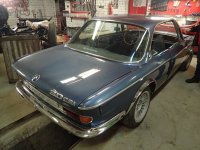
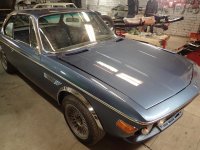
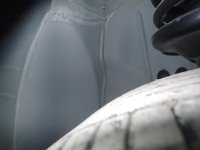
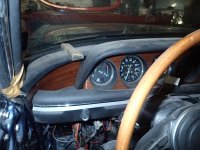
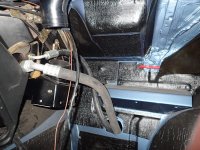
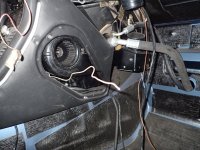
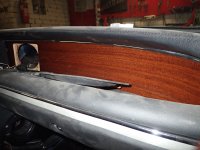
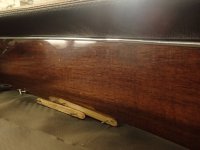
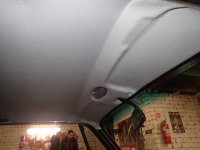
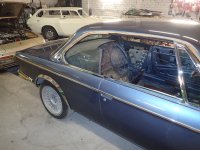
It is close to being finished and the last bits just need to be put back together. Electrical system and interior. This will of course take a little time as it is detail work but it will be done by summer.

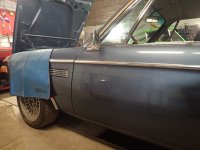
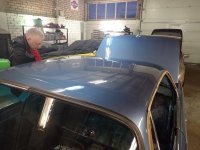
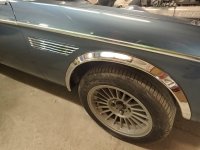
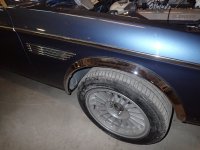
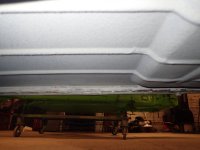
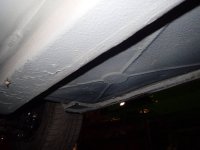
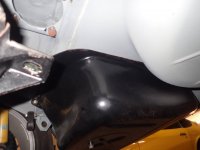
- it is dirty as work is in progress
- detailing of engine and gearbox will be done last
- proper polish will do done towards the end
- the lighting is florescent indoor lighting, hard to get colors right so there are often a flash and no flash version, flash makes the color look more true. I think the picture in this post is the closest but hard to tell....
-It is Baikal (glasurit)

And sorry, it was a new camera. Still learning it...

Please, any comments are appreciated. Not only positive ones, I want to know what to improve.

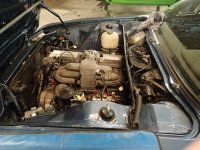
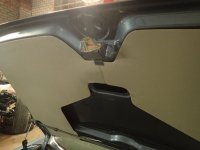
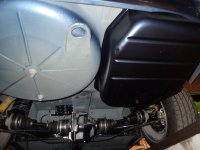
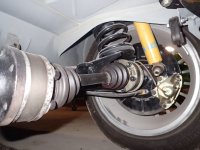
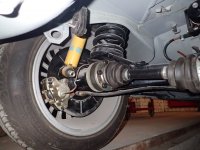
Since the engine is a 3.5L transplant I will use a MegaSquirt the engine wiring will be done from scratch. No point in using old loom, much cleaner and safer with a new one. So much of the old cabling is not needed.
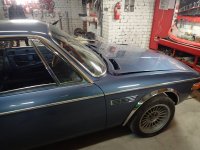
 

Attachments

  • 10.jpg
    10.jpg
    379.6 KB · Views: 242
Last edited:
Wheel house covers are somewhat temporary until I find nice original ones
 

Attachments

  • 1.jpg
    1.jpg
    413 KB · Views: 297
  • 2.jpg
    2.jpg
    332.2 KB · Views: 277
  • 3.jpg
    3.jpg
    318.1 KB · Views: 283
  • 4.jpg
    4.jpg
    287.3 KB · Views: 258
  • 5.jpg
    5.jpg
    300.3 KB · Views: 264
  • 6.jpg
    6.jpg
    311.3 KB · Views: 279
  • 7.jpg
    7.jpg
    347.4 KB · Views: 275
  • 8.jpg
    8.jpg
    352.8 KB · Views: 271
  • 9.jpg
    9.jpg
    257 KB · Views: 280
  • 10.jpg
    10.jpg
    379.6 KB · Views: 266
some more
 

Attachments

  • 11.jpg
    11.jpg
    381.3 KB · Views: 231
  • 12.jpg
    12.jpg
    322.8 KB · Views: 238
  • 13.jpg
    13.jpg
    244.2 KB · Views: 239
  • 14.jpg
    14.jpg
    315.2 KB · Views: 254
  • 15.jpg
    15.jpg
    367.7 KB · Views: 242
  • 16.jpg
    16.jpg
    354.7 KB · Views: 270
  • 17.jpg
    17.jpg
    296.8 KB · Views: 237
  • 18.jpg
    18.jpg
    273.1 KB · Views: 256
  • 19.jpg
    19.jpg
    432.5 KB · Views: 271
  • 20.jpg
    20.jpg
    434.1 KB · Views: 259
even more
 

Attachments

  • 21.jpg
    21.jpg
    345.8 KB · Views: 247
  • 22.jpg
    22.jpg
    316.9 KB · Views: 229
  • 23.jpg
    23.jpg
    377.8 KB · Views: 235
  • 24.jpg
    24.jpg
    528.2 KB · Views: 230
  • 25.jpg
    25.jpg
    130.7 KB · Views: 230
  • 26.jpg
    26.jpg
    356.7 KB · Views: 230
  • 27.jpg
    27.jpg
    236.8 KB · Views: 226
  • 28.jpg
    28.jpg
    413 KB · Views: 269
  • 29.jpg
    29.jpg
    242.1 KB · Views: 242
  • 30.jpg
    30.jpg
    395.2 KB · Views: 222
Not sure I like the paint on the wheel well
Old shocks were OK so I might keep them
Pic 38, not too happy with the undercoat not being smooth
 

Attachments

  • 31.jpg
    31.jpg
    293.6 KB · Views: 245
  • 32.jpg
    32.jpg
    278.7 KB · Views: 216
  • 33.jpg
    33.jpg
    387.2 KB · Views: 214
  • 34.jpg
    34.jpg
    394.4 KB · Views: 223
  • 35.jpg
    35.jpg
    172.2 KB · Views: 225
  • 36.jpg
    36.jpg
    340 KB · Views: 231
  • 37.jpg
    37.jpg
    352.7 KB · Views: 235
  • 38.jpg
    38.jpg
    247.8 KB · Views: 223
  • 39.jpg
    39.jpg
    211.1 KB · Views: 226
  • 40.jpg
    40.jpg
    211.2 KB · Views: 243
44- the lip needs looking at
46 - paint on the tank seems to not cover properly?
 

Attachments

  • 41.jpg
    41.jpg
    281.3 KB · Views: 233
  • 42.jpg
    42.jpg
    320.8 KB · Views: 266
  • 43.jpg
    43.jpg
    164.2 KB · Views: 240
  • 44.jpg
    44.jpg
    149 KB · Views: 246
  • 45.jpg
    45.jpg
    182.6 KB · Views: 239
  • 46.jpg
    46.jpg
    131.4 KB · Views: 245
  • 47.jpg
    47.jpg
    285.2 KB · Views: 223
  • 48.jpg
    48.jpg
    171.7 KB · Views: 246
  • 49.jpg
    49.jpg
    354.8 KB · Views: 208
  • 50.jpg
    50.jpg
    363.5 KB · Views: 221
53 - old weld, not too pretty
54 - old dash was cracked so we covered it in leather
Am happy with the wood
 

Attachments

  • 51.jpg
    51.jpg
    269.1 KB · Views: 211
  • 52.jpg
    52.jpg
    287.2 KB · Views: 212
  • 53.jpg
    53.jpg
    331.1 KB · Views: 227
  • 54.jpg
    54.jpg
    329.1 KB · Views: 215
  • 55.jpg
    55.jpg
    410.7 KB · Views: 208
  • 56.jpg
    56.jpg
    412 KB · Views: 218
  • 57.jpg
    57.jpg
    342.3 KB · Views: 214
  • 58.jpg
    58.jpg
    390.1 KB · Views: 220
  • 59.jpg
    59.jpg
    244.2 KB · Views: 214
  • 60.jpg
    60.jpg
    353.3 KB · Views: 214
61 and 62 are my chairs (recaros), leather is a little darker in real life
65 - not my interior, for another car. Just to show the work. All my stuff is covered in protective plastic.
66 - my door vs the other piece
 

Attachments

  • 61.jpg
    61.jpg
    287.8 KB · Views: 205
  • 62.jpg
    62.jpg
    351 KB · Views: 203
  • 63.jpg
    63.jpg
    311.8 KB · Views: 196
  • 64.jpg
    64.jpg
    303.6 KB · Views: 189
  • 65.jpg
    65.jpg
    334.7 KB · Views: 204
  • 66.jpg
    66.jpg
    360.9 KB · Views: 182
The A/C lines in US coupes are steel inside the passenger area, your hoses are going to interfere with the glove box. Be sure to insert the temp sender probe into the evaporator box, the hole is tiny and it needs to fit into the fins. I would touch up the spare tire well as you suggested too. Nice seeing so many photos of a very nice coupe coming back together.
 
The A/C lines in US coupes are steel inside the passenger area, your hoses are going to interfere with the glove box. Be sure to insert the temp sender probe into the evaporator box, the hole is tiny and it needs to fit into the fins. I would touch up the spare tire well as you suggested too. Nice seeing so many photos of a very nice coupe coming back together.

AC is sold but here is a pic from my parts car for illustration. Ignore the giant hole to the right of the AC lines. If you look closely you can find a red tricycle across the garage.

30971113804_410d6c13de_c.jpg


30971113704_279464672f_c.jpg
 
Thanks both :)

I assume they will make sure the hoses will not interfere with the glove box. I can see why that is easier with the metallic ones like in Markos picture. I will also send a note about the probe and ask for the well to be touched up.
 
Looks nice. You do that all yourself? Who did your interior? Mine is ready


Sent from my iPhone using Tapatalk
 
Back
Top