I am going to replace the wheel well on the '71 2800 since repairing would take too long and not produce the best results. If you have done this replacement with the W&N body part, what tips can you provide about the process? Thank you.
You are using an out of date browser. It may not display this or other websites correctly.
You should upgrade or use an alternative browser.
You should upgrade or use an alternative browser.
Walloth-Nesch spare tire wheel well replacement
- Thread starter halboyles
- Start date
Hal, i haven't done it, but i do have a thought. the standard wheel well will only fit a 195/70-14 tire size. i wonder if you used a wheel well from a 6 series, i believe the well is a little deeper ... at least the later ones that used bigger width wheels.
I did it many years ago. Fitment was good. If memory serves trick was cut out the round well section and then keep nibbling away until the flange of the repair section sits flush with the corresponding section of the car. You can then cut that away to get a really tight fitment before you weld. Not sure of your welding ability but I used a gasless MIG turned down low. Couple of other tips.
1. Cover all paintwork with blankets etc as sparks from the grinder and MIG will damage paint and/or start a fire. This may not be relevant if doing a full resto.
2. Weld very slowly and keep applying a wet cloth the welds or you will get heat deformation.
3. The big one - pull the gas tank and weld in a well ventilated area.
Attached to the spare wheel well panel are a few brackets that you need to relocate.
Measure them out before chopping them off: bumper bracket, spare tire wheel pin (Walloth's part is incorrect vs original), tow hook, pin for jack location, cable hooks and a "foot rest" for the jack that protects the wiring harness, rear muffler hanger and the bracket that suspends the floor.
For the relocation I find it important that the panel sits at the right height, the left/right and fore/aft is fixed by shape, but the depth only on front and center.
Measure it out, check it to a spirit level, or weld in some stoppers /blocks, then remove the old part.
When rewelding the panel back in (I repaired my original), I choose to use a combination of spotwelds and structural glue, to aid in the water tightness of the seams. I plan to drive in the rain... in 2030 or so...
A few things I did:
Added a strengthening plate from left to right to support the diff. It required me to remove the fuel tank as well - a mission creep warning.
I zinc plated everything before welding it all up; a tad expensive as the tub is big and is paid by surface area (by my local company), just plating all the above mentioned brackets will also help tremendously.
Remember - one man's waste is another man's treasure: with some care your old part may be salvable by another enthusiast with golden hands and plenty of time.
Last edited:
tdgray
Well-Known Member
Oh… the spare tire well.
I just did this. Now mine was easier because I replaced the back lower panel as well.
But the part from WN fit very nicely in my opinion. Only one small area trimmed on the panel. Small notch where it goes up against the inner fender.
Only thing I would add to the above is the spot welds… there are a ton of them including crucial ones in the rear fender at the bumper line. And the factory seam sealer is abundant.
Like someone mentioned. I glued mine in for the most part except the spot welds in the outer fender and inner fender. Welded those back in.
day66
Well-Known Member
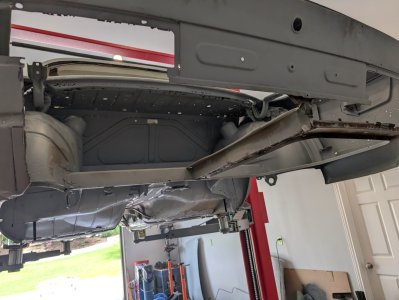
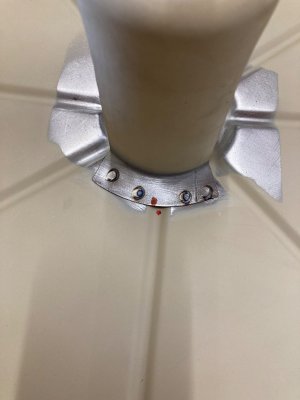
Have done his job also - it's satisfying replacing such a large piece in one go and the W&N part is good and fits well. Here are a few photos for inspiration:
As Erik says, there are half a dozen or so brackets to come out and be swapped over once the new panel is in. It is a great opportunity to also fix any holes in the lower quarters and/or clean off surface rust. also worthwhile to open up the seam between the back panel and the rear quarter panel as they're always rust lurking in there.
I plug welded my floor back in - most welding done from the outside as easy to clean up afterwards.
View attachment 206172
tdgray
Well-Known Member
tdgray
Well-Known Member
lol… popular repair obviously 
Good thought, as we have the same problem with the '02 wheel well in that they were designed only for 13" rims. Since W&N make a direct replacement I'll have to stick with that.Hal, i haven't done it, but i do have a thought. the standard wheel well will only fit a 195/70-14 tire size. i wonder if you used a wheel well from a 6 series, i believe the well is a little deeper ... at least the later ones that used bigger width wheels.
Good tips. I'll be using the 3M epoxy body panel adhesive and some rivets for clamping/reinforcement. I'll try to remember to take some pics as we go. I once saw a mechanic neighbor in GJ, CO get blown out into a corn field when welding a gas tank and, while it looked like great fun to me, he wasn't so happy.I did it many years ago. Fitment was good. If memory serves trick was cut out the round well section and then keep nibbling away until the flange of the repair section sits flush with the corresponding section of the car. You can then cut that away to get a really tight fitment before you weld. Not sure of your welding ability but I used a gasless MIG turned down low. Couple of other tips.
1. Cover all paintwork with blankets etc as sparks from the grinder and MIG will damage paint and/or start a fire. This may not be relevant if doing a full resto.
2. Weld very slowly and keep applying a wet cloth the welds or you will get heat deformation.
3. The big one - pull the gas tank and weld in a well ventilated area.
I hope to be able to salvage all the mounted attachments for reuse. Some of them are the same as the '02s so replacements are plentiful.Attached to the spare wheel well panel are a few brackets that you need to relocate.
Measure them out before chopping them off: bumper bracket, spare tire wheel pin (Walloth's part is incorrect vs original), tow hook, pin for jack location, cable hooks and a "foot rest" for the jack that protects the wiring harness, rear muffler hanger and the bracket that suspends the floor.
For the relocation I find it important that the panel sits at the right height, the left/right and fore/aft is fixed by shape, but the depth only on front and center.
Measure it out, check it to a spirit level, or weld in some stoppers /blocks, then remove the old part.
When rewelding the panel back in (I repaired my original), I choose to use a combination of spotwelds and structural glue, to aid in the water tightness of the seams. I plan to drive in the rain... in 2030 or so...
A few things I did:
Added a strengthening plate from left to right to support the diff. It required me to remove the fuel tank as well - a mission creep warning.
I zinc plated everything before welding it all up; a tad expensive as the tub is big and is paid by surface area (by my local company), just plating all the above mentioned brackets will also help tremendously.
Remember - one man's waste is another man's treasure: with some care your old part may be salvable by another enthusiast with golden hands and plenty of time.
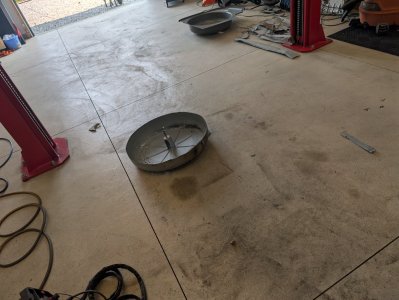
I just knew I needed a plasma cutter for something!And yes... Cut the tub out first. I used a plasma cutter but a cut off wheel will work just fine.
Hal the tub can easily be cut out with side cutter wheel, the pneumatic offset flange tool that I was telling you about will work on this as well…
I had to cut off a few 2-3 millimetres of the pieces to made it perfect fitted. Tip: spray the underbody coating pre fitted. So you can spray it at the right angle (easier).
I made the bold and welding plate for jacket off stainless steel.
Also remove the temporarily coating from W&N. (It’s not bonded very good to the metal). Use an epoxy primer. I used “stripper”. In Dutch called “afbijt”")
I made the bold and welding plate for jacket off stainless steel.
Also remove the temporarily coating from W&N. (It’s not bonded very good to the metal). Use an epoxy primer. I used “stripper”. In Dutch called “afbijt”
Attachments


Last edited:
Thank you @Fritzie for those ideas, it will certainly helpI had to cut off a few 2-3 millimetres of the pieces to made it perfect fitted. Tip: spray the underbody coating pre fitted. So you can spray it at the right angle (easier).
I made the bold and welding plate for jacket off stainless steel.
Also remove the temporarily coating from W&N. (It’s not bonded very good to the metal). Use an epoxy primer. I used “stripper”. In Dutch called “afbijt”
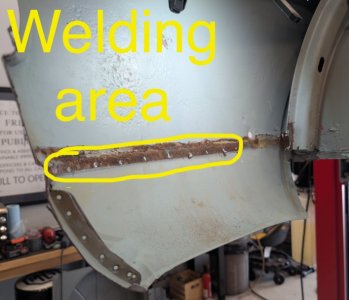
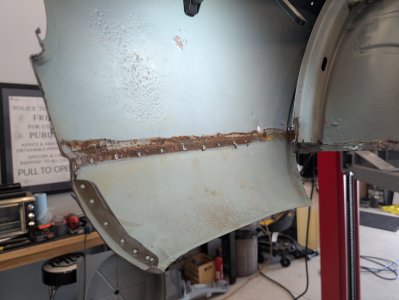
Please note that the welding area at the side fender stops nearby the hole for the bumper. The area between the hole and the wheel arch is only filled with kit. Original!!
(If you should welded and thus pushes the part together, the metal sheet of your fender will misalign).
(If you should welded and thus pushes the part together, the metal sheet of your fender will misalign).