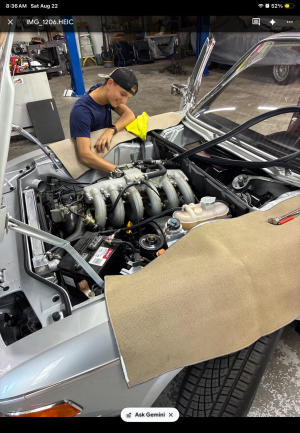
what modifications do you have to make to the M30B35 fuel rail as well as the brontosaurus ribs manifold and do I need a diferent air filter box?

BMW part number for the flange:

13641256446​

i was also looking for the flanges and I came across the 70’s Datsun that use similar injector setup.
I have not verified if those flanges would fit the BMW manifold


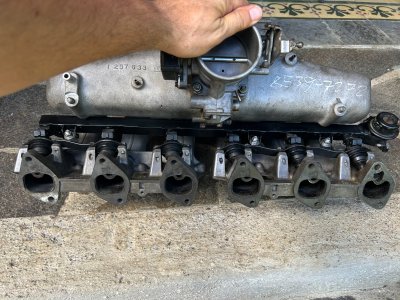
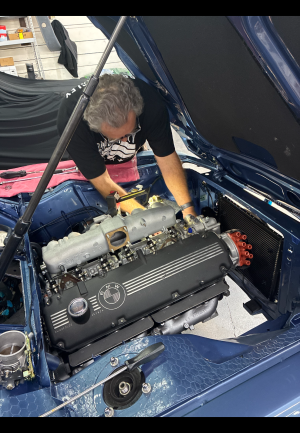
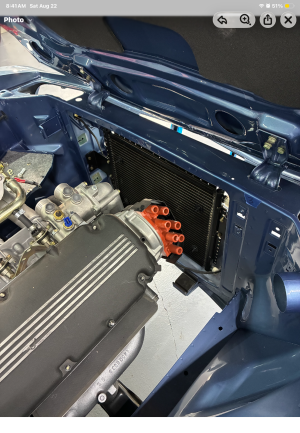
Good afternoon gentlemen, so after carefull thought I decided to use the M30 B35 injection tube (fuel rail) instead of the E12 one on my C banana ribed manifold, here is an update on what I've done so far in order for my M30B35 fuel rail as well as the injectors to fit properly.

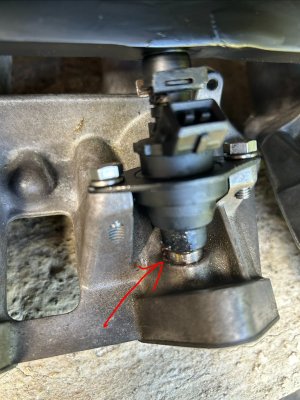
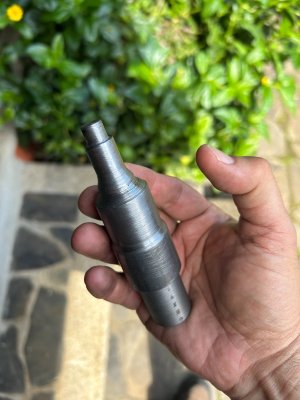
In the bottom parts of the manifold We had to bore out the center part of the hole where the injectors fit to 12mm in order for the M30B35 injector tip to fit in well and fully, also left the sides of the hole as is in order to acomodate the O-Ring that now sits and fits in snuggly and completely in its 14mm diameter hole. Because of the angle we had to make a tool to bore out the holes (picture 1 and 2)

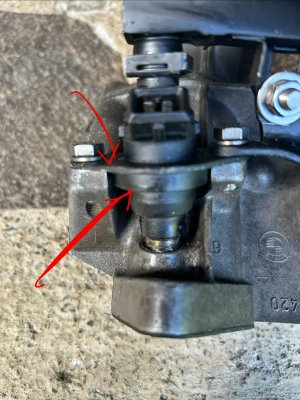
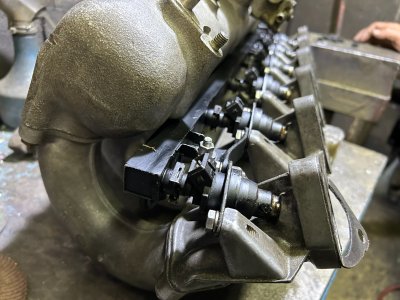
The injectors had to be fit with a metalic center belt that the oval brackets now hug in order to hold properly to the lower parts of the manifold (picture 3).

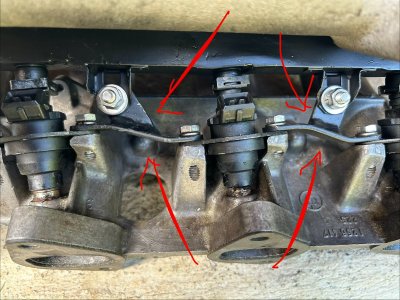
We had to make metal holders in order to hold the injection tube to the oval brackets (picture 4).

When we fit in the upper part of the manifold, the injection tube did not fit in well as it touched the inner part of the upper manifold, this happens because of the angle of the position of the injectors, therefore we had to cut the injection tube and angle it so that the upper tips of the injectors would fit properly into the tube holes, this left a very small but confortable space for the tube to fit in properly without touching the upper part of the manifold (picture 5).

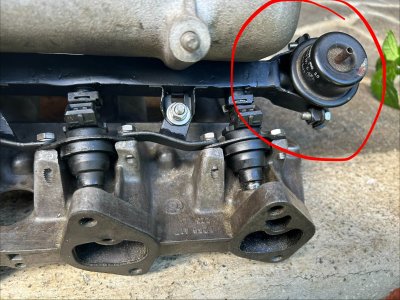
We also had to cut out the pressure regulator bracket and extend the tube in order to reaccommodate the pressure regulator to the side (picture 6).
The tube itself will need to be properly fixed for cosmetic purposes.

All in all it's been a fun couple of days trying to get this thing to work properly. Please remember that I am doing this only to get the look of the 3.0 CSI motor when I open the hood, in other words to keep it looking more like an original E9. The 3.5 M30 motor obviosly does come with it's very own manifold, tower or wedding cake style that can be used without any mods.

Hopefully this will help any other member from the Forum that is interested in using the C style manifold instead of the tower manifold.

 

Attachments

  • IMG_3482.jpeg
    IMG_3482.jpeg
    315.8 KB · Views: 45
  • IMG_3487.jpeg
    IMG_3487.jpeg
    225.2 KB · Views: 34
  • IMG_3481.jpeg
    IMG_3481.jpeg
    326.1 KB · Views: 27
  • IMG_3483.jpeg
    IMG_3483.jpeg
    379.8 KB · Views: 27
  • IMG_3484.jpeg
    IMG_3484.jpeg
    233.9 KB · Views: 29
  • IMG_3485.jpeg
    IMG_3485.jpeg
    390.4 KB · Views: 31
  • IMG_3486.jpeg
    IMG_3486.jpeg
    514.6 KB · Views: 29
  • IMG_3479.jpeg
    IMG_3479.jpeg
    306.1 KB · Views: 20
Last edited:
True, but had to try Chris, and it came out pretty good I think, and had some extra time on my hands, and btw once I started I just could'nt go back , had to finish it, although in retrospective I could have taken an easier path by putting on the tower manifold from the get go. As far as fuel rails go, I had the E12 fuel rail in my hands but it did not fit the M30B35 injectors so in that manner there was no choice but to take the long way.
 
Last edited:
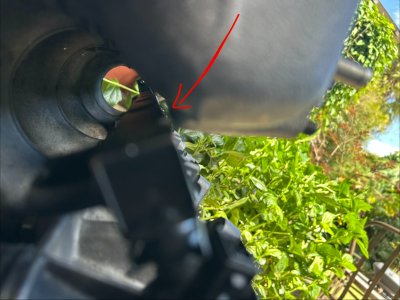
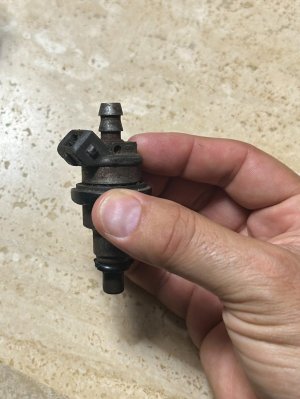
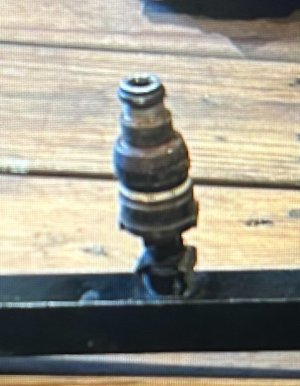
Just for the record ,the E12 fuel rail has 6 small metal tubes where hoses are supposed to be inserted and at the other end those same hoses are inserted into the M30B30 injectors that came with the 3.0 CSI (picture 1). So the M30B35 injectors are not compatible because they have no nozzle for inserting the hose (picture 2) and must be inserted into the cavity in the M30B35 fuel rail with the O-ring.
That is why I mention they are not compatible.
 

Attachments

  • IMG_3489.jpeg
    IMG_3489.jpeg
    237 KB · Views: 18
  • IMG_3488.jpeg
    IMG_3488.jpeg
    196.4 KB · Views: 22
Last edited:
Mr. Costa Rica?

I sent you a DM last Tuesday with my phone number at 7am?

My injection shop makes custom new injectors that cost $50 each that go right on a e12, e23, e24 fuel rail.

I applaud your craft skills but it sure seems to be a hard road!
 
It may be possible that you were trying to get going on this project of yours exactly at the same time that people were traveling to go to Legends of the Autobahn our big event on the West Coast of the United States.
 
Hi Dom, yes I did see that, so thing is I did not know that those existed and furthermore that you had some for sale. I did not call and that was my mistake. Yes bad timing I guess, I have not tried them out yet, but if it does not work properly I will purchase the 6 injectors from you.;)
 
Fuel Injection Corp for injectors

Tracy California

Ask for Bob


What wiring harness are you intending to use for your fuel injection system?
 
Are you using the stock BMW Bosch ECU? Number 179 or are you using a standalone ECU?


That harness will take a good 6 to 8 hours of work to prep - you need to fillet it to delete the unnecessary wires. Make sure that you have correct wiring to the new fuel pump and the O2 sensor extend the wires to the coil position at the front of the car delete the wire to the temperature gauge so that you only use one wire, delete purge system wiring, delete oil level wiring, install a diode to the alternator to prevent dieseling, prepare six wires to integrate into your car harness over by your brake booster, install two fuses, one at the starter for power to the systemand one at the fuel pump relay, and so on.
You have to decide whether you’re using a automatic transmission throttle position sensor or manual throttle position sensor.

Key point and don’t forget this- only only only use a Bosch metal stainless steel top Dead center sensor. All the others will leave you stranded on the side of the road. They are junk.
If you are using a standalone, ECU only only only use German top Dead center sensors. Do not use Chinese anything. No Chino…..


IMG_0085.png
 
And when you are preparing your wiring harness, don’t forget to save the red white wires that you will need to extend the red white wire to go to the idle control valve
 
Pics for you…
 

Attachments

  • IMG_0088.png
    IMG_0088.png
    3.2 MB · Views: 32
  • IMG_0087.png
    IMG_0087.png
    2.9 MB · Views: 30
  • IMG_0086.png
    IMG_0086.png
    3 MB · Views: 28
Back
Top