Okay, I am a disaster when it comes to computer stuffThey are. The Media section is just for photos but they have to be uploaded separately. It's nice to have helpful images stored there.

But I will try and add them !
Thanks again !!!
Okay, I am a disaster when it comes to computer stuffThey are. The Media section is just for photos but they have to be uploaded separately. It's nice to have helpful images stored there.
No worries. I go through and add photos from time to time so they'll end up there.Okay, I am a disaster when it comes to computer stuff
But I will try and add them !
Thanks again !!!
")
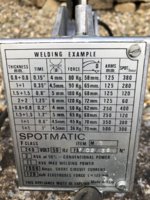
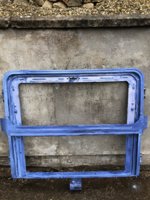
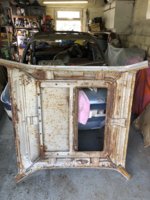
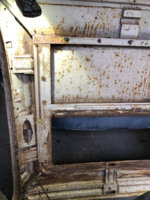
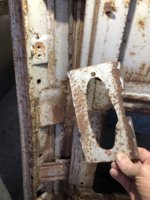
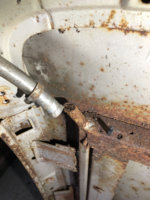
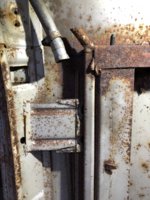
Okay , so I have started separating the donor roof’s sunroof support frame today, and so far all is going well .Barry,
since the main issue with the sunroof is the area in between the frame and the skin, that you can't reach, if you don't devide these two parts, I'd only consider to replace the whole roof if the car had a rool over i.e..
But in this case you can't protect the roof against rusting away once again in a reasonable way.
I would recommend to repair the frame in your car, sacrify the frame of the donor roof and prepare that skin with as much as possible demage while you seperate the skin from the rest.
Preparing it to go into your car, should be easy as the installation is as well.
To exchange the complete roof is WAY more risky and complicated, cause you need to be rather precise in cutting both.
And the main you weaken the allready weak integrity of the chassis and might not reach every layer by welding it on. So you'd need to reinforce the pillars as well I think.
So not my prefered way to go for that job ....
Greets
Ingo
Hi KrzysztofOh my... I can expect such or worse as well.
I'm wondering how precise the sunroof frame needs to be adjusted to make the roof mechanism to work properly and the roof flap to be in line with the roof surfce.
Shouldn't it be somehow measured or even special reference frame built before cutting the frame from the roof?
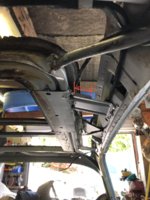
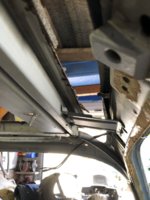

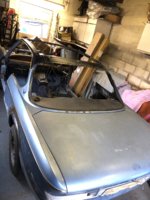
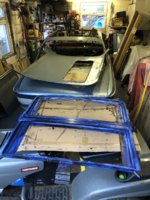
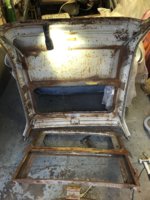
Hi thereI think I’ll have to repair what I have, though until I investigate properly I won’t know just how bad mine is. I’m tempted to see if I can separate the frame from the roof and remove from the inside, sandblast it, repair as necessary and then look at the roof skin - at least with the frame out I can get to both sides of the roof skin and it gives me the best chance of success with any welding and straightening
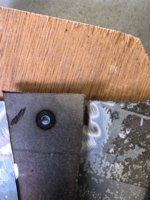
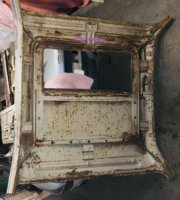
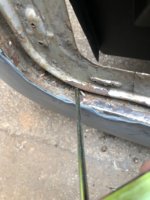
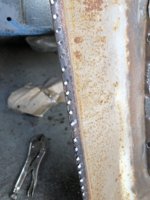
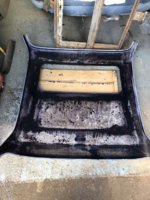
Any then I after wire brushing the surface rust with my grinder , painted on rust converter , it goes on light blue and then chemically neutralises the rust and turns black.
So that’s enough for today.
Thanks yes I had a busy dayHi,
Hard work! Well done.
Will you be removing all with the paper disc later on?
My experience with leaving the converter on is bad as the paint (primer etc) is not holding properly.
I was told some time ago it has to be removed till bare metal and converter is only left in the micro holes to stop potential rust from growing.
Most of the rust converters are based on ant acid, so it can explain why not to keep it (especially where the acid has noting to react with)
But there are also base on different chemistry as well.
No worries !Barry, thanks for the additional hints. Once I make a start , I’ll let you know how I get on!
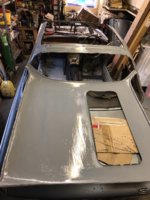
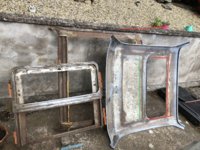
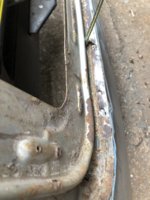
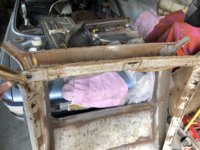
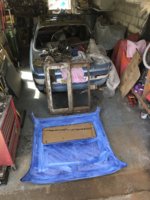
Okay so I got my sunroof frame sand blasted today and she now has had a coat of rust converter on top just to help it stay clean in the future . I will give it a couple of coats of zinc primer too and maybe some smooth rite to keep the rust away.Thanks yes I had a busy day
I find it quite good to leave there and I paint over it with a couple of coats of zinc primer. And then a top coat also.
But that is okay as it is a surface which will not be seen once the car if re assembled.
On the outside I would sand it flat like you said and leave only the minimum to prevent further rust from developing.