Check your rocker panel drain holes!

Stevehose

Well-Known Member
Site Donor $$
Messages
12,934
Reaction score
5,598
Location
Sarasota, FL
Hear me now and believe me later, if you haven't physically cleaned out the 5 drain holes on each rocker, do yourself a favor and pull off the covers asap and run a zip tie or metal wire up each one to verify they are clean.

I confirmed the reason why my driver side carpets got soaked on the way home from the Vintage, rain came in the rear side window, filled up the rocker because the drains were plugged, and spilled into the floors.

Here's the body count: the driver side had 4 of the 5 holes plugged, and the front and rear ones were also bent closed! Probably from improper jacking or who knows, I had to bend them open then clean them out. I also noticed that the rear most drain doesn't seem to empty out the rocker like the others, it drains the area between the rear wheel arch and the body panel. Confirmed by spraying rust converter in that area vs down into the rear most point of the rocker which drains out the second to back hole. Fun stuff.

The passenger side, although dry, had the front and rear drains clogged and bent. Nasty and I feel like an idiot for not checking these even though I take the covers off annually to clean underneath.

Check yours! Here are some ugly pics to show you why.

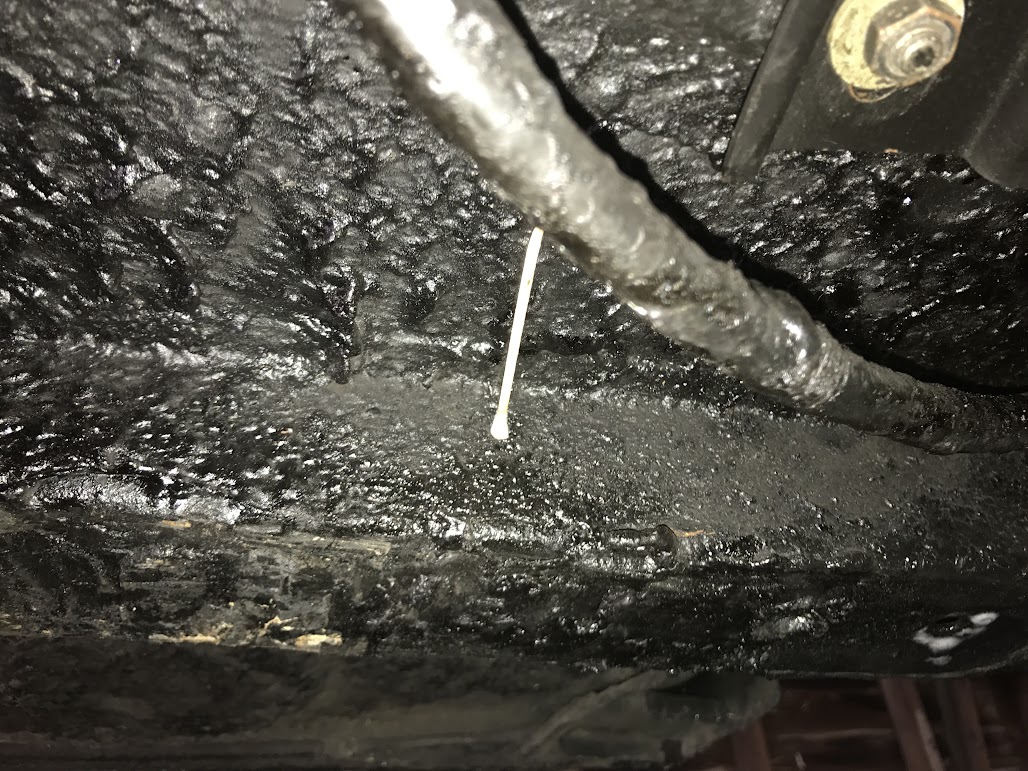
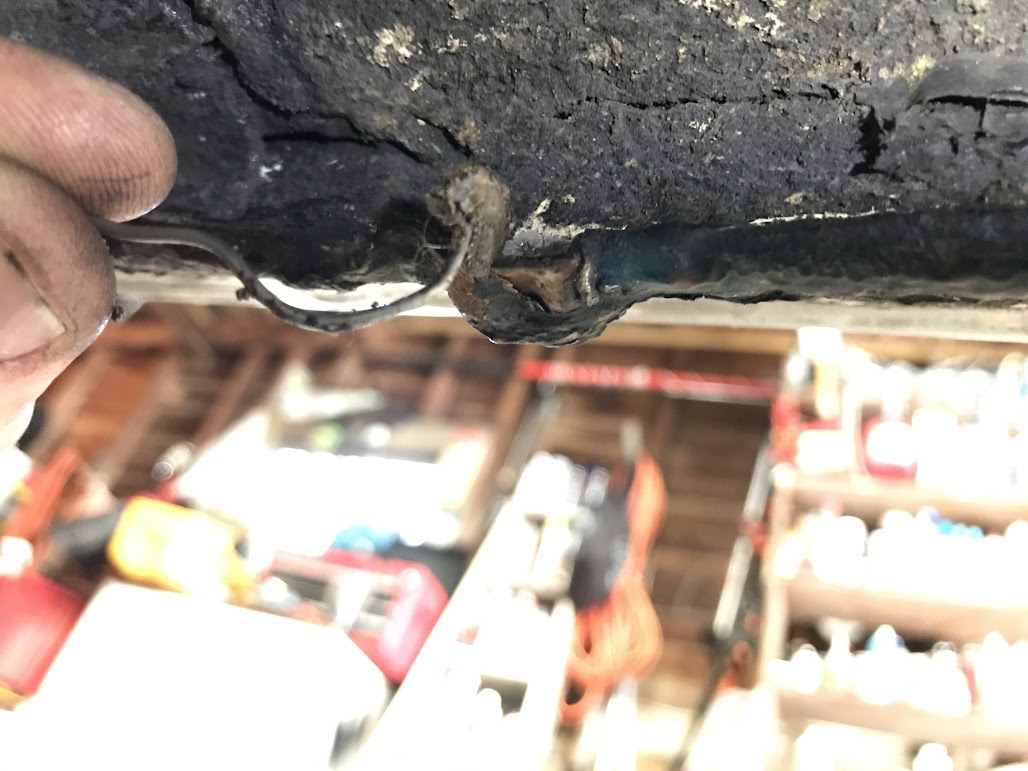
Each drain has a little opening bent into the inside rocker, this one needed a wire to break through the crap, then a zip tie to further break up the sludge:

AqyXVkndbslhSNtbWk1Yqk2p2_rDSnQ9Xajh6UAIBEAik_0HRn8iCymPO7n3TSYXtOqReahckd5oFDu4mPE2k9TxtkKB61fQ6DnBDy1thB4WA3qsY0VLo61zJux8JoecDWOmUpMsjnuYVbWXTcn1hHDgP-6V2ZoVxfAz7y00sPTC1VDwO_i6PXLJ0Fe5XpOP9hPCu0F-6HTqsMIMdOKjiUg8E6aaNpW0nkHkh6GyObSdrJI8W0jg0arZH31CKW1pN8dPXOgHxFN1oYOq75TaI3FsKi0um80PoPT0FIQUYz55vj-ITzA2-FkiTz1fGjNqo8aI3PAQR1LBnbPfW2ixVMNIA8TZ5GAmXhJqu5aOZyStkBVqjwEQNPQPXCe8Q25saFLVbxBZeDy6X77SG3PQpgkuDfEt9CutoSV31KVtr1vq0bb285lBR6GXLw_frTP543cvRc13L0o0MFhSsu0AdB_L5PuAg7nMwmo5Zl_ibZ-YMuhL9NS0tXTRxcwihFpRHwDcC4Hj_bkYmSyiESlJzc1jblIJT8NEYPpIqx-t9bB_bFmicl8a3BFDxqIpa6LXimz3FyUWayhNHEUp_VrXGpWxSPx1fbnYlQ4gPBXHJj6CExs8=w1028-h771-no


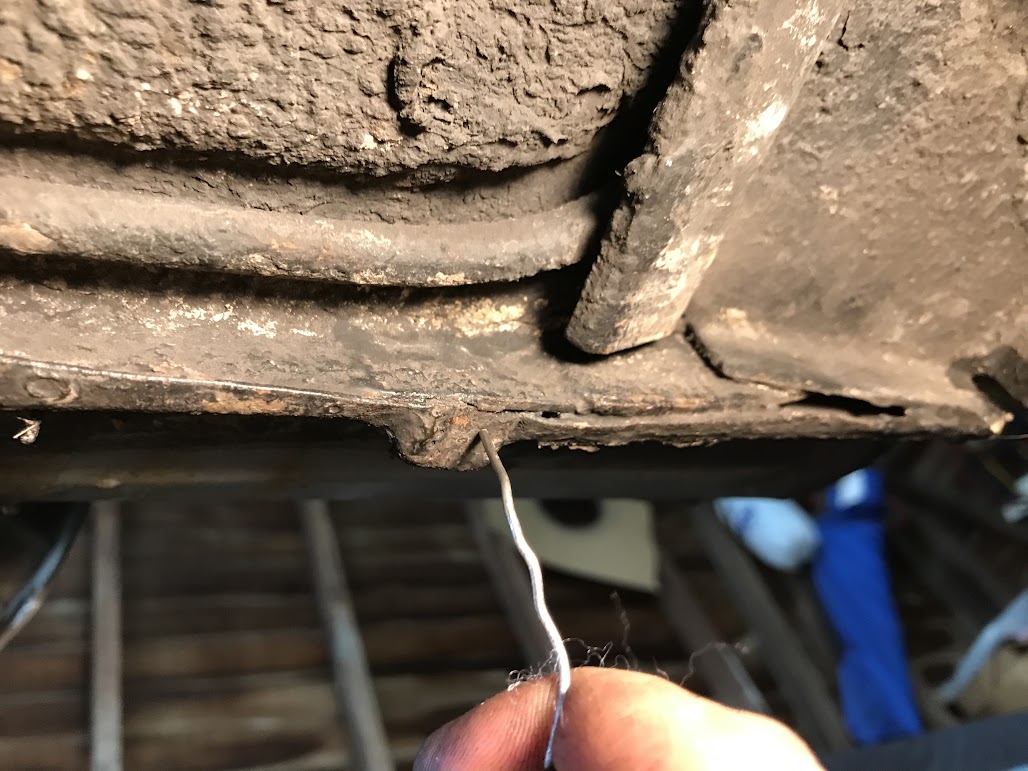
On the end of the wire is a mixture of water and silt turned into a paste:

xo67qneFF-IwrfSHdItKLVIlCSo2pmIU3u1nsQy9vcKOqCr-38mhb-dU3lIbVspz87xJoNwYZ4DYGajmmrgMZP_VyYRiBZw-lESxmJpKP2CUcXyuGjTo4itOr7l-gXMCRI1-o29tfb9_d71ZIliL8EIKjV19H8ssgw4p1IJREj4kMbdEhEjk9B_RqBhOirOaFqr59F_xlaFzzv8__zLp6CxfNa_ZBD0Bb-zRJneQ5FyBC0wgruZ6pPcdh5aosYkG5sy5n2FV4S4iXWzM_xBD85d2kPfChftk_TFMo4vWI7-aeX2B5e6vdZB5HL963HX6COFsjS8OMa4j12EOqIQO2nXbisBYFBPmcVqGfbTCOUM6NMCkX3NTMyzLiDqNWwl4rdL7EG-m0pD6XT0d6KJt5_7YlkB1cajva3WOfRY_K-WZtTouN4TZjg5r2vm7XPSyXzJXj3R7RwQ9GZFvqsVcDg2h5D06bYksmu6enxYmjHS-PnZ_e7VA3-E9wOX50_uPFVLcsn4j-TDsr6zG_TOcI8x41Z_-6yJ9pewnmggtiTMnRjS2dc7WM-lgc6hmz8yxh-hNue8HYWuSPd53Z8lgTufvH3Wlud3Nvl-V159eTax1x8tW=w1028-h771-no


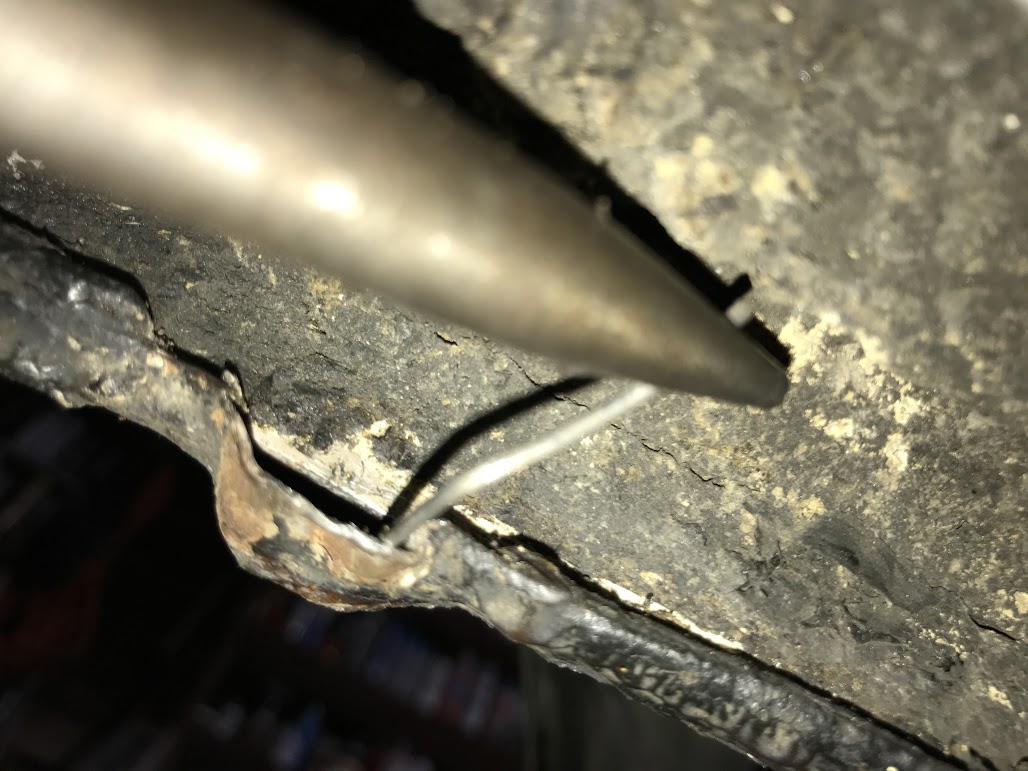
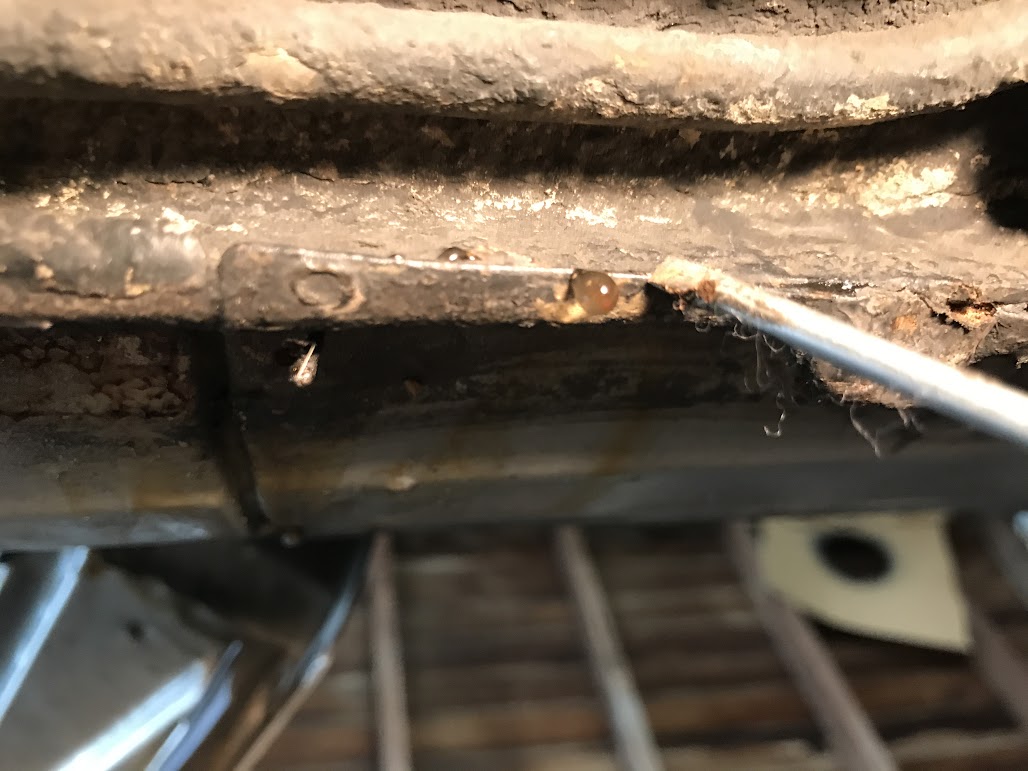
This one was bent closed and full of crap:

jA0VrIFxpSPSAgs5S4G3UAJc83vzygj_OEE_WfYnRM5UXvNY09kl8E8HQ7uPVXy98B0reLnIEVYqnQ7vSOT_8qr08QJclbLvhrXvIr7SNYjFuCLAE4kRxW6lOcp6m_pZ1gR_OCfnid_Q4y5QnePwiwU9X00xVtrGRZyO-po7iZm1WzLOapwuw5nihS9Mg8qwGltXk01GyaE9Ut2MKu7VCTBk_jcv6koPab-Q12qZCSf2JxoYd2fIvOl7orfBqcHZFtyWDlvN-7v4tz3EdI8ZiNyaDKv0zTWdLM--M5I83CELDKRHbMBPbk1APOYENN26XEYvYqz9dtdtp31QKTzCRS86HVLz14YQzlkISwtW0pO-h-RgOaUQ5hnDSJwb9DtUtNCulzJQ-SkmusChuiS_jfNrl1lmdaNVxqYOSrLC_D4_vf5n-ZdQfHfS3lkXtJkQCtxMjcLNQBzZC8qHf_MTIVCdBgox-iJCqXK3sm_AYCVu5OFb3UqR0w9Z294JDsppXRLnak7sI4rrt8gYOD5ajp5cCeNWf1O31nVTgy-51NRoAfn5uiql-66phDUsvzmpRgUdMBAtaebc2qJQb2SYDdb_QpZ-OegTbQThsNA_oljG7-0M=w1028-h771-no


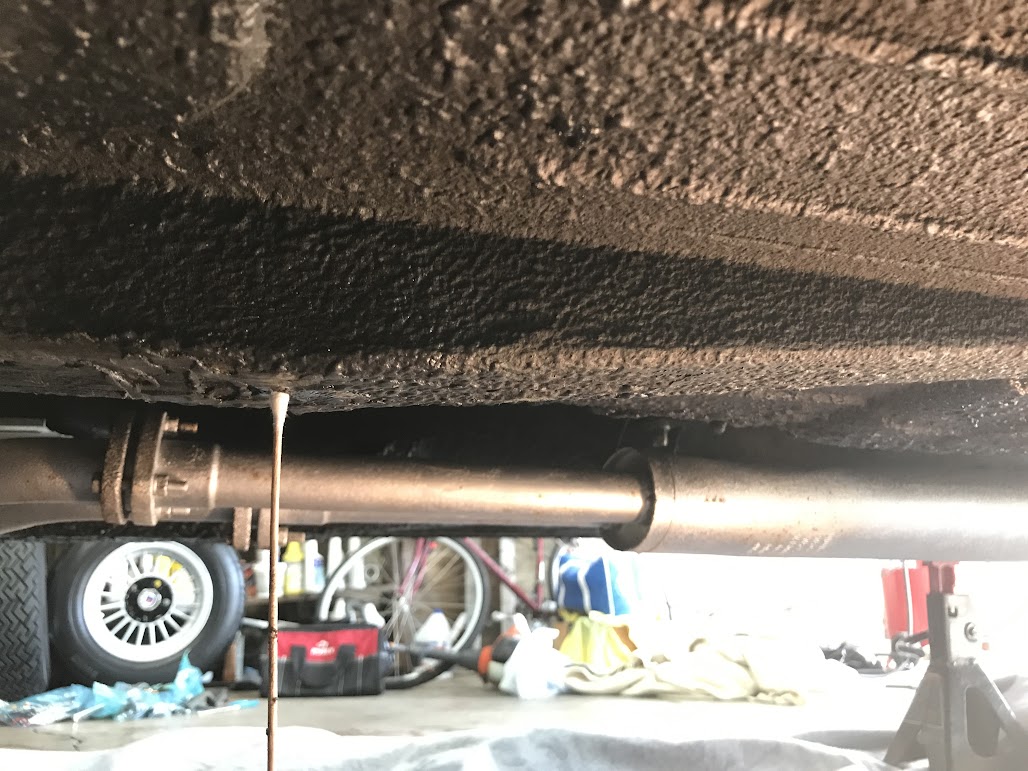
Surprise, last week's water came out!

r1ss6TSElVPsHshxpjH7NhyB7v9u5h9Ba7CyNFAliCNoKniJoVCk7-8zGFuTvtpgiFFF9xeaJlVrM-M8qNsY-X1upN6F8jnJW273CtBgckbFY5Dr7ze7eXVRXpbUy1e1TwCkAGN4yXYqKRuMXILqAyu9c70PI-uNWxizhCrDZoYyZC2tlSRAY5gkl9wf1AeZhYiRzMm5okPhRVCmW3v5OhrG9F1riwBHsDC7NqbMzjEJblCpTSWyJ93ReDNjYR2fBsgbfLX353VXQKy0KqQHzYWgQdywp99c5FnaHKiP7xpSDZ1ObN_ESwyZ5avqicKmEXBHKP1l7SIqv5Jnqru3kZ8ZOSXDkfe_tadpMCr1XSEjUX-MJFyJSrf0_sK4fS-S7WtEb3HFHjm_pc1hkyJi9igpp2zR97Qp96WR1HgEqTC8lRaVkXfLsFJpdcX7mImHaSgQL-eo0PCzrbT21zVOvb1tsPozKcHNXENc8oTEififPslU-C9yJHWJyluXgFym3ou95bEnaXX-FG1FmUkUW8Kg4BujYSz0aR41fFlFKeRD304ljU6mCjCSXiP0bV562IOzDkH7jrmOCvQ4HrmP4j6S8ojmXnx8iMuf_KhEmbE1wgtc=w1028-h771-no


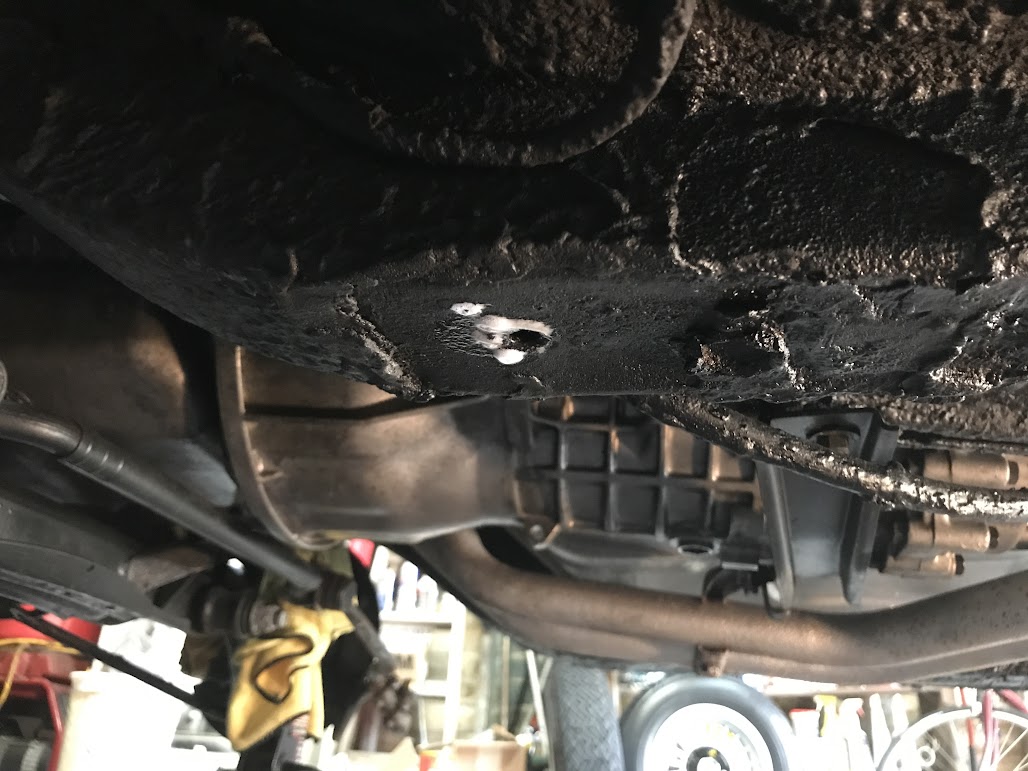
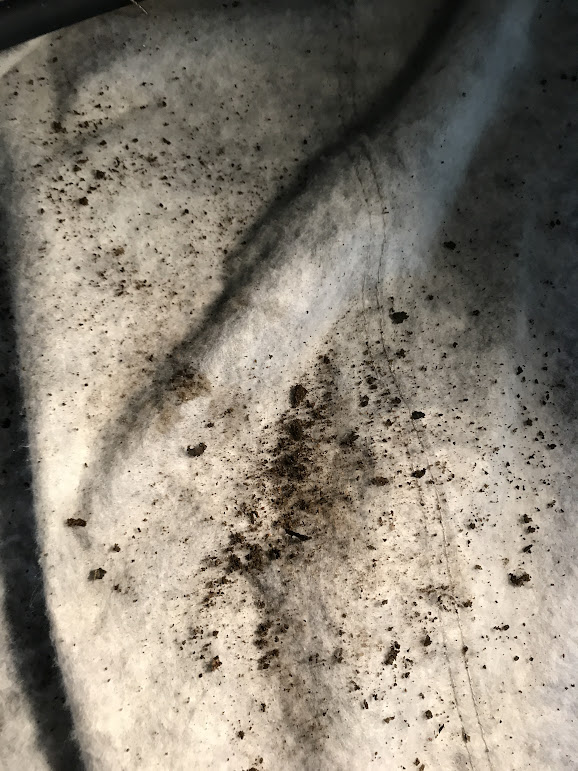
Sh!t from the front driver side drain:

aWaHiZ_MDHzRCQZIteSwGdf8G5JLxbQf8Uedsh4deOUxRtz2s-6fyELQyF7sWD2TMhC3VtUMYuoN8sqaRKq5ye6sPI3or6F9jJLlILaYo8q3iIVa13jcgDlsGAY213USqPOjQUc9FU0ODPN488Biv_yQnCSBjJGXdPDbVWni4vSbvTzCrexTUg463lAYgV89xRoPlnULLmxiiltHa-PhsizriHxWzDMU27sCc49Jupt6lQzHKRN1agPNXfNncj9y948wYEXRtO95tfG31rSdCc5V99kz20W_0H5J0X75SH4-VrMFO5WJ1IPPxdBqSgSXmcQ_ET2oz7_m9x-GdyATTlcxmE7GUp_4sqD1jO6G0txoFQD6b-6KnpWN-gra4UvlNZ0qdOgGiyMlUvlLhONqrauxpZ8vxy-Qqphc8DFwn6SaEl-iw9kyu7I6DH3OF--pCP2kyjvqsPfbSZbihCi6ji6kBb009amiwCkiHthiJkArqxaoReNihm8MFNlIiRWUYoAWbM78lNRB7gfN00sMQ5q8Zq0BtW44sYBAXK3AlMa5CWl-Iamjd5jPHQVwQJv0I-71QlF6J5nqCj70HNcyHqW43xBjsWKUEXunubFjW1XqQ-gZ=w579-h771-no


I've flushed the rockers with POR-15 metal prep rust converter then tomorrow will cavity wax. Then I will treat any outer surface rust and repaint. Luckily the rockers are in good shape because when I got the car I cavity waxed in there, but that was 7 years ago.

Also check your frame rail drains, there are 3 each side, at the bottom of the first downward bend from the engine compartment, at the bottom of the slope where it ends at the floors, and in the inboard vertical side near the tranny bracket.

You've been warned :D
 
Last edited:

Stevehose

Well-Known Member
Site Donor $$
Messages
12,934
Reaction score
5,598
Location
Sarasota, FL
Easier said than done when you go to long distance events. Or get trapped by a freak thunderstorm which is often the case here. I just never put it away wet.

Thanks for the photos and the info or DO NOT drive your car when it rains
 

autowerks

Well-Known Member
Site Donor
Messages
561
Reaction score
82
Location
Dallas, Texas
Never washed since repainted, use wet ultra soft microfiber towels to dust it every 3 to 4 days. Steve I bid you have a rust free car if you drive it when there is chance of rain, mine has rust
 

CSteve

Well-Known Member
Site Donor $$
Messages
3,767
Reaction score
1,279
Location
Bucks County, PA
Never washed since repainted, use wet ultra soft microfiber towels to dust it every 3 to 4 days. Steve I bid you have a rust free car if you drive it when there is chance of rain, mine has rust
Steve, I suspect this was "real news" for many of us. Question, should we consider drilling more holes or opening the existing ones with a wider diameter drill bit? If we do drill new holes should there be one closer to the front and rear to facilitate better draining?

Thanks, Steve
 

Stevehose

Well-Known Member
Site Donor $$
Messages
12,934
Reaction score
5,598
Location
Sarasota, FL
I think they'll drain fine as is if checked periodically. They are rectanglar, about 1/4" x 1/2" so keep them clean and use cavity wax and all should be ok.

Steve, I suspect this was "real news" for many of us. Question, should we consider drilling more holes or opening the existing ones with a wider diameter drill bit? If we do drill new holes should there be one closer to the front and rear to facilitate better draining?

Thanks, Steve
 

Philippe db

Well-Known Member
Messages
726
Reaction score
205
Location
Belgium
Also check your frame rail drains, there are 3 each side, at the bottom of the first downward bend from the engine compartment, at the bottom of the slope where it ends at the floors, and in the inboard vertical side near the tranny bracket.

Hi Steve,

Could you elaborate a little on these drains. Didn't spend much time yet under my car but the few times I had the opportunity to look at its belly I just can't recall ever seeing these holes.
 

Stevehose

Well-Known Member
Site Donor $$
Messages
12,934
Reaction score
5,598
Location
Sarasota, FL
You first have to remove the long rocker covers, then you will see the small rectangular folds in the metal that make up the drains as Sven shows and the other pics here. They're not very noticable at first but you'll find them.

Hi Steve,

Could you elaborate a little on these drains. Didn't spend much time yet under my car but the few times I had the opportunity to look at its belly I just can't recall ever seeing these holes.
 
Last edited:

Bmachine

Well-Known Member
Site Donor $
Site Donor $$
Messages
3,525
Reaction score
1,779
Location
Northern California coast
You first have to remove the log rocker covers, then you will see the small rectangular folds in the metal that make up the drains as Sven shows and the other pics here. They're not very noticable at first but you'll find them.

I think Philippe was referring to the frame rail holes.
 

eriknetherlands

Moderator
Site Donor
Messages
2,699
Reaction score
1,930
Location
Netherlands, Eindhoven area
here's a quick line up of how the outer layers of the sill are built-up, looking at the right side of the car ( last pic in the line; I've used the images of Walloth&Neesch; very good parts b.t.w.)

- the red lines indicate how the different parts line up,
- the black part is the outer, screw-on, decorative sill; or 'trim' in BMW terms. That should be the thing you see when on your knees. It has 6 cut-outs, under which you will find 6 other drains;

- 3 drains are pressed into in the lower quarter panel with the jacking point. (green in the image, thus also drawn green in the decorative trim as well) The center drain is 3 times wider, as it is beneath it the drain of the outer sill.
- 3 drains are in the outer sill, one behind the quarter panel, 2 are only hidden by the decorative trim
- 1 drain is in the front bottom of the wheel arch; its purple in my pic, thus also purple on the outer sill image.

Now the black decorative trim actually has a gap of a few mm to the inner sill, running all the way from front wheel to back wheel with the outer sill, apart from the locations of the drains where the sheets are actually touching. (see image PC050107 of the BMW on display at the BMW museum in Munich). However due to improper lifting of our cars by previous owners, this gap is usually closed. (For current owners; I dented it also before reading somewhere in this forum how it should be done properly, so do 't feel bad if you squashed your sill too) . Also some more pics showing detail of the outer trim.

My right frame rail has just 2 openings in the bottom, included is a pic of a naked rail for reference. I can get measurements easily if needed. let me know. I can however not detect the 'over flow' hole mentioned in next post, in my quite clean rails, there is no trace of them.....perhaps a build difference from year to year?
 

Attachments

  • PC050107 left rear.JPG
    PC050107 left rear.JPG
    1.1 MB · Views: 430
  • PC050105 left rear.JPG
    PC050105 left rear.JPG
    1.2 MB · Views: 416
  • PC050094left front.JPG
    PC050094left front.JPG
    1.2 MB · Views: 388
  • 20160822_223325.jpg
    20160822_223325.jpg
    700.3 KB · Views: 395
  • 20160822_224132.jpg
    20160822_224132.jpg
    646.3 KB · Views: 419
  • 20160901_192202.jpg
    20160901_192202.jpg
    496.1 KB · Views: 418
  • RHD sill drain point locations..png
    RHD sill drain point locations..png
    371.3 KB · Views: 463
Last edited:

Stevehose

Well-Known Member
Site Donor $$
Messages
12,934
Reaction score
5,598
Location
Sarasota, FL
Doh yes, thanks, i don't read very well sometimes.

There are 3 holes as pictured, they start at the bottom of the curve where the rail exits the engine compartment at the passenger compartment, about a 8mm hole there. Farther back the frame rail tapers into the passenger compartment, where this angle begins to slope up there is a smaller hole, about 6mm. On the inboard side of the frame rail across from the transmission bracket is anothe 8mm hole, this looks like an overflow hole if it fills up.

There may be more drain holes in the frame rails under the engine but I have not looked there yet.

I think Philippe was referring to the frame rail holes.
 

mulberryworks

Mr. Fixity
Site Donor
Messages
1,243
Reaction score
612
Location
Jacksonville FL
The problem with drilling new holes is you've just created a raw steel surface for rust to attack. Proper priming and paint should follow any such procedure. I'd only consider that if I was in the middle of a restoration so I could be assured of a completely unbroken paint film. However, the stock ones should be fine if kept clean and there isn't a lot of crud in the spaces to block them up.
Me? I have a lot of crud to deal with before painting anything. The frame rails look bad enough I'll remove enough floor to be able to clean and prep them thoroughly.
2800CS photos 1-16 022 Frame rail crud.jpg
IMG_4459 Lower right front fender crud.JPG
 
Last edited:

Philippe db

Well-Known Member
Messages
726
Reaction score
205
Location
Belgium
Thanks guys. Dove under the car and found all 4 of them like in Erik's picture. All fully functional. Will sleep well this night.
 

Bmachine

Well-Known Member
Site Donor $
Site Donor $$
Messages
3,525
Reaction score
1,779
Location
Northern California coast
here's a quick line up of how the outer layers of the sill are build-up, looking at the right side of the car ( last pic in the line; i used the images of Walloth &Nesch; very good parts b.t.w.)

Excellent info and pictures, Erik. Well bedankt.

My right frame rail has just 2 openings in the bottom, included is a pic of a naked rail for reference. I can get measurements easily if needed. let me know. I can however not detect the 'over flow' hole mentioned in nextpost, in my quite clean rails, there is no trace of them.....perhaps a build difference from year to year?

I will have to double check tonight but if I remember correctly, my car does not have any holes in the bottom of the frames rails. Mine is a '74.
http://www.e9coupe.com/forum/threads/what-is-the-purpose-of-the-holes-in-the-frame-rails.22306/
 
Top