You are using an out of date browser. It may not display this or other websites correctly.
You should upgrade or use an alternative browser.
You should upgrade or use an alternative browser.
Glovebox re-flocking
- Thread starter Stevehose
- Start date
thanks for the specific information Mike ... its very helpful. and your pieces look great.
Dohn
Well-Known Member
As they say, birds of a feather...
Mark Jarman
Member
For the benefit of anyone restoring their dash, I followed this thread to re-flock my dash parts and I'm happy with the outcome. I brushed the glue on instead of spraying it. I'd emphasis what was previously stated that it is important to liberally apply the glue so the fibers stick well everywhere. The glove box is the trickiest part because you don't have much time between applying the glue and applying the flock material. I first did the fuse box door because its a small part and was a good warm up run. My very first warm up run was the end of a tin can. Overall the flocking process is forgiving, but I recommend doing a warm up on something like a tin can.
As part of this project I had Just Dashes re-cover all my dash parts. I'm very happy with their work, but you need to be patient... it takes awhile for them to turn around their projects. Before I sent my parts to Just Dashes I asked if they did the re-flocking and they said no. This lead me to process below.
1. Remove all the various hardware on the dash parts.
2. Remove all the old flock. I sanded it off.
3. If/where necessary apply rust converter to any rusty areas on the sheet metal. I used this stuff - https://www.eastwood.com/eastwood-rust-converter-quart-and-aerosol-kit.html
4. Prime the sheet metal to be flocked.
5. Send dash to Just Dashes for restoration.
6. While dash is at Just Dashes clean up all the hardware and re-painted the black parts.
7. Received restored dash from Just Dashes.
8. Flock it.
9. Re-installed hardware on dash parts.
Note: When I received my dash back from Just Dashes they had painted the surfaces that are flocked a nice black finish. This finish wouldn't look bad, but it is the original finish.
Here are some pictures:
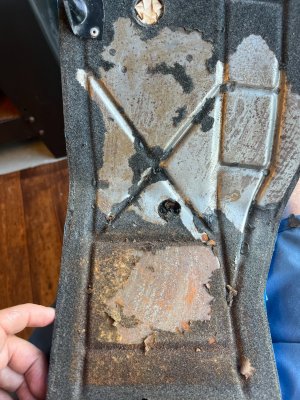
Condition of flock prior to restoration

Removing the old flock - its a grind

Primed and ready to send to Just Dashes

Final result

As part of this project I had Just Dashes re-cover all my dash parts. I'm very happy with their work, but you need to be patient... it takes awhile for them to turn around their projects. Before I sent my parts to Just Dashes I asked if they did the re-flocking and they said no. This lead me to process below.
1. Remove all the various hardware on the dash parts.
2. Remove all the old flock. I sanded it off.
3. If/where necessary apply rust converter to any rusty areas on the sheet metal. I used this stuff - https://www.eastwood.com/eastwood-rust-converter-quart-and-aerosol-kit.html
4. Prime the sheet metal to be flocked.
5. Send dash to Just Dashes for restoration.
6. While dash is at Just Dashes clean up all the hardware and re-painted the black parts.
7. Received restored dash from Just Dashes.
8. Flock it.
9. Re-installed hardware on dash parts.
Note: When I received my dash back from Just Dashes they had painted the surfaces that are flocked a nice black finish. This finish wouldn't look bad, but it is the original finish.
Here are some pictures:
Condition of flock prior to restoration
Removing the old flock - its a grind
Primed and ready to send to Just Dashes
Final result
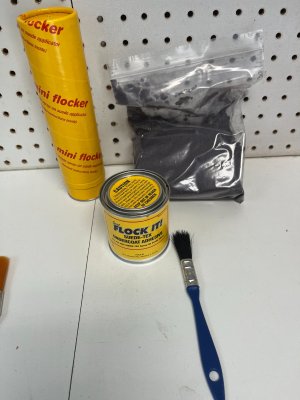
The original link to Donjer no longer works — I found out the company is now called Flock It. Based on that, I ordered their Suede-Tex Rayon Charcoal Grey kit with Black Glue, since a dark grey glue wasn’t available:
Flock It Suede-Tex Rayon Mini Flocker Kit
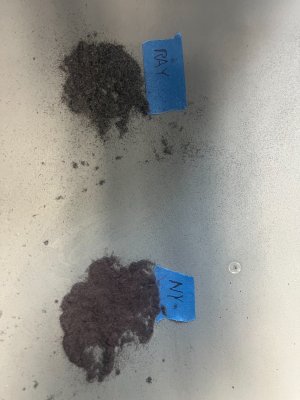
After receiving the kit, I was worried one bag might not be enough, so I ordered an extra bag of flocking fiber from Amazon (planning to return it if I didn’t need it). Once it arrived, I actually preferred the Amazon flock over the Flock It product. I’ve attached a comparison photo — the one labeled “NY” is from Flock It, and “RAY” is the Amazon version. At first, I even thought Flock It might have sent nylon instead of rayon.
Here are the Amazon links:
Prep Process:
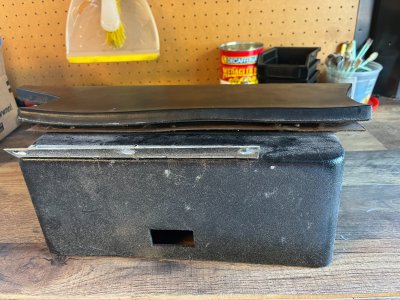
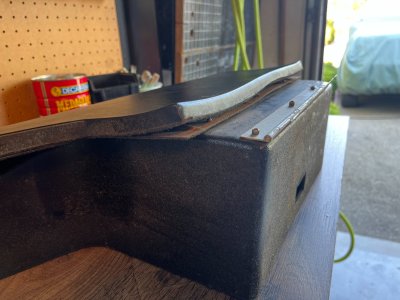
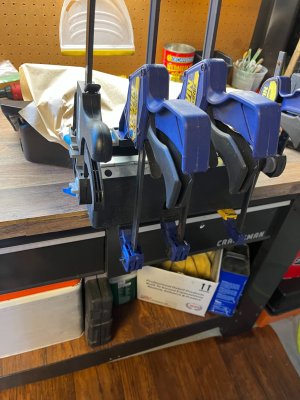
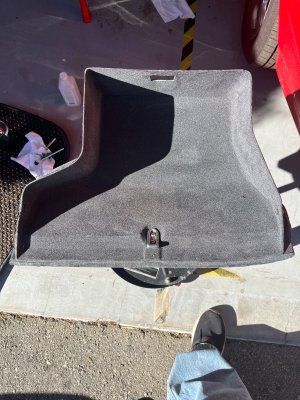
First, I repaired the warping box (see photos). Then I sanded it using a Dremel with an abrasive wheel — this one worked well:
Abrasive Wheel on Amazon
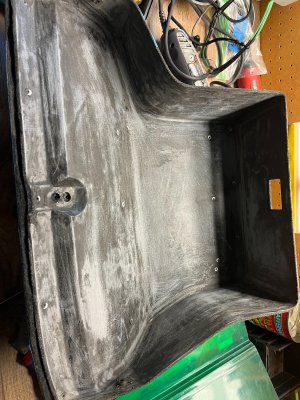
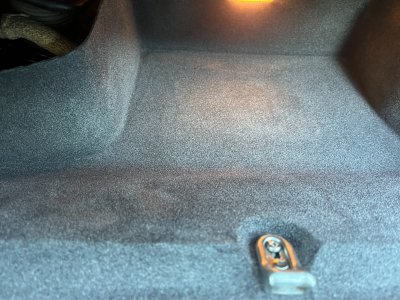
That said, I later discovered that spraying the surface with acetone made it much easier to peel off both the old flock and glue using a putty knife. After stripping it clean, I did a fine sanding, applied primer, and then used the flocking glue.
 Tip: Work quickly — the glue sets up very fast on the glove box. I applied the inside first, then did the outside the following day.
Flock It Suede-Tex Rayon Mini Flocker Kit
After receiving the kit, I was worried one bag might not be enough, so I ordered an extra bag of flocking fiber from Amazon (planning to return it if I didn’t need it). Once it arrived, I actually preferred the Amazon flock over the Flock It product. I’ve attached a comparison photo — the one labeled “NY” is from Flock It, and “RAY” is the Amazon version. At first, I even thought Flock It might have sent nylon instead of rayon.
Here are the Amazon links:
- Flocking kit I purchased:
https://www.amazon.com/dp/B07CLTKH31 - For those who want to order just the materials (no kit):
https://www.amazon.com/dp/B0037MK0W6
https://www.amazon.com/dp/B0C3NMKJNG
Prep Process:
First, I repaired the warping box (see photos). Then I sanded it using a Dremel with an abrasive wheel — this one worked well:
Abrasive Wheel on Amazon
That said, I later discovered that spraying the surface with acetone made it much easier to peel off both the old flock and glue using a putty knife. After stripping it clean, I did a fine sanding, applied primer, and then used the flocking glue.
Tip: Work quickly — the glue sets up very fast on the glove box. I applied the inside first, then did the outside the following day.Attachments
-
 IMG_1999.jpg463 KB · Views: 29
 -
 IMG_2001.jpg266.3 KB · Views: 27
 -
 IMG_2006.jpg476.9 KB · Views: 27
 -
 IMG_2010.jpg265.9 KB · Views: 30
 -
 IMG_2108.jpg241.9 KB · Views: 30
 -
 IMG_2201.jpg348.3 KB · Views: 30
 -
 IMG_2328.jpg492.3 KB · Views: 30
 -
 IMG_2340.jpg458.9 KB · Views: 29
 -
 IMG_2043.jpg544.5 KB · Views: 30